11-5
IM AQ1200-01EN
Loss T
esting (Option)
11.2 Performing an Auto Loss Test
3
2
1
4
5
6
7
8
9
10
11
12
13
14
15
16
17
18
Index
App
Saving Data
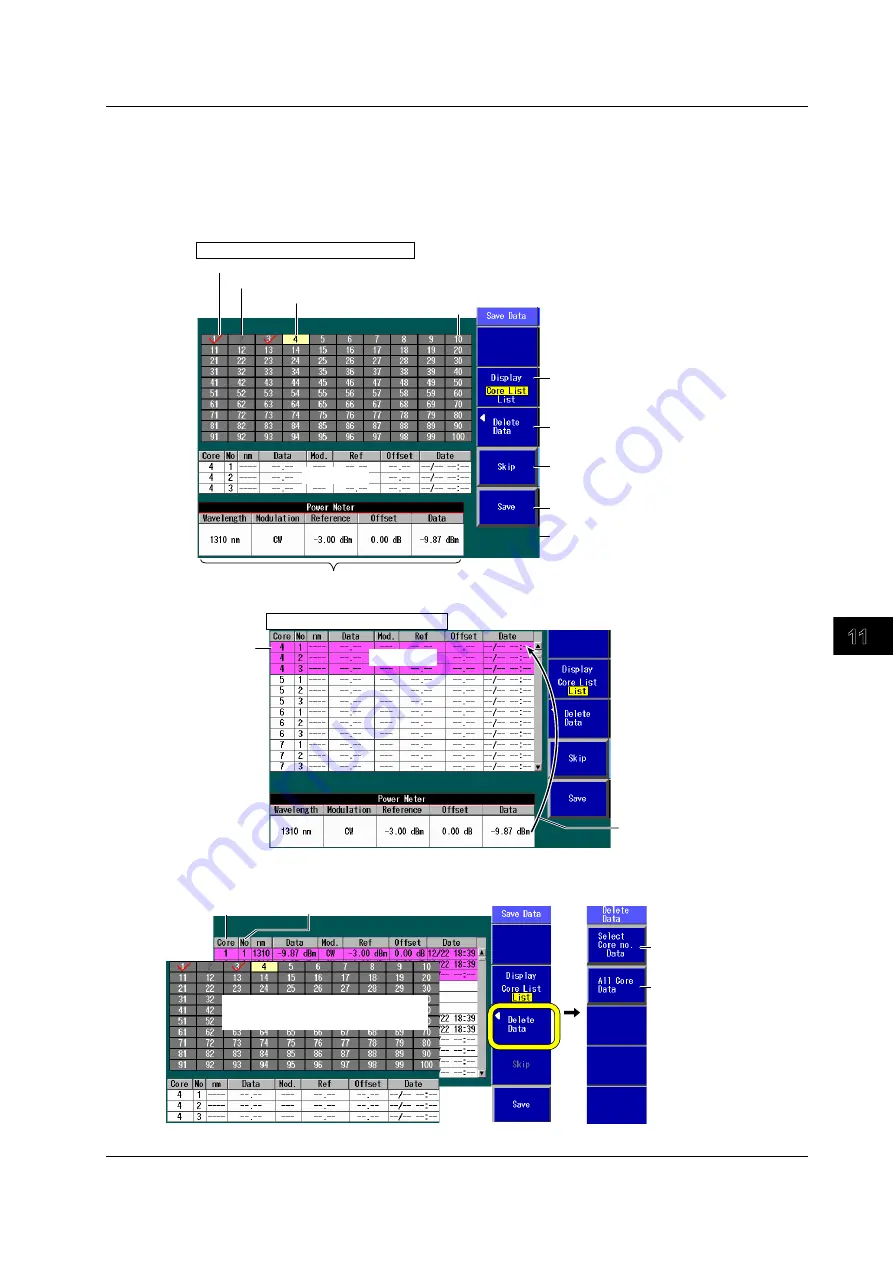
Data Save Screen
In the Power Meter screen of the optical power meter, press the
Save Data
soft key to display the
following screen. On the detailed setup screen on the next page, you can set the starting core number,
tape number type, and number of fibers.
Core no.
Check mark indicating that the data has been saved
Skipped core numbers are dimmed.
The core number that is set as the save destination is highlighted.
Set the list to show (Core List, List).
Data (measurement conditions and measured values)
The data set on the power meter screen is displayed.
Save area
Save area
When “Display” is set to “List”
Core no.
When “Display” is set to “Core List”
You can save up to three sets of
data in the save area of the
specified core.
Use the rotary knob and the
arrow keys to select a core
number.
Use the rotary knob and the arrow keys to
select a core number.
Delete data (see the Delete Data screen in
the next section).
You can save up to three sets of data in the
save area of the specified core.
Saves the data
Specify skipping.
To cancel skipping, press this soft key again.
Delete Data Screen
No. 1, 2, and 3
Core no.
Deletes the data of all the
selected cores
Deletes all the core data
Use the rotary knob and the arrow
keys to select a core number.
If you delete data, the Save
Data menu is displayed.


