


Network Video Recorder User Manual
12.2.8
Configuring NAT
Purpose:
Two ways are provided for port mapping to realize the remote access via the cross-
segment network, UPnP™ and manual mapping.
UPnP
TM
Universal Plug and Play (UPnP™) can permit the device seamlessly discover the
presence of other network devices on the network and establish functional network
services for data sharing, communications, etc. You can use the UPnP™ function to
enable the fast connection of the device to the WAN via a router without port mapping.
Before you start:
If you want to enable the UPnP™ function of the device, you must enable the UPnP™
function of the router to which your device is connected. When the network working mode
of the device is set as multi-address, the Default Route of the device should be in the
same network segment as that of the LAN IP address of the router.
Step 1 Enter the Network Settings interface.
Menu > Configuration > Network
Step 2 Select the
NAT
tab to enter the port mapping interface.
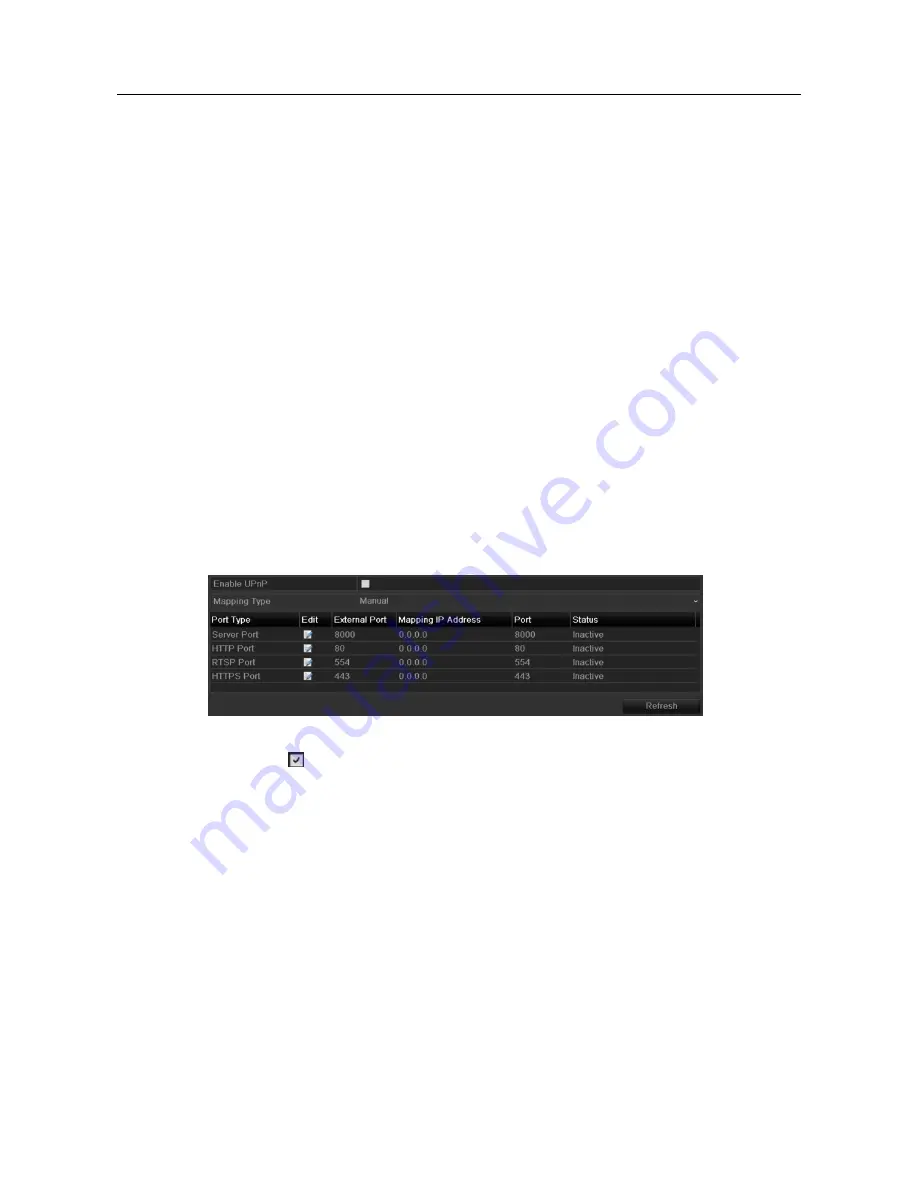
Figure 12-
22 UPnP™ Settings
Interface Step 3 Check checkbox to enable
UPnP™.
Step 4 Select the Mapping Type as Manual or Auto in the drop-down list.
OPTION 1: Auto
If you select Auto, the Port Mapping items are read-only, and the external ports are
set by the router automatically.
1)
Select
Auto
in the drop-down list of Mapping Type.
2) Click
Apply
button to save the settings.
3) You can click
Refresh
button to get the latest status of the port mapping.
Содержание VZ-NVR-161080-P
Страница 1: ...NETWORK VIDEO RECORDER Quick Start Guide...
Страница 115: ...Network Video Recorder User Manual Figure 6 19 Interface of External File Playback...
Страница 145: ...Network Video Recorder User Manual Figure 8 18 Copy Settings of Alarm Output...
Страница 214: ...Network Video Recorder User Manual Figure 13 26 View HDD Status 2...
Страница 220: ...Network Video Recorder User Manual Figure 14 3 Set Privacy Mask Area Step 6 Click the Apply button to save the settings...


