Controlled-Rate Freezer
Start Up | 11
Initial Start Up
To start up the Controlled-Rate Freezer, complete the
following steps:
•
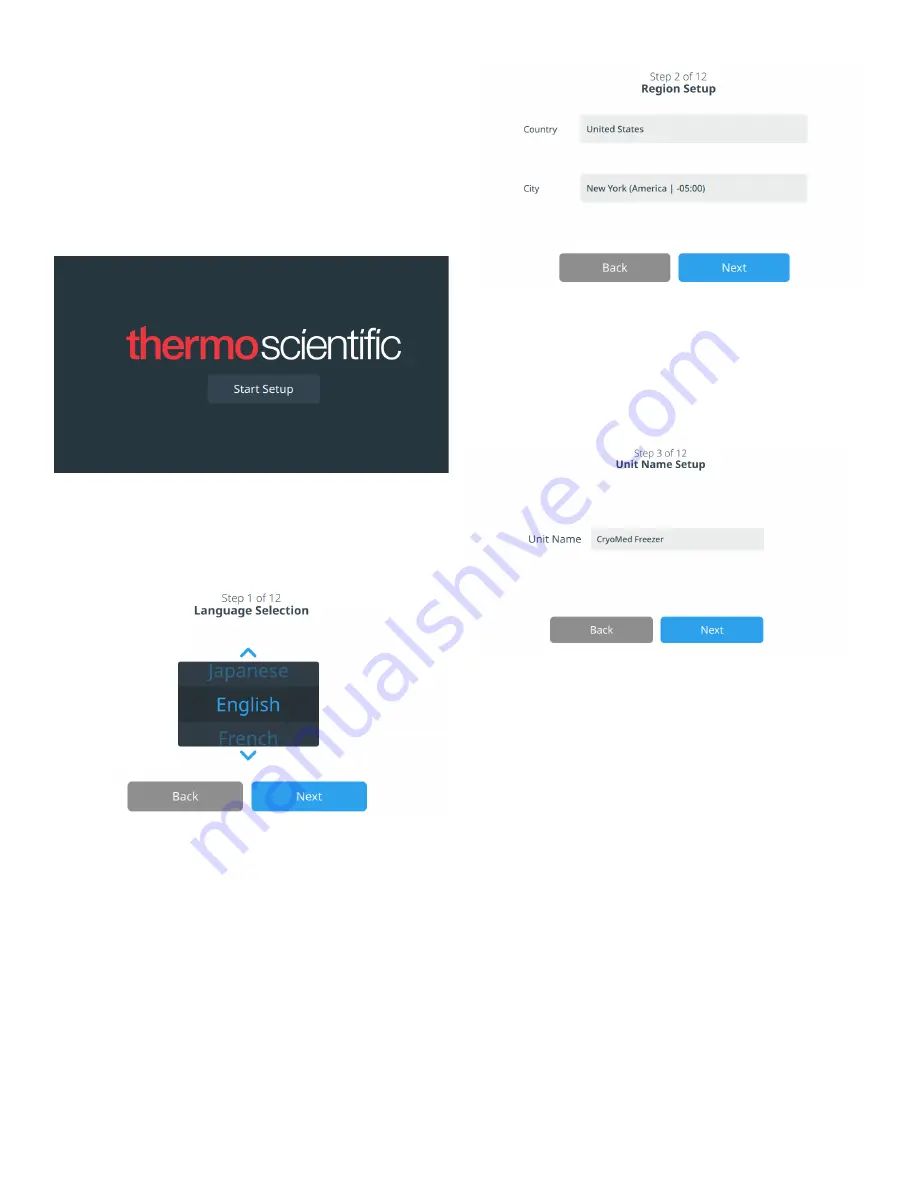
Once the Controlled-Rate Freezer is powered up, the
Thermo Scientific logo is displayed on the front screen. If
this is the first time the unit is being turned on, an initial
setup must be completed. Press the
Start Setup
button
to initiate the setup.
Figure 6. Main Screen
The first step of the setup is to select the language. This
screen allows you to specify the preferred display language.
Once the language is selected, press the
Next
button.
Figure 7. Language Selection Screen
The next screen allows you to select your location. Enter the
name of the country and the city and select from the list of
suggestions displayed.
After selecting the region, press the
Next
button.
Figure 8. Region Setup Screen
When entering your “City” into the Region Setup screen, refer
to “
”. Follow the table to select
the city closest to your time zone. The next screen allows you
to identify an individual Controlled-Rate Freezer by specifying
a Unit Name. After entering a name, press the
Next
button.
Figure 9. Unit Name Setup Screen
The next few screens allow you to setup a wireless
connection to store information on InstrumentConnect.
To fully connect your new unit, you will need to:
1. Connect the unit to a wireless network allowing data to
be sent to Thermo Fisher Connect.
2. Log in to Thermo Fisher Connect (web or app) and link
the unit to your account via InstrumentConnect.
Note:
Before you begin, establish a Thermo Fisher Connect
account and have your network login information available.
Refer to
section for details.
Accept the terms and conditions for using connectivity on this
device.


