Chapter 4
Maintenance
4-8
Chapter 4
Maintenance
Replacing hard disks
The Replace Disk function copies the data from an
original hard disk (called original disk below) to a new
disk, and reconstructs the RAID drive, replacing the
original disk with the new disk.
Note
Data that cannot be read from an original hard disk
cannot be copied to the new disk, so it will be lost.
Proceed as follows to replace hard disks.
1
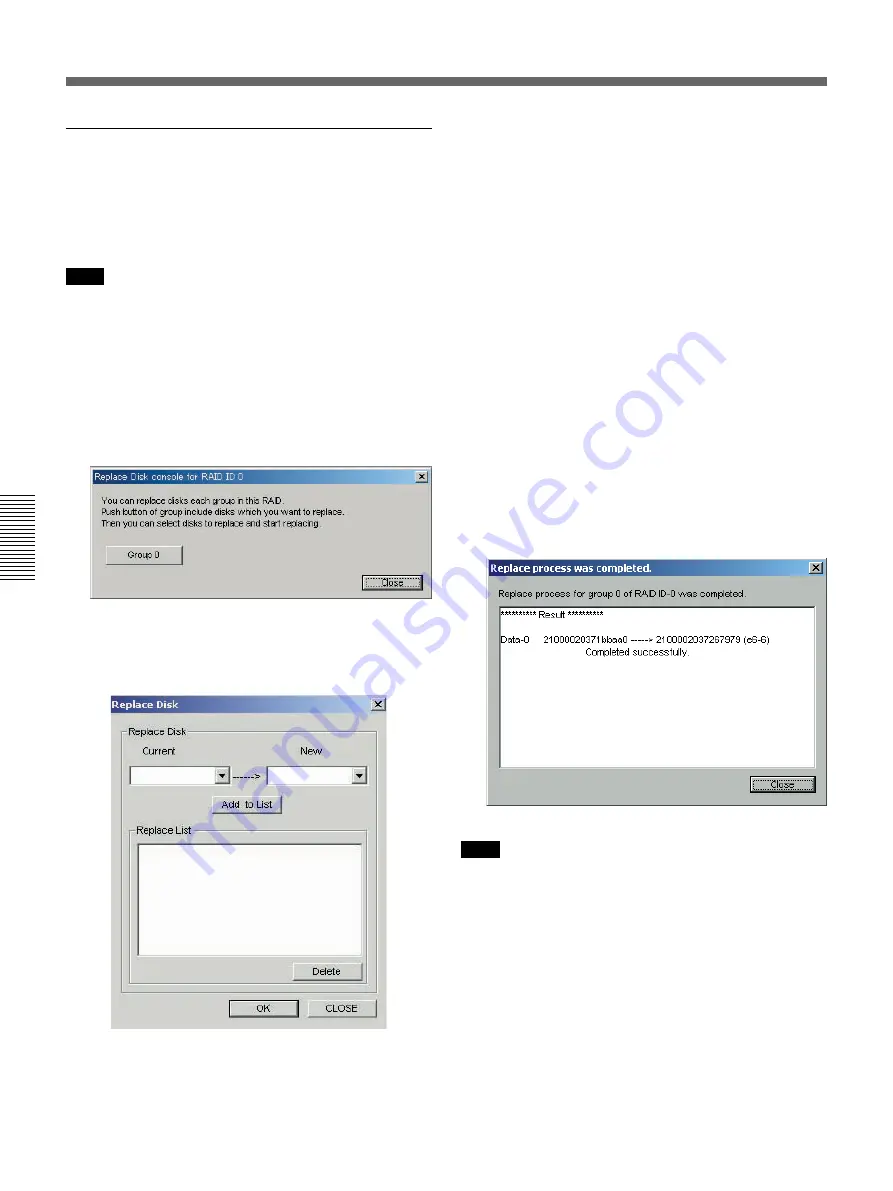
Click the Replace Disk button in the Maintenance
Menu dialog.
The Replace Disk Console dialog opens.
2
Click the Group button of the group that contains
the hard disk to be replaced.
The Replace Disk dialog opens.
3
Select the original disk from Current, and select
the new disk from New.
4
Click the Add to List button.
The original disk and new disk selected in step
3
are displayed in Replace List.
5
Click the OK button.
Processing starts. The progress of the operation is
displayed in the Replace Disk Console dialog.
During the processing, you can click the buttons in
the Replace Disk Console dialog to abort, stop, or
restart the operation.
If you reboot the system by pressing the Stop
button during the processing and then press the
Restart button, the processing can be restarted from
where you pressed the Stop button.
When processing finishes, the Complete dialog
appears and maintenance results are displayed.
Note
After this operation, please reboot the Digital Media
Workstation so that you can make the best use of the
designed system performance.
4-1
Fibre Channel Storage Unit Maintenance


