


61
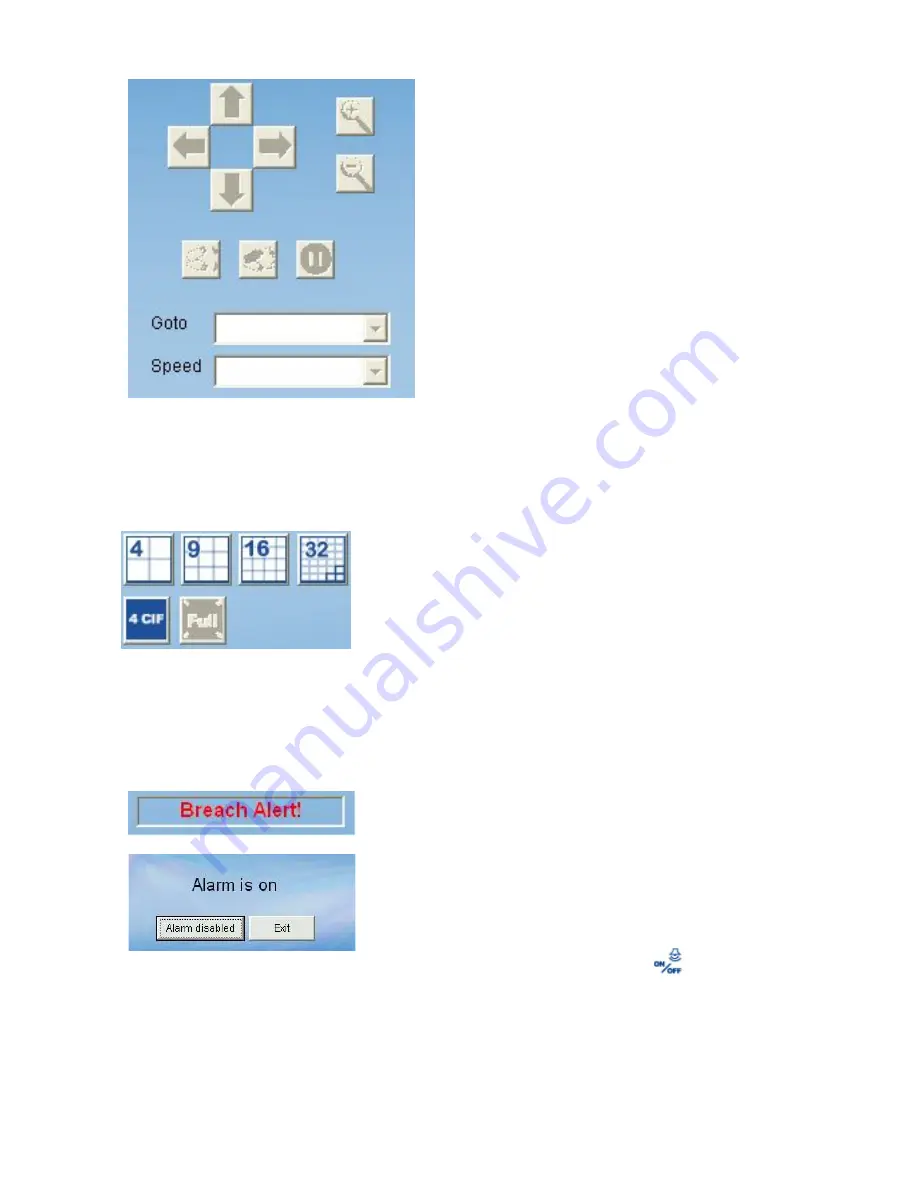
1: PT Speed:
You can select the drop list to
change the speed of camera movement.
2: PT control:
PT interface consists of a
control icon which can be used to change the
view angle of your camera to 4 directions
manually.
3: - (Zoom out)
:
Used to
control PT camera to
zoom out.
4: + (Zoom in)
:
Used to control PT camera to
zoom in.
5: AutoPan:
Used to control PT camera to
auto panning.
6: AutoPatrol:
Used to control PT camera
auto patrolling preset location.
7: Stop:
Used to stop PT camera’s auto-action.
8: Preset Point:
in this drop list, you can select
preset point (Preset point is configured in
Admin program).
E.2.3. Display Selection
E.2.4. Alarm Notification
STEP 1:
Disable a System Alarm. “Breach Alert”
message will appear in this box when an
alarm occurs to warn the user. The most
up-to-date alarm is logged in the “Alarm
notification log”.
Depending on your alarm setting, a live
video of the device may pop up in the
Video Display Area.
STEP 2:
Click the “Alarm Switch”
button and
the system will bring up an alarm switch
window, click “Alarm disabled” button to
cancel the “Breach Alert” message.
Please remember to enable it again to
activate the alarm function.
Select split screen in Display Selection, the video display
area will change the video accordingly.
[Note]
Double click the selected screen in Split screen
and the split screen will change to single display mode.
CIF/4CIF/Full
While in a single mode video display (only one video
display in Video Display Area), or the select video from
the split screen, you can click
CIF
/
4CIF
and
Full
button
to change resolution.
1
2
3
4
5
6
8
7
Содержание EZ Connect Vision SMCWIPCFN-G
Страница 1: ...USER GUIDE SMCWIPCFN G EZ Connect VisionTM Wireless Night Vision IP Camera...
Страница 18: ...17 MPEG4 Wireless Day Night IP camera User Manual SMCWIPCFN G Version 1 0 March 2008...
Страница 34: ...33 STEP 4 Click OK to continue the uninstall process Uninstall Complete STEP 5 Click Finish to exit the window...


