ST750
G
ENERAL
H
ANDBOOK
667/HB/33750/000
Page 94
Issue 6
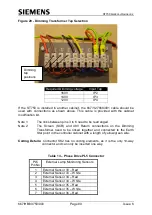
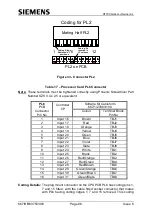
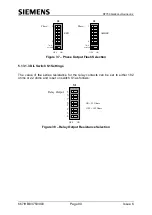
Replace each of the 4 off 10A fuses in the fuse holders F6 to F11 on the Phase
Drive PCB with 3.15A fuses, leaving the dummy fuses in place. See Figure 42 and
Figure 39 for details. This protects the individual circuits whilst the self-test is being
performed in the event of a short circuit in any of the cables.
Select and run the self-test
– see section 8.
If the self test passes, replace the 10A fuses in the Phase Drive PCB.
The ST750P stand-alone pedestrian controllers normally run one of the standard
configurations generated by Siemens Poole that are listed below:
EM30700 Single/dual stand-alone Pelican crossing
EM30701 Single/dual stand-alone crossing with a red clearance period, i.e. near-
sided Puffin or Toucan crossing.
EM30702 Single/dual stand-alone crossing with a blackout clearance period, i.e.
far-sided Pedestrian or Toucan crossing.
EM30703
Single stand-alone crossing with a red clearance period, i.e. near-sided
Puffin or Toucan crossing, with centre island blackout option.
These configurations are available on the IC4 CD. Other configurations may be
produced by Siemens Poole in order to meet the particular requirements of an area
or of one particular site.
These configurations need to be customised for particular installations using the
handset and the information in the special instructions of the configuration printout.
The commands to customise the ST750 are described in the Handset Handbook
and in the Special Instructions. These allow facilities such as kerbside and on-
crossing detectors and speed discrimination/assessment to be enabled or disabled.
However, the fundamental lamp sequence (i.e. flashing green-man, red-man or
blackout clearance periods) cannot be changed using the handset and is fixed in
each of the default configurations.
The configuration data for a stand-alone pedestrian crossing ST750 is loaded
through the handset port from a PC running IC4.
The configuration data could be loaded while the ST750 is still in the depot rather
than using a PC on the street. Provided the battery isolators are removed, the
configuration data will still be present in the battery backed-up RAM when the
ST750 is installed.
The procedure for loading the configuration data is given in the Handset Handbook.
Once the configuration data has been loaded, ensure the Signals ON/OFF switch on
the manual panel is in the off position and connect a suitable handset to the 25-way
D-type connector on the ST750 CPU PCB.

