1 - 71
ADJUSTMENT
1.15 Adjustment of Duplexer
1.15.1
Adjustment of the stack guide unit
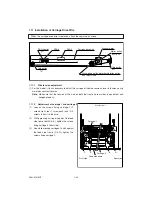
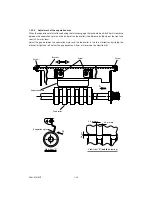
[A] Stack guide stop position adjustment
When making copies in the double-sided mode
on the Duplexer, make sure that the horizontal
deviation on both sides of the paper is less than
±2 mm.
If the deviation is outside of this range, follow
the procedure below to adjust.
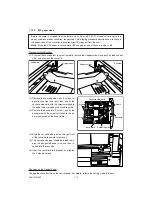
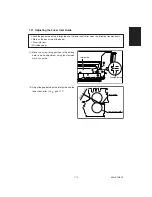
(1) Stack paper on the stack guide, and make sure
that the gap between the paper and the stack
stopper on the stack guide is 1±0.5mm. To ad-
just the gap, loosen the fixing screw on the rear
side of the stack guide unit, and then, make
adjustment with the adjusting screw.
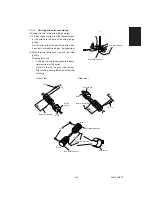
[B] Duplexer horizontal deviation adjustment
When the image on the double-sided copy de-
viates horizontally even after adjustment [A]
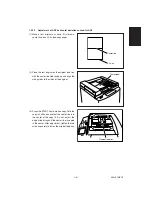
(1) Loosen the 2 screws for fixing the stack guide
unit. If the paper drifts toward either the front or
the rear side, move the stack guide unit toward
the opposite side by the amount of the paper
drift, using the scales on the unit as a guide.
(2) After adjustment, tighten the 4 fixing screws on
the stack guide unit.
Note:
The 1mm interval scales are useful in mak-
ing this adjustment.
(3) After adjustment, make a copy to check that
horizontal deviation is corrected.
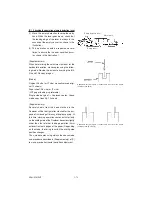
Holizontal width adjustment method
Detection switch
Eccentric cam
+
–2mm
(Adjustment width)
Narrower
Wider
Stack frame
Scale (F side)
Lower feed guide
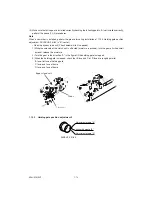
Holizontal deviation adjustment method
+
–2mm
(Adjustment width)
Содержание AR-650
Страница 103: ...MAINTENANCE 2 6 Rear drive system 38 36 37 3 54 54 54 54 54 54 96 12 81 63 63 46 ...
Страница 104: ...2 7 MAINTENANCE ADF front sectional view 100 104 109 105 106 102 108 99 101 103 107 98 ...
Страница 118: ...SUPPLIES 3 6 9 REMOVE 1 1 2 10 REMOVE 11 TURN OVER 13 REMOVE 15 REMOVE 14 REMOVE 12 REMOVE 16 INSTALL 2 2 1 ...
Страница 119: ...3 7 SUPPLIES 18 INSTALL 2 1 19 INSTALL 2 1 20 CONNECT 21 INSTALL 2 2 2 1 22 CLOSE 1 3 2 23 INSTALL 17 CONNECT ...
Страница 122: ...SUPPLIES 3 10 13 CONNECT 15 CLOSE 2 1 14 CLOSE 1 2 16 TURN ON 17 PRESS 18 END ...
Страница 125: ...3 13 SUPPLIES 5 OPEN 2 1 6 DISCONNECT 7 REMOVE 2 1 9 8 REPLACE 2 1 9 INSTALL 1 2 10 CONNECT 11 CLOSE 1 2 12 CLOSE 2 1 ...
Страница 126: ...SUPPLIES 3 14 13 TURN ON 14 PRESS 15 END 5 DEVELOP UNIT 1 REMOVE 3 2 3 5 4 2 REMOVE 3 INSTALL 4 FILL 5 INSTALL 10 ...
Страница 168: ...Select Direct Connection and then click Next button Select Communications Port COM1 and then click Next button 5 4 ...
Страница 169: ...Click Finish button then Virtual Modem installation is completed 5 5 ...
Страница 179: ...To make the connection ONLINE mode click button before firmware downloading 5 15 ...
Страница 194: ......
Страница 195: ...MEMO ...
Страница 196: ...MEMO ...
Страница 197: ...MEMO ...
Страница 198: ...MEMO ...
Страница 199: ...MEMO ...

