


MAINTENANCE
2 - 8
*1 Main blade and fur brush
If defective cleaning occurs due to the adhesion of paper dust, etc., the edge of the blade might have
been damaged. Replace the blade regardless of the number of the copies made so far. Also replace
the fur brush at this time
*2 Recovery blade
If the edge of the blade is damaged, replace the blade regardless of the number of copies made so
far.
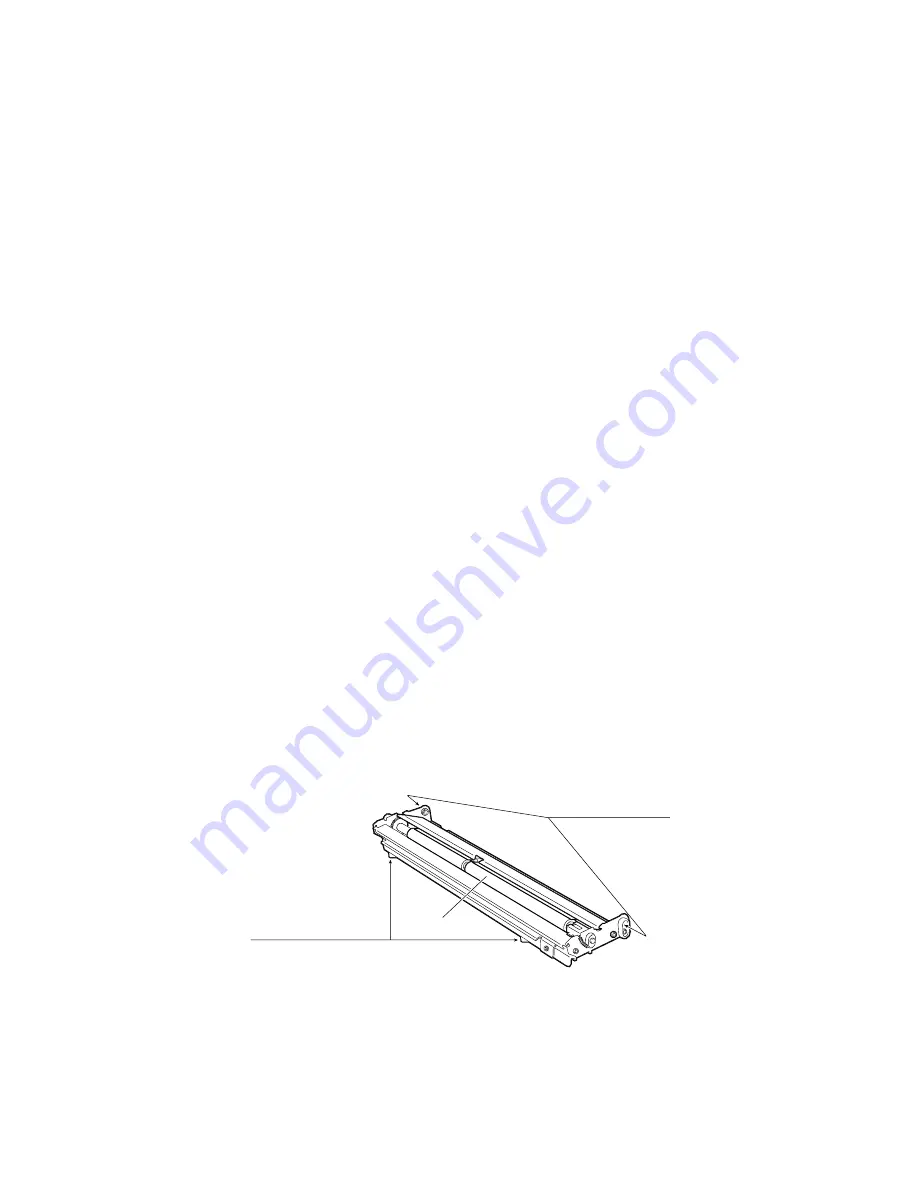
*3 Drum separation claw
If the tip of the separation claw has been damaged (e.g. worn coating) or separation claw marks are
apparent in the copied image, replace the claw regardless of the number of copies made so far.
Clean the tip of the claw by lightly wiping with a dry cloth. After cleaning, be sure to remove bits of lint
from the claw. In addition, be sure to apply patting powder (lubricant) to the separation claw after
cleaning the claw and when replacing the claw or drum.
*4 Drum
Refer to section “3.2 Checking and Cleaning the OPC Drum”.
*5 Air filter, Duct filter
Replace the air filter if it is heavily dirty.
*6 Charger wire and case
Use a cloth which should be soaked in water and then wrung lightly to clean those.
*7 Developer material
After replacing the developer material, be sure to adjust the corresponding auto-toner sensor.
*8 Upper and lower heat rollers
Refer to section “3.5 Checking and Cleaning Upper and Lower Heater Rollers”.
*9 Heat roller separation claw
If the tip of the separation claw is chipped, replace it regardless of the number of copies made so far.
If toner adhering to the separation claw is forcibly scraped off, the claw may be damaged. Therefore,
replace the claw if its tip is heavily coated with toner.
*10 Heat roller cleaning roller 1, 2, 3, 4
Refer to section “3.4 Checking and Replacing Heat roller cleaning roller 1, 2, 3, 4”.
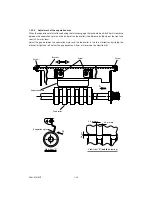
*11 Aligning unit support bush and pressurizing leaf spring
Aligning unit
White Molycoat
on inner surface of bush
* Apply one drop.
White Molycoat on surface
of pressurizing leaf spring
* Apply one drop.
Содержание AR-650
Страница 103: ...MAINTENANCE 2 6 Rear drive system 38 36 37 3 54 54 54 54 54 54 96 12 81 63 63 46 ...
Страница 104: ...2 7 MAINTENANCE ADF front sectional view 100 104 109 105 106 102 108 99 101 103 107 98 ...
Страница 118: ...SUPPLIES 3 6 9 REMOVE 1 1 2 10 REMOVE 11 TURN OVER 13 REMOVE 15 REMOVE 14 REMOVE 12 REMOVE 16 INSTALL 2 2 1 ...
Страница 119: ...3 7 SUPPLIES 18 INSTALL 2 1 19 INSTALL 2 1 20 CONNECT 21 INSTALL 2 2 2 1 22 CLOSE 1 3 2 23 INSTALL 17 CONNECT ...
Страница 122: ...SUPPLIES 3 10 13 CONNECT 15 CLOSE 2 1 14 CLOSE 1 2 16 TURN ON 17 PRESS 18 END ...
Страница 125: ...3 13 SUPPLIES 5 OPEN 2 1 6 DISCONNECT 7 REMOVE 2 1 9 8 REPLACE 2 1 9 INSTALL 1 2 10 CONNECT 11 CLOSE 1 2 12 CLOSE 2 1 ...
Страница 126: ...SUPPLIES 3 14 13 TURN ON 14 PRESS 15 END 5 DEVELOP UNIT 1 REMOVE 3 2 3 5 4 2 REMOVE 3 INSTALL 4 FILL 5 INSTALL 10 ...
Страница 168: ...Select Direct Connection and then click Next button Select Communications Port COM1 and then click Next button 5 4 ...
Страница 169: ...Click Finish button then Virtual Modem installation is completed 5 5 ...
Страница 179: ...To make the connection ONLINE mode click button before firmware downloading 5 15 ...
Страница 194: ......
Страница 195: ...MEMO ...
Страница 196: ...MEMO ...
Страница 197: ...MEMO ...
Страница 198: ...MEMO ...
Страница 199: ...MEMO ...