2 - 1
MAINTENANCE
2.
PERIODICAL MAINTENANCE
2.1
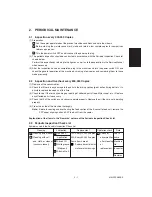
Inspection every 400,000 Copies
(1) Preparation
1
Ask the copier operator about the present machine conditions and note them down.
2
Before starting the maintenance work, make and retain a few sample copies for comparison
reference purposes.
3
Turn the power switch OFF and disconnect the power cord plug.
(2) The periodic inspection should be conducted in accordance with the Periodic Inspection Check list
shown below.
Perform the inspection by referring to the figures, as well as to the explanation in the Service Manual
when necessary.
(3) After the inspection has been completed, plug in the machine and turn the power switch ON, and
check the general operation of the machine by making a few copies and comparing them to those
made previously.
2.2
Inspection and Overhaul every 800,000 Copies
(1) Replace all the consumables.
(2) Check that if there is any damage to the parts in the driving section (gear, pulley, timing belt, etc.). In
principle, replace those parts at this time.
(3) Check to see if there is any damage or peeling of adhered parts (tape, Mylar sheet, etc.). Replace
any affected parts if necessary.
(4) Check that if all the switches and sensors operate properly. Replace them if they are not operating
properly.
(5) Clean the inside of the machine thoroughly.
Note:
Before inspecting and overhauling the feed section of the 3-cassette feed unit, remove the
PFP upper aligning unit and PFP feed unit from the copier.
Explanation of the items in the “Remarks” column of the Periodic Inspection Check List
2.3
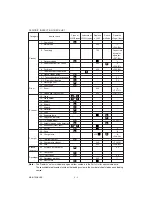
Periodic Inspection Check List
Symbols used in the Periodic Inspection Check List
Cleaning
Lubrication
Replacement
Operation check
Date
A
: Cleaning with alcohol
L
: Launa 40
100: Every 100,000 copies
: Check for
User’s
: Cleaning with soft
Application
400: Every 400,000 copies
abnormalities name
pad, cloth, or cleaner
SI
: Silicon Oil
Same from here on
after cleaning Machine
(vacuum cleaner)
W
: White grease
: Replace in event of defor-
or
No.
(Molycoat)
mation or other damage
replacement. Inspector
AV
: Alvania No.2
Remarks
Содержание AR-650
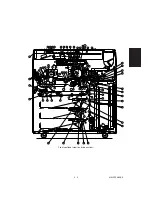
Страница 103: ...MAINTENANCE 2 6 Rear drive system 38 36 37 3 54 54 54 54 54 54 96 12 81 63 63 46 ...
Страница 104: ...2 7 MAINTENANCE ADF front sectional view 100 104 109 105 106 102 108 99 101 103 107 98 ...
Страница 118: ...SUPPLIES 3 6 9 REMOVE 1 1 2 10 REMOVE 11 TURN OVER 13 REMOVE 15 REMOVE 14 REMOVE 12 REMOVE 16 INSTALL 2 2 1 ...
Страница 119: ...3 7 SUPPLIES 18 INSTALL 2 1 19 INSTALL 2 1 20 CONNECT 21 INSTALL 2 2 2 1 22 CLOSE 1 3 2 23 INSTALL 17 CONNECT ...
Страница 122: ...SUPPLIES 3 10 13 CONNECT 15 CLOSE 2 1 14 CLOSE 1 2 16 TURN ON 17 PRESS 18 END ...
Страница 125: ...3 13 SUPPLIES 5 OPEN 2 1 6 DISCONNECT 7 REMOVE 2 1 9 8 REPLACE 2 1 9 INSTALL 1 2 10 CONNECT 11 CLOSE 1 2 12 CLOSE 2 1 ...
Страница 126: ...SUPPLIES 3 14 13 TURN ON 14 PRESS 15 END 5 DEVELOP UNIT 1 REMOVE 3 2 3 5 4 2 REMOVE 3 INSTALL 4 FILL 5 INSTALL 10 ...
Страница 168: ...Select Direct Connection and then click Next button Select Communications Port COM1 and then click Next button 5 4 ...
Страница 169: ...Click Finish button then Virtual Modem installation is completed 5 5 ...
Страница 179: ...To make the connection ONLINE mode click button before firmware downloading 5 15 ...
Страница 194: ......
Страница 195: ...MEMO ...
Страница 196: ...MEMO ...
Страница 197: ...MEMO ...
Страница 198: ...MEMO ...
Страница 199: ...MEMO ...

