


ADJUSTMENT
1 - 76
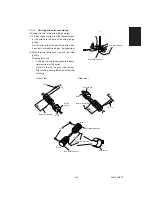
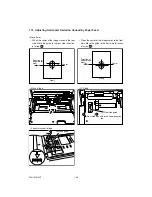
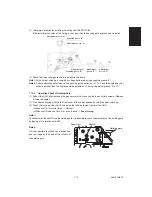
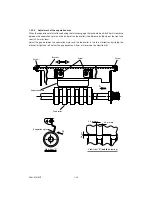
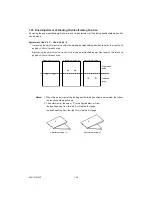
1.16 Adjusting the Thickness of the Magnetic Brush (leveler)
Bring both edges of the developer leveler up against
the projections on the front and rear side frames.
Positional adjustment is not needed as the thick-
ness of the transport roller magnetic brush is al-
ready fixed.
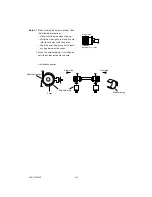
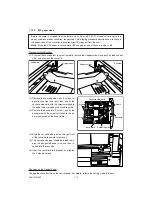
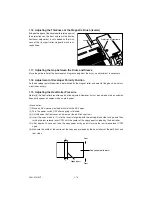
1.17 Adjusting the Gap between the Drum and Sleeve
Since the guide roller of the developer unit is pressed against the drum, no adjustment is necessary.
1.18 Adjustment of Developer Polarity Position
As the developer polarity position is determined by the magnet roller and polarity fixing bush, no adjust-
ment is necessary.
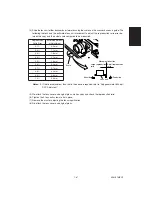
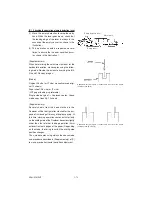
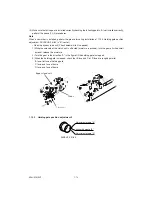
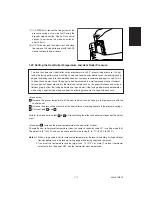
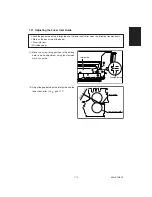
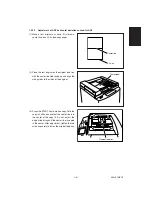
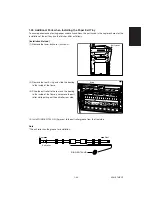
1.19 Adjusting the Heat Roller Pressure
Normally, the heat roller pressure need not be adjusted. However, it must be carried out when wrinkles
frequently appear on copies made on plain paper.
<Procedure>
(1) Make an A3 size copy (entirely black) with the ADF open.
(2) Turn the power switch OFF after copying is finished.
(3) Quickly open the front cover, and draw out the belt transport unit.
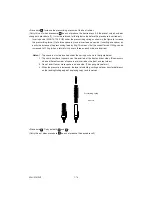
(4) Insert the copy made in (1) into the fuser inlet guide with the entirely black side facing down then
turning the jam release lever CCW until the center of the copy paper is nipped by the heat roller.
(5) After approx. 20 seconds, take the copy paper out by quickly turning the jam release lever CCW
again.
(6) Measure the width of the section of the copy paper nipped by the heat rollers at the both front and
rear sides.
R
F
Nipped part
Front
Rear
Copy paper(solid black)
Leveler
Projection of sideframe
Содержание AR-650
Страница 103: ...MAINTENANCE 2 6 Rear drive system 38 36 37 3 54 54 54 54 54 54 96 12 81 63 63 46 ...
Страница 104: ...2 7 MAINTENANCE ADF front sectional view 100 104 109 105 106 102 108 99 101 103 107 98 ...
Страница 118: ...SUPPLIES 3 6 9 REMOVE 1 1 2 10 REMOVE 11 TURN OVER 13 REMOVE 15 REMOVE 14 REMOVE 12 REMOVE 16 INSTALL 2 2 1 ...
Страница 119: ...3 7 SUPPLIES 18 INSTALL 2 1 19 INSTALL 2 1 20 CONNECT 21 INSTALL 2 2 2 1 22 CLOSE 1 3 2 23 INSTALL 17 CONNECT ...
Страница 122: ...SUPPLIES 3 10 13 CONNECT 15 CLOSE 2 1 14 CLOSE 1 2 16 TURN ON 17 PRESS 18 END ...
Страница 125: ...3 13 SUPPLIES 5 OPEN 2 1 6 DISCONNECT 7 REMOVE 2 1 9 8 REPLACE 2 1 9 INSTALL 1 2 10 CONNECT 11 CLOSE 1 2 12 CLOSE 2 1 ...
Страница 126: ...SUPPLIES 3 14 13 TURN ON 14 PRESS 15 END 5 DEVELOP UNIT 1 REMOVE 3 2 3 5 4 2 REMOVE 3 INSTALL 4 FILL 5 INSTALL 10 ...
Страница 168: ...Select Direct Connection and then click Next button Select Communications Port COM1 and then click Next button 5 4 ...
Страница 169: ...Click Finish button then Virtual Modem installation is completed 5 5 ...
Страница 179: ...To make the connection ONLINE mode click button before firmware downloading 5 15 ...
Страница 194: ......
Страница 195: ...MEMO ...
Страница 196: ...MEMO ...
Страница 197: ...MEMO ...
Страница 198: ...MEMO ...
Страница 199: ...MEMO ...