2A3/4
3-3-62
4.
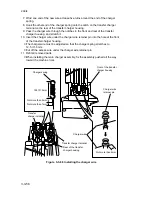
Detach the 2-pin connector and remove the cleaning unit from the image formation
unit.
5.
Remove the E-rings, bushings and gear from both ends of the cleaning brush.
6.
Clean or replace the cleaning brush.
7.
Refit all removed parts.
∗
When installing the cleaning brush, position the end with the D-section at the
machine rear and take care not to pinch the cleaning lower seal assembly.
2-pin connector
Cleaning brush
Bushing
Bushing
Cleaning unit
Cleaning lower seal
assembly
Gear
E-ring
E-ring
D-section
Figure 3-3-73
Содержание Ri 4230
Страница 1: ...4230 5230 S M MCA SERVICE MANUAL Published in June 00 2A370941 Revision 1 Ri 4230 5230 Ri 4230 5230 ...
Страница 3: ...SERVICE MANUAL Ri 4230 5230 ...
Страница 13: ...4230 5230 S M MCA THEORY AND CONSTRUCTION SECTION I I Theory and Construction Section ...
Страница 14: ...1 1 5 2A3 4 CONTENTS 1 1 Specifications 1 1 1 Specifications 1 1 1 ...
Страница 21: ...1 1 7 2A3 4 CONTENTS 1 2 Handling Precautions 1 2 1 Drum 1 2 1 1 2 2 Developer and toner 1 2 1 ...
Страница 100: ...4230 5230 S M MCA ELECTRICAL SECTION II II Electrical Section ...
Страница 119: ......
Страница 138: ......
Страница 159: ...4230 5230 S M MCA III Set Up and Adjustment Section III SET UP AND ADJUSTMENT SECTION ...
Страница 419: ...1 1 25 2A3 4 CONTENTS 3 5 Self Diagnosis 3 5 1 Self diagnosis 3 5 1 1 Self diagnostic function 3 5 1 ...
Страница 448: ...2A3 4 3 6 3 25 Toner scatters at the leading edge of the image See page 3 6 17 ...


