112
Chapter 5 Playing Along with Patterns
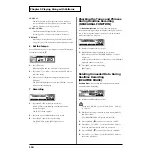
Adding a Count Sound Before
Recording or Playback (COUNT IN)
You can have a count sound (click) inserted before recording
or playback of a pattern begins.
When set to play before playback of the pattern, the sound is
added before playback of the song.
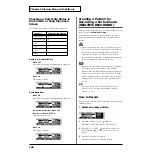
fig.06-041
1.
Press [CLICK], then [F3 (COUNT)].
[CLICK] lights, and the click sound begins to play.
The “CLICK” screen appears.
2.
Press CURSOR [
] or [
] to move the cursor to
“PLAY” when adding the click before playback, and to
“REC” when adding the count sound before the start of
recording.
3.
Press [INC/+] or [DEC/-] or rotate the VALUE dial to
make the setting.
4.
When you have finished making the settings, press
[CLICK].
The [CLICK] light is turned out.
PLAY: OFF, 1 MEAS, 2 MEAS
REC: OFF, 1 MEAS, 2 MEAS
OFF
:
Playback/recording will begin without a count-in.
1 MEAS
:
Playback/recording begins after a 1-measure count-in.
2 MEAS
:
Playback/recording begins after a 2-measure count-in.
Starting Recording at the Same
Time a Pad Is Hit (HIT-PAD START)
This function starts the recording process the instant you
strike a pad.
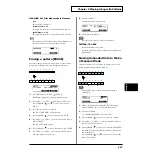
fig.06-042
1.
Press [PATTERN], then [REC].
[PLAY/STOP] flashes, and [REC] lights.
The “REC STANDBY” appears, and the click sound
begins to play.
2.
Press CURSOR [
] to move the cursor to “HIT PAD
START.”
3.
Press [INC/+] or [DEC/-] or rotate the VALUE dial to
select “ON.”
4.
In record-standby mode, recording starts the instant you
strike a pad.
Importing Data from Another
Sequencer
Data created on another sequencer can be imported via the
MIDI IN and recorded on the TD-8’s sequencer. The backing
part (Parts 1–4), percussion part, and drum kit part can be
imported simultaneously. You will need to make settings for
MIDI channels and MIDI synchronization.
1.
Follow the procedures described in “Setting the MIDI
Channel for a Part” (p. 154) to match the MIDI channel of
the sending device with the TD-8’s MIDI channel.
2.
Follow the procedures described in “Synchronizing to
the playback of an external sequencer” (p. 162) to set
“SYNC MODE” to “EXT.”
3.
Press [PATTERN], then [REC].
[REC] lights, and [PLAY/STOP] flashes.
The “REC STANDBY” screen appears, and the click
sound begins to play.
4.
Press CURSOR [
] or [
] to move the cursor to “REC
MODE.”
5.
Press [INC/+] or [DEC/-] or rotate the VALUE dial to
select “REPLACE.”
6.
Begin playback of the imported data.
For playback instructions, refer to the owner’s manual
for the external device.
The TD-8 automatically synchronizes and begins
recording.
7.
Stop playback of the imported data.
The TD-8 stops recording.
Содержание V-Drums TD-8
Страница 24: ...24 ...
Страница 25: ...25 Quick Start Quick Start ...
Страница 76: ...76 ...
Страница 77: ...77 Advanced Use Advanced Use ...
Страница 164: ...164 ...
Страница 165: ...165 Appendices Appendices ...
Страница 178: ...178 ...

