


110
Chapter 5 Playing Along with Patterns
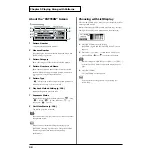
LOOP ALL:
The entire pattern will be repeated, and on each pass
your performance will be added (“overdubbed”), and
mixed with what you did previously.
LOOP 1, LOOP 2:
This determines the length of the section you are
recording, and 1 or 2 measure sections will repeat.
REPLACE:
Recording will continue until you press [PLAY/STOP].
Any previously recorded data for all Parts will be erased.
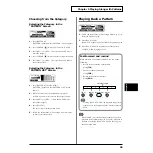
6.
Set the tempo
Press [TEMPO] if you are recording at a tempo different than
the tempo set in Step
2
.
fig.06-036
1.
Press [TEMPO].
[TEMPO] lights, and the “TEMPO” screen appears.
2.
Press [INC/+] or [DEC/-] or rotate the VALUE dial to
select the tempo.
3.
When you have finished making the settings, press
[TEMPO].
The [TEMPO] light goes out, and the “TEMPO” screen is
removed from the display.
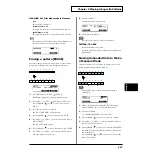
7.
Recording
fig.06-037
1.
Press [PLAY/STOP] to begin recording.
[PLAY/STOP] stops flashing and remains lit, and
recording begins.
The “REC” screen appears.
2.
Play with pads or MIDI keyboards to record.
3.
Press [PLAY/STOP] to stop recording.
The [PLAY/STOP] and [REC] lights go out.
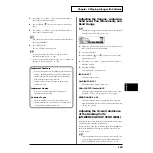
Checking the Tones and Phrases
During Realtime Recording
(REHEARSAL FUNCTION)
The
Rehearsal function
is a feature that temporarily
suspends recording during Realtime Recording. This allows
you to check the next instrument or phrase to be recorded
while recording is in progress.
fig.06-038
1.
Start Realtime Recording (p. 108).
2.
While the recording is underway, press [REC].
[REC] flashes, and the “REC REHEARSAL” screen is
displayed.
At this point, performances of the pads or external MIDI
keyboard cannot be recorded.
3.
Press [REC] to resume recording.
[REC] lights.
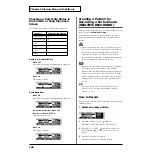
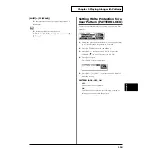
Deleting Unneeded Data During
Realtime Recording
(REALTIME ERASE)
Realtime Erase
is a function that deletes unneeded data
during Realtime Recording.
ig.06-039
1.
Start Realtime Recording (p. 108).
Set the ”REC MODE” (p. 109) to “LOOP ALL”, ”LOOP 1”,
or ”LOOP 2”.
2.
While the recording is underway, hold down [SHIFT],
and press [REC].
The “REALTIME ERASE” screen is displayed.
3.
Press CURSOR [
] to move the cursor to “PART.”
4.
Press [INC/+] or [DEC/-] or rotate the VALUE dial to
select the part from which data is to be erased.
5.
Press CURSOR [
] to move the cursor to “ERASE.”
6.
Press [INC/+] or [DEC/-] or rotate the VALUE dial to
choose the delete part.
Содержание V-Drums TD-8
Страница 24: ...24 ...
Страница 25: ...25 Quick Start Quick Start ...
Страница 76: ...76 ...
Страница 77: ...77 Advanced Use Advanced Use ...
Страница 164: ...164 ...
Страница 165: ...165 Appendices Appendices ...
Страница 178: ...178 ...


