Chapter 3 Functions for Master Making
74
2
Place the paper.
Place the paper in the direction of a short edge
paper feed.
3
Set the paper receiving tray.
31 “Setting up the paper receiving tray”)
4
Touch [Layout] in the [Functions]
tab screen.
5
Touch an original size.
6
Touch [Next].
7
Touch the number of copies to be
laid out on a single sheet of paper.
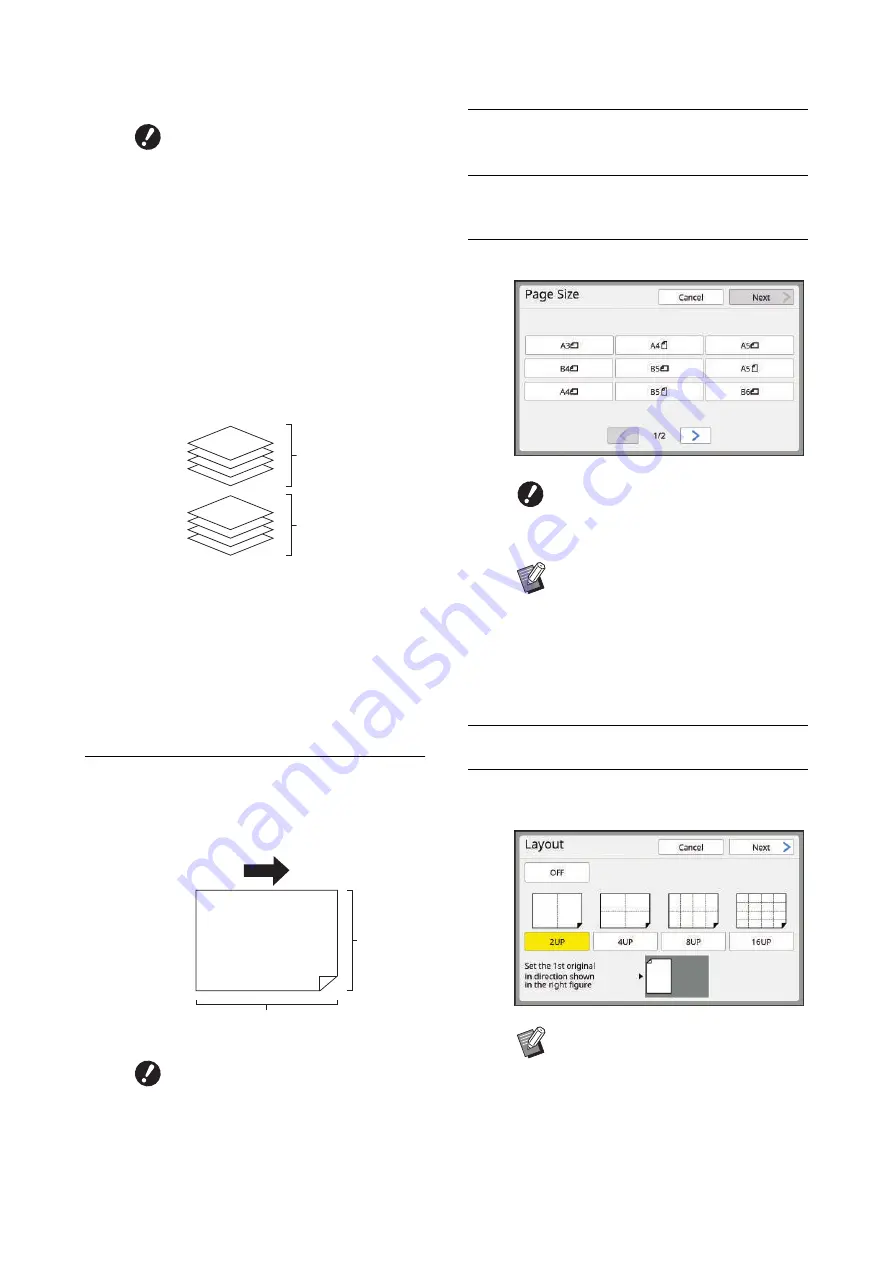
B
The glass platen cannot be used
with the optional auto document
feeder. If you place the first origi-
nal on the glass platen, place the
rest of the originals on the glass
platen too.
B
When you place originals on the
auto document feeder in dual-
color mode, place together the
originals for print drum (cylinder)
1 and then the originals for print
drum (cylinder) 2. For example, in
the case of [4UP], place pages 1
to 4 of the original for print drum
(cylinder) 1 over pages 1 to 4 of
the original for print drum (cylin-
der) 2.
B
In dual-color mode, the number of
pages of the original for print
drum (cylinder) 1 must be the
same as the specified number of
copies. When you have less
pages than copies, add blank
sheets to the pages so that the
numbers of pages of the original
and copies become equal.
B
Use a standard size of paper. You
cannot use custom size paper or
paper sizes that are registered in
[Admin.].
Original for print
drum (cylinder) 1
Original for print
drum (cylinder) 2
Paper feeding direction
Short side
Long side
B
For 4-up and 16-up printing,
touch an original size button that
shows a
R
symbol.
B
The magnification rate is automati-
cally calculated using the selected
original size and the size of the
paper that is placed. If the magnifi-
cation rate is out of the range
between 50 and 200%, the combi-
nation of the original and paper
sizes cannot be used.
B
Check that the original is placed in
the direction shown at the bottom of
the screen.
Содержание MH 9350
Страница 21: ...Chapter 1 19 1 About This Machine ...
Страница 31: ...29 2 Chapter 2 Basic Operations ...
Страница 53: ...51 3 Chapter 3 Functions for Master Making ...
Страница 97: ...95 4 Chapter 4 Functions for Printing ...
Страница 109: ...107 5 Chapter 5 Useful Functions ...
Страница 130: ...Chapter 5 Useful Functions 128 ...
Страница 131: ...129 6 Chapter 6 Functions for Scanning ...
Страница 137: ...135 7 Chapter 7 Setting the Operation Conditions ...
Страница 159: ...157 8 Chapter 8 RISO Console ...
Страница 165: ...163 9 Chapter 9 Replacing Consumables ...
Страница 177: ...175 10 Chapter 10 Maintenance ...
Страница 181: ...179 11 Chapter 11 Troubleshooting ...
Страница 205: ...203 12 Chapter 12 Appendix ...
Страница 215: ...Chapter 12 Appendix 213 12 V View edit 48 W WAKE UP key 23 Z Zoom 71 ...


