Chapter 3 Functions for Master Making
67
3
4
Place the paper.
30 “Setting up the paper feed tray and the
5
Set the paper receiving tray.
31 “Setting up the paper receiving tray”)
6
Touch [Separation] in the [Func-
tions] tab screen.
7
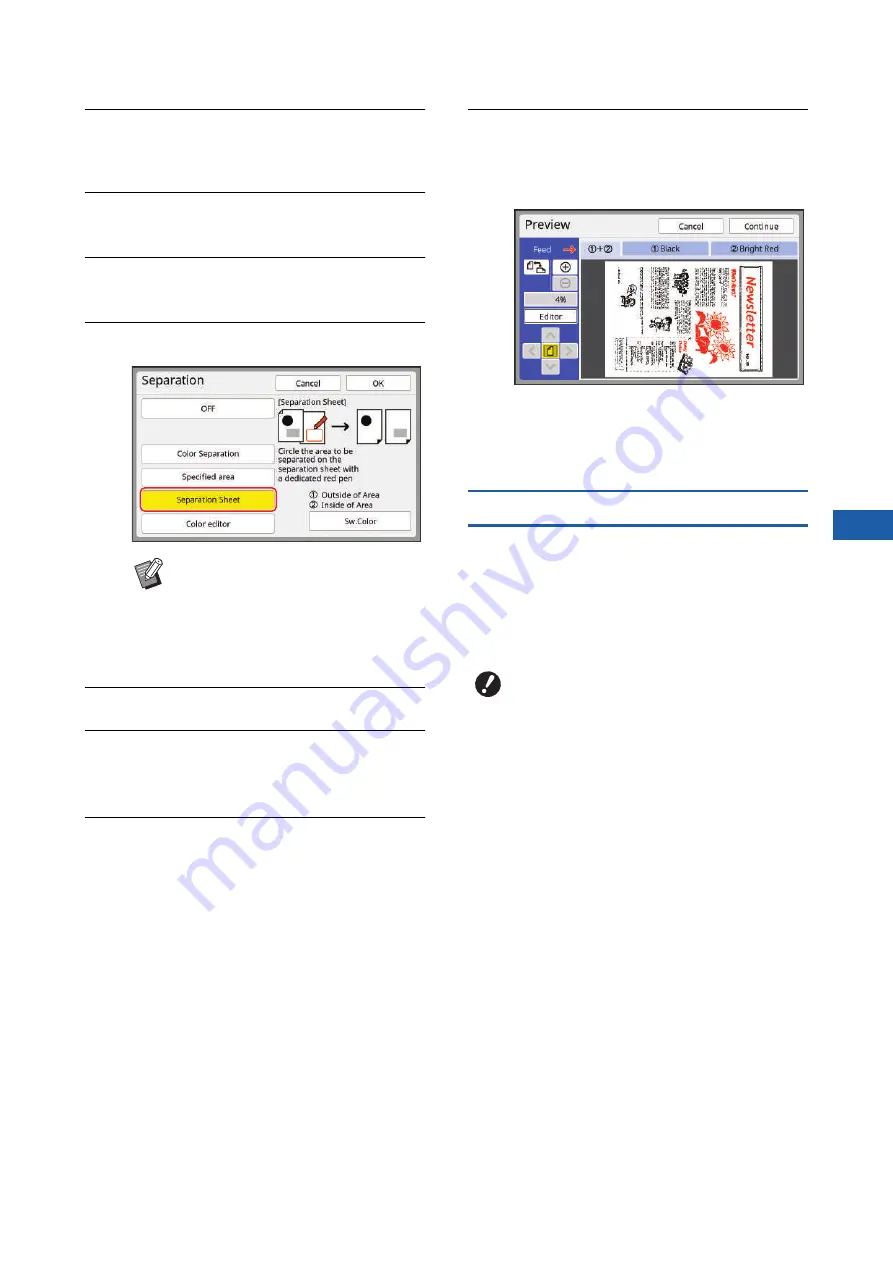
Touch [Separation Sheet].
8
Touch [OK].
9
Set the other required printing
conditions.
52 “Functions for Master Making”)
10
Press the [START] key.
Scanning of the tracing paper starts.
■
When using the glass platen in step
3
After scanning of the tracing paper is complete,
the master making basic screen is displayed.
Remove the tracing paper from the glass platen
and place the original. Then, close the platen
cover and press the [START] key.
■
When using the auto document
feeder in step 3
The original is scanned after the tracing paper.
11
Check if separation is performed
as intended.
scanning the original.
• Touch [Continue] to start master making.
• Touch [Editor] to move to the [Editor] editing
screen. You can use the touch panel to
change the areas that you want to separate.
[Color editor]
Select this option for originals that do not contain pho-
tos.
You can perform separation by using the touch panel
to specify the area.
You can perform separation not only for paper origi-
nals but also for original data that is saved in [Storage]
or [USB Job List].
B
The lower right part of the screen
displays the print drum (cylinder) to
which the original is assigned: [
k
(Print drum 1)] or [
l
(Print drum 2)].
Touch [Sw.Color] to switch the print
drums (cylinders).
B
When paper originals are scanned in
[Color editor], [Image] is automatically
set to [Line]. For paper originals that
contain photos, use [Specified area] or
[Separation Sheet].
B
[Color editor] is a specialized function
for specifying areas for separation.
Therefore, several functions are limited
in comparison with [Editor] as follows:
C
You cannot edit the created area. (You
cannot select the area even if you
touch inside the area.)
C
You cannot use the [Image Overlay]
function.
C
You cannot perform temporary saving
or re-retrieve during editing.
Содержание MH 9350
Страница 21: ...Chapter 1 19 1 About This Machine ...
Страница 31: ...29 2 Chapter 2 Basic Operations ...
Страница 53: ...51 3 Chapter 3 Functions for Master Making ...
Страница 97: ...95 4 Chapter 4 Functions for Printing ...
Страница 109: ...107 5 Chapter 5 Useful Functions ...
Страница 130: ...Chapter 5 Useful Functions 128 ...
Страница 131: ...129 6 Chapter 6 Functions for Scanning ...
Страница 137: ...135 7 Chapter 7 Setting the Operation Conditions ...
Страница 159: ...157 8 Chapter 8 RISO Console ...
Страница 165: ...163 9 Chapter 9 Replacing Consumables ...
Страница 177: ...175 10 Chapter 10 Maintenance ...
Страница 181: ...179 11 Chapter 11 Troubleshooting ...
Страница 205: ...203 12 Chapter 12 Appendix ...
Страница 215: ...Chapter 12 Appendix 213 12 V View edit 48 W WAKE UP key 23 Z Zoom 71 ...


