Chapter 3 Functions for Master Making
68
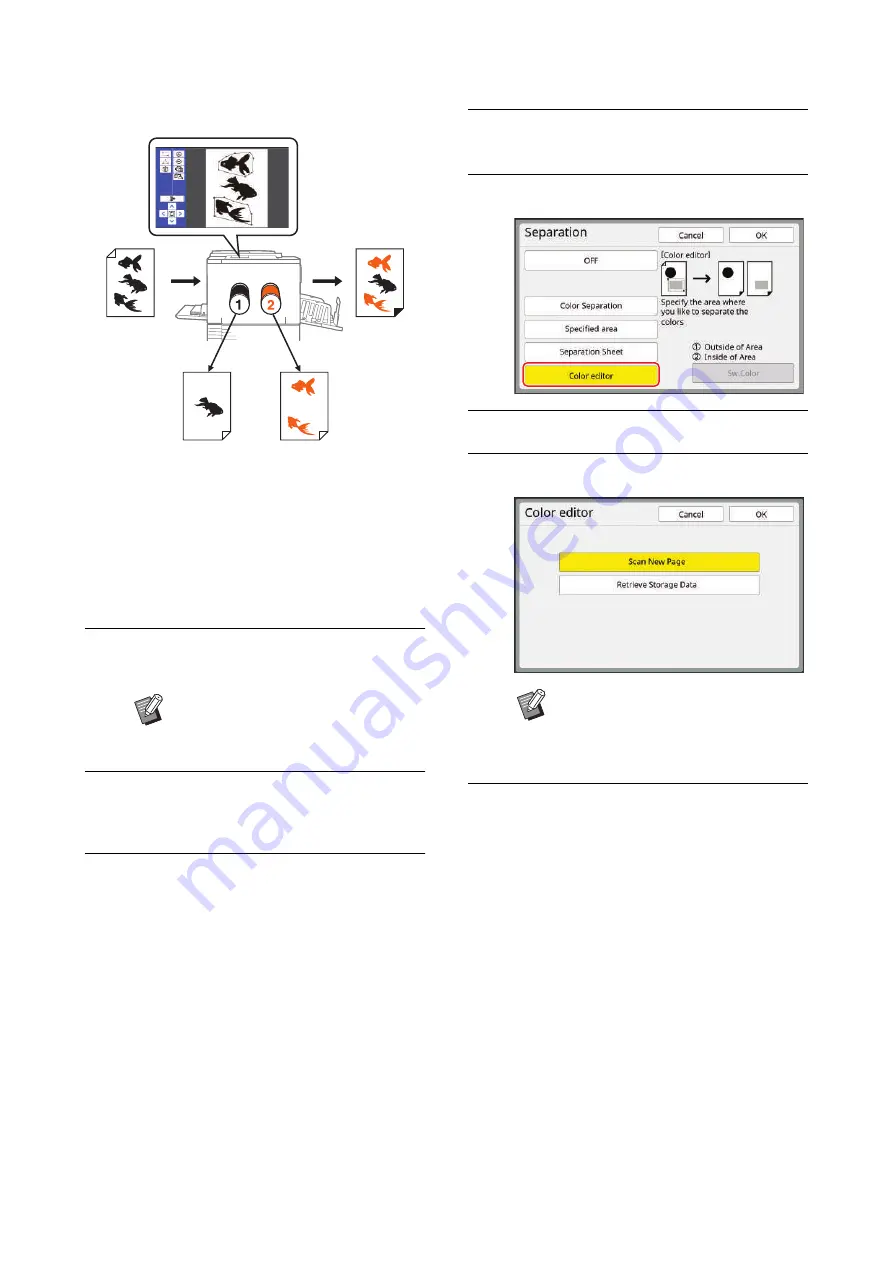
The original is separated into inside and outside of the
specified area.
1
Display the master making basic
screen for dual-color mode.
24), touch [
m
Dual-
Color].
2
Place an original.
3
Place the paper.
30 “Setting up the paper feed tray and the
4
Set the paper receiving tray.
31 “Setting up the paper receiving tray”)
5
Touch [Separation] in the [Func-
tions] tab screen.
6
Touch [Color editor].
7
Touch [OK].
8
Touch [Scan New Page].
9
Touch [OK].
Scanning of the original starts.
When scanning is complete, the edit screen is
displayed.
For information on further operations, see the
separate volume “RISO Editor User's Guide”.
B
You can skip this step when you
separate original data that is saved
in [Storage] or [USB Job List].
Print drum (cylinder) 1
(Outside the areas)
Touch panel (specify areas)
Print drum (cylinder) 2
(Inside the areas)
Print result
Original
B
If you touch [Retrieve Storage Data],
you can perform separation on origi-
nal data that is saved in [Storage] or
[USB Job List].
Содержание MH 9350
Страница 21: ...Chapter 1 19 1 About This Machine ...
Страница 31: ...29 2 Chapter 2 Basic Operations ...
Страница 53: ...51 3 Chapter 3 Functions for Master Making ...
Страница 97: ...95 4 Chapter 4 Functions for Printing ...
Страница 109: ...107 5 Chapter 5 Useful Functions ...
Страница 130: ...Chapter 5 Useful Functions 128 ...
Страница 131: ...129 6 Chapter 6 Functions for Scanning ...
Страница 137: ...135 7 Chapter 7 Setting the Operation Conditions ...
Страница 159: ...157 8 Chapter 8 RISO Console ...
Страница 165: ...163 9 Chapter 9 Replacing Consumables ...
Страница 177: ...175 10 Chapter 10 Maintenance ...
Страница 181: ...179 11 Chapter 11 Troubleshooting ...
Страница 205: ...203 12 Chapter 12 Appendix ...
Страница 215: ...Chapter 12 Appendix 213 12 V View edit 48 W WAKE UP key 23 Z Zoom 71 ...


