


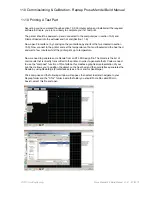
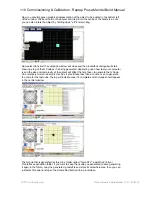

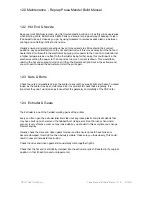
Now you should a green graphical representation of the object to be printed in the bottom left
of the window. Click and hold on the object and drag it into the centre of the build area, note
you can also rotate the object by holding down “alt” and scrolling.
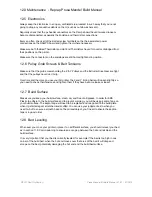
Now select done and the compose window will close and the pronterface dialogue will start
showing a log of the G Code as it is being generated, depending upon how fast your computer
is and the size and complexity of the object will affect the time taken to generate the G Code.
On a relatively modern dual core machine it should take less than a minute or so to generate
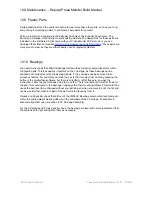
the code for the test cube, the log will indicate once it’s complete and an image should appear
in the central window.
The Gcode that is generated is stored in a folder called “Temp STL” inside the Printrun/
Pronterface application folder. If you want to keep the gcode you generated to save generating
it again in the future, copy the generated g code file and store it somewhere else, then you can
just select file open and open the Gcode file directly within pronterface.
11.0 Commissioning & Calibration - Reprap Prusa Mendel Build Manual
©2012 NextDayReprap
Prusa Mendel Kit Build Manual V1.01 - 07/2012