


10.7
Firmware
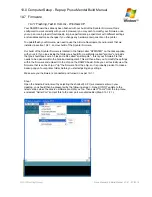
10.7.1
Flashing, Test & Comms - Windows XP
Your RAMPS board has already been flashed with our build of the Sprinter Firmware, this is
configured to work correctly with your kit. However you may wish to modify your firmware once
your up an running to add functionality, improve performance, experiment with different settings
and variables and make changes if you change any hardware components on the printer.
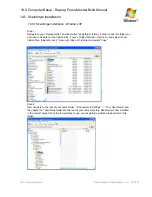
To update/flash your firmware, we need to use the Arduino Development environment that we
installed in section 10.2.1. and our build of the Sprinter firmware.
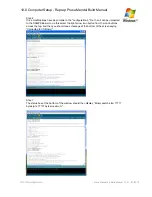
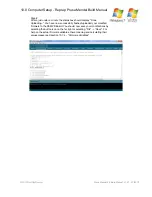
Our build of the Sprinter firmware is located in the folder caller “SPRINTER” on the disk supplied
with your kit, if you look inside the folder you should find a subfolder called “sprinter” and inside
that you should see some .h files and a file called “sprinter.pde” - this is your firmware file that
needs to be opened within the Arduino development. This will then allow you to modify the settings
within the firmware and upload it to the chip on the RAMPS board. Note you can’t actually view the
firmware that is on the chip or “rip” the firmware from the chip, so it is probably prudent to make a
backup copy of our sprinter folder, before you start adjusting any settings.
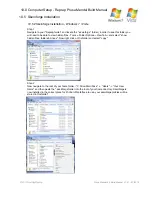
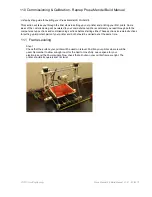
Make sure your hardware is connected and turned on as per 10.1.1
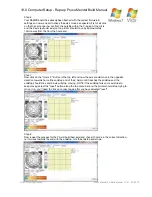
Step 1
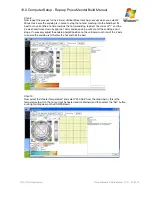
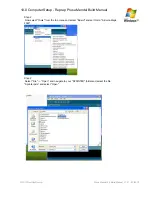
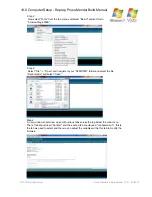
Open the Arduino Environment by selecting the shortcut(10.2.1) we created earlier on your
desktop, you should then be presented by the following screen -
Note, DO NOT update to the
latest version when the Arduino software prompts you too.
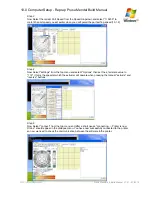
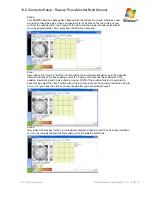
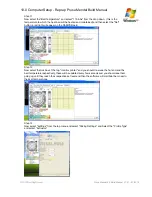
Then select “Tools” from the top menu
and select “Serial Port” and set this to the com port we noted earlier (Step 3 10.1.2.1).
10.0 Computer Setup - Reprap Prusa Mendel Build Manual
©2012 NextDayReprap
Prusa Mendel Kit Build Manual V1.01 - 07/2012