Other connections
08
76
En
Important
• You can’t use the SR+ features when HDMI Control
is set to ON. Make sure to set HDMI Control to OFF
when you use the SR+ features (page 99).
• If you connect to a Pioneer plasma display using an
SR+ cable, you will need to point the remote control
at the plasma display remote sensor to control the
receiver. In this case, you won’t be able to control the
receiver using the remote control if you switch the
plasma display off.
• Before you can use the extra SR+ features, you need
to make a few settings in the receiver. See
The Input
Setup menu
on page 101 and
SR+ Setup for Pioneer
plasma displays
on page 104 for detailed
instructions.
•
Use a 3-ringed miniplug SR+ cable to connect the
CONTROL IN jack of this receiver with the CONTROL
OUT jack of your plasma display.
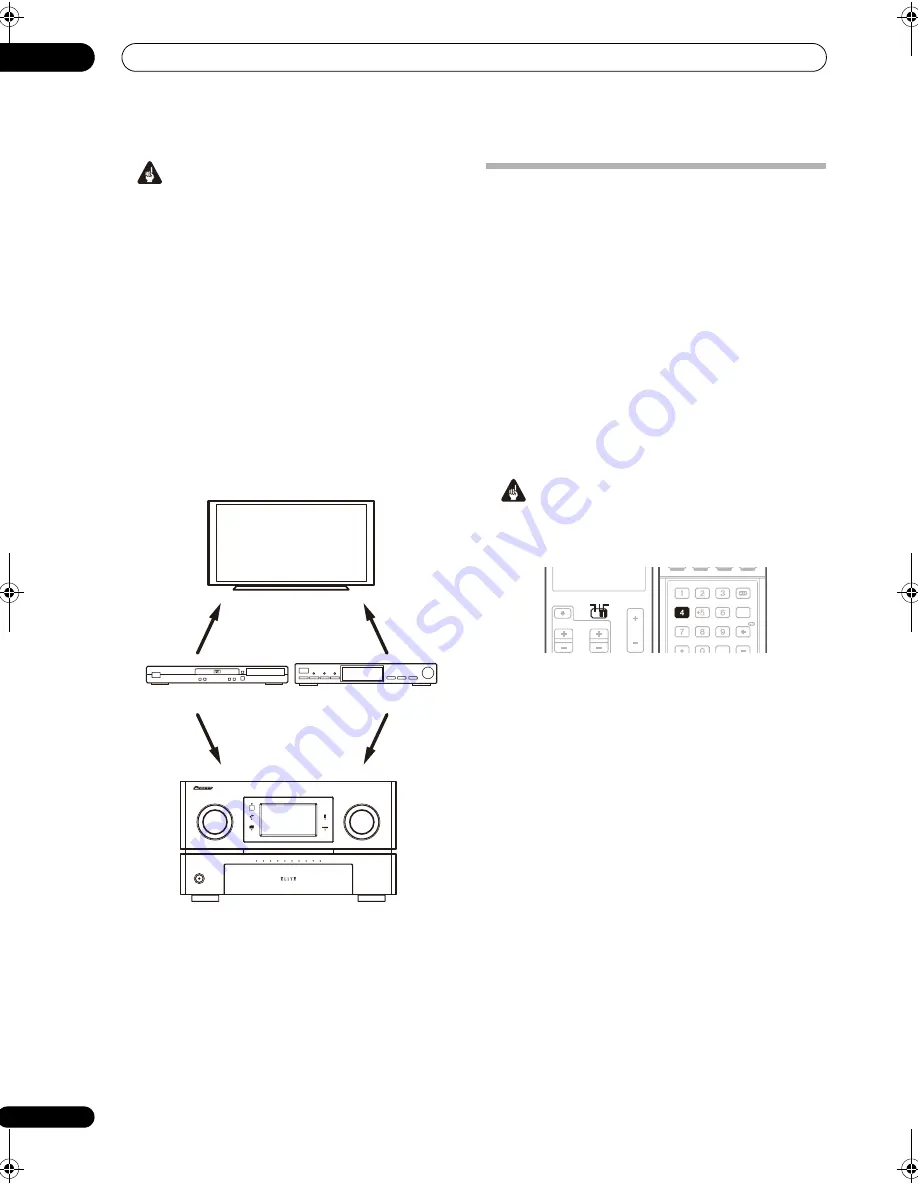
To make the most of the SR+ features, you should
connect your source components (DVD player, etc.) in a
slightly different way to that described in this chapter. For
each component, connect the video output directly to the
plasma display, and just connect the audio (analog and/
or digital) to this receiver.
Using the SR+ mode with a Pioneer
plasma display
When connected using an SR+ cable, a number of
features become available to make using this receiver
with your Pioneer plasma display even easier. These
features include:
• On-screen displays when making receiver settings,
such as speaker setup, MCACC setup, and so on.
• On-screen volume display.
• On-screen display of listening mode.
• Automatic video input switching on the plasma
display.
• Automatic volume muting on the plasma display.
See also
SR+ Setup for Pioneer plasma displays
on
page 104 for more on setting up the receiver.
Important
• The SR+ features do not work when any of the iPod,
HOME MEDIA GALLERY, XM, or SIRIUS Radio
function is selected.
1
Make sure that the plasma display and this receiver
are switched on and that they are connected with the
SR+ cable.
See
Using this receiver with a Pioneer plasma display
above for more on connecting these components.
• Make sure you have also selected the display input to
which you’ve connected the receiver in
The Input
Setup menu
on page 101.
2
To switch SR+ mode on/off, set the operation
selector switch to RCV, then press the SR+ button.
The front LCD display shows
SR+ ON
or
SR+ OFF
.
• The automatic video input switching and the
automatic volume muting features are enabled
separately; see
SR+ Setup for Pioneer plasma displays
on page 104.
SC-09TX
MASTER
VOLUME
STANDBY/ON
INPUT
SELECTOR
R1
R2
R3
R4
R5
ACTIVE MONITOR
L5
L4
L3
L2
L1
VIDEO
INPUT 1
VIDEO
INPUT 2
SAT
AUDIO IN
DVD/LD
AUDIO IN
Pioneer plasma display
This receiver
DVD player
Satellite receiver, etc.
SOURCE
TV
RCV
VOL
VOL
CH
SOURCE
TV
RCV
SIGNAL SEL SLEEP
AUDIO
iPod CTRL
DIMMER
SR+
SBch
PHASE
A.ATT
GENRE HDMI OUT
D.ACCESS
ENTER
MCACC
CLASS
DISP
CH
SR+
SC_09TX.book Page 76 Monday, November 26, 2007 10:32 PM
Содержание SC-09TX - Elite AV Network Receiver
Страница 1: ...uctions REC ...
Страница 160: ......


