background image

4

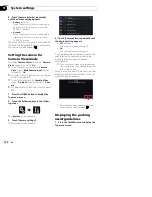
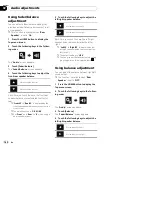
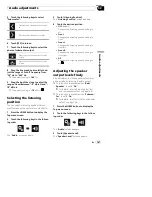
Touch [Camera Polarity] repeatedly

until the desired setting appears.

!

Battery

(default):

When the polarity of the connected lead is
positive while the shift lever is in the RE-
VERSE (R) position.

!

Ground

:

When the polarity of the connected lead is
negative while the shift lever is in the RE-
VERSE (R) position.

When the shift lever is moved to the REVERSE
(R) position after setting the rear view camera,
the rear view image appears.

Setting the camera for
Camera View mode

To display

Camera View

at all times,

Camera

View

needs to be set to

On

.

p

To set the rear view camera for

Camera

View

mode,

Back Camera Input

needs

to be set to

On

.

=

For details, refer to

Setting rear view camera

activation

on page 151.

p

To set the 2nd camera for

Camera View

mode,

AV Input

needs to be set to

Cam-

era

.

=

For details, refer to

Setting AV input

on page

150.

1

Press the HOME button to display the

Top menu screen.

2

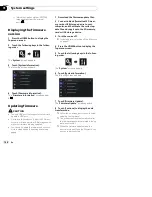
Touch the following keys in the follow-

ing order.

The

System

screen appears.

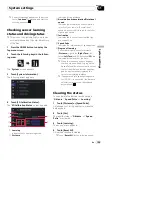
3

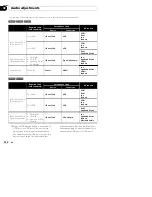
Touch [Camera settings].

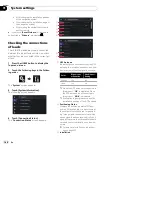
The following screen appears.

4

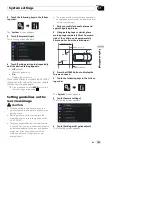
Touch [Camera View] repeatedly until

the desired setting appears.

!

Off

(default):

Turns the camera view setting off.

!

On

:

Turns the camera view setting on.

If no operations are performed for seven sec-
onds after the AV operation screen is dis-
played, the camera view will appear
automatically.

p

If you touch the screen while the camera
view is displayed, the displayed image will
turn off temporarily.

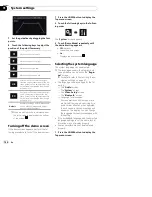
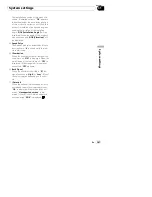
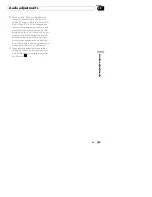
When the camera view of both rear view cam-
era and 2nd camera are available, the key to
switch the display appears.

1

1

Switches the display between rear view
image and 2nd camera image.

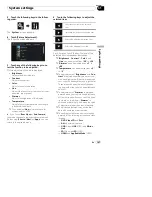
Displaying the parking
assist guidelines

1

Press the HOME button to display the

Top menu screen.

En

152

Chapter

31

System settings

Содержание AVIC-X8610BS

Страница 1: ... to your vehicle s parking brake and depending on your vehicle additional installation may be required For more information please contact your Authorized Pioneer Electronics retailer or call us at 800 421 1404 Be sure to read Important Information for the User first Important Information for the User includes the important information that you must understand before using this product English ...

Страница 2: ...plugging a USB storage device 16 Startup and termination 16 On first time startup 17 Regular startup 17 A message about the map database 17 Turning off the display 17 How to use the screens 18 Switching screens using the touch panel keys 18 Switching screens using the hardware buttons 19 Supported AV source 20 Displaying the AV operation screen 20 Selecting a front source on the AV source selectio...

Страница 3: ... a new starting position for the route 39 Editing the list of destinations 40 Canceling the current route guidance 40 Building a route using Route Planner 41 Checking route information and preferences 41 Watching the simulation of the route 42 Registering and editing locations and routes Storing a location in Saved Location 43 Storing a route in Saved Routes 43 Saving a location as an alert point ...

Страница 4: ...6 Answering a call automatically 66 Switching the ring tone 66 Inverting names in the phone book 66 Setting the private mode 66 Adjusting the other party s listening volume 67 Using the voice recognition function for iPhone 67 Notes for hands free phoning 67 iPod iPhone or smartphone setup operation The basic flow of iPod iPhone or smartphone setup 69 Setting the device connection method 69 iPod c...

Страница 5: ...ng procedure for Disc 94 Starting procedure for USB SD 94 Switching the browse mode 94 Selecting files from the file name list 95 Selecting a file from the list related to the song currently playing link search 95 Playing files in random order 95 Setting a repeat play range 95 Switching the media file type 96 Operating with the hardware buttons 96 Playing compressed video files Using the touch pan...

Страница 6: ...the touch panel keys 116 Reading the screen 117 Starting procedure 117 For iPhone with a 30 pin connector users 117 For iPhone with a Lightning connector users 118 For smartphone users 118 Selecting a Pandora station from the list 118 Add station 119 Operating with the hardware buttons 119 Using Aha Radio Using the touch panel keys 120 Reading the screen 121 Starting procedure 121 For iPhone with ...

Страница 7: ...ouch panel keys 141 Reading the screen 141 Starting procedure 141 Using an AUX source Using the touch panel keys 142 Reading the screen 142 Starting procedure 142 Setting the video signal 143 Switching the operation screen 143 Using AV input Using the touch panel keys 144 Reading the screen 144 Starting procedure for AV source 144 Starting procedure for camera 145 Setting the video signal 145 Usin...

Страница 8: ...Changing to the background display image stored on the external device USB SD 175 Setting the illumination color 176 Selecting the color from the preset colors 176 Creating a user defined color 176 Selecting the theme color 177 Selecting the clock image 177 Changing the preinstalled splash screen 178 Changing to the splash screen stored on the external device USB SD 178 Replicating the settings 17...

Страница 9: ...208 AVCHD recorded discs 209 Playing DualDisc 209 Dolby Digital 209 Detailed information for playable media 209 Compatibility 209 Media compatibility chart 212 Bluetooth 216 SiriusXM satellite radio 216 HD Radio Technology 216 SDHC and microSDHC 216 WMA WMV 217 DivX 217 AAC 217 Android 217 MirrorLink 217 Detailed information regarding connected iPod devices 217 iPod and iPhone 218 Lightning 218 Ap...

Страница 10: ...uotation marks e g System screen or Audio screen Touch panel keys that are available on the screen are described in bold in brackets e g Disc AV Source Settings Extra information alternatives and other notes are presented in the following for mat e g p If the home location has not been stored yet set the location first Functions of other keys on the same screen are indicated with at the beginning ...

Страница 11: ... lead from the battery or removing the battery itself p Some of the settings and recorded con tents will not be reset Resetting the microprocessor CAUTION Pressing the RESET button resets settings and re corded contents to the factory settings p Do not perform this operation when a device is connected to this product p Some of the settings and recorded contents will not be reset The microprocessor...

Страница 12: ...h between the Application screen and the AV operation screen p If the display cannot switch from the AV operation screen to the Applica tion screen when the MODE button is pressed the display will turn off For details of the operations refer to How to use the screens on page 18 Press and hold to turn the display off For details refer to Turning off the dis play on page 17 6 TRK button Press to per...

Страница 13: ...nd high temperatures When removing or attaching the detachable faceplate do so after turning off the ignition switch ACC OFF Removing the detachable faceplate p This product cannot be operated while the detachable faceplate is removed from this product 1 Press the button When you release your finger the bottom of the detachable faceplate separates slightly from this product 2 Gently grip the botto...

Страница 14: ...right position 3 Touch the following key Returns to the previous screen p The adjusted angle of the LCD panel will be memorized and the LCD panel will automa tically return to that angle the next time the LCD panel is opened or closed Inserting ejecting connecting media CAUTION Do not insert anything other than a disc into the disc loading slot Do not insert anything other than SD memory cards int...

Страница 15: ...may not achieve optimum per formance with some SD memory cards Inserting an SD memory card 8000NEX 7000NEX 1 Press the h button The following screen appears 2 Touch the following key Opens the LCD panel 3 Insert an SD memory card into the SD card slot Insert it with the label surface face up and press the card until it clicks and completely locks 4 Press the h button The LCD panel closes Ejecting ...

Страница 16: ...data is being accessed Plugging and unplugging a USB storage device p This product may not achieve optimum per formance with some USB storage devices p Connection via a USB hub is not possible p A USB cable is required for connection Plugging in a USB storage device 1 Pull out the plug from the USB port of the USB cable 2 Plug a USB storage device into the USB cable 2 1 1 USB cable 2 USB storage d...

Страница 17: ...for a few seconds p The screen shown will differ depending on the previous conditions p If the anti theft function is activated you must enter your password p The terms appear if the screen displayed last was the navigation screen Read the terms carefully checking the de tails and then touch OK if you agree to the conditions After you touch OK the screen that was displayed just before turning off ...

Страница 18: ...How to use the screens Switching screens using the touch panel keys 1 2 3 4 7 8 a b 5 6 9 En 18 Chapter 02 Basic operation ...

Страница 19: ...e operation refer to Changing the display order of source icons on page 21 7 AV operation screen You can customize the settings for each source 8 Navigation menu screen You can specify way points and a destina tion 9 Map screen You can use this screen to check the cur rent vehicle position information and route to the destination You can customize navigation settings p If you press the MAP button ...

Страница 20: ...tion key The AV operation screen appears 1 3 2 6 4 5 1 Displays the source list For details refer to Selecting a front source on the source list on page 21 2 Displays the Time and date setting screen For details refer to Setting the time and date on page 189 3 Displays the Setting menu screen 4 Recalls equalizer curves For details refer to Using the equalizer on page 170 5 Displays the Phone menu ...

Страница 21: ...you want to se lect The AV operation screen of the selected source appears Selecting a rear source You can select a source output to the rear dis play For details of the operations refer to Select ing the video for the rear display on page 192 Turning off the AV source Turn off the AV source to stop playing or re ceiving the AV source 1 Press the HOME button to display the Top menu screen 2 Touch ...

Страница 22: ...e following key Returns to the previous screen p If the source key is moved the source icons displayed on the Top menu screen and the AV source screen are also moved Using the touch panel You can operate this product by touching the marks and items touch panel keys displayed on the screen directly with your fingers p To protect the LCD screen from damage be sure to touch the touch panel keys only ...

Страница 23: ...inning at the end of the text Continuing to touch the key deletes all of the text 5 Confirms the entry and allows you to proceed to the next step 6 You can leave spaces A space equivalent to the number of touches is inserted 7 Switches between alphabet and numbers symbols 8 You can switch between capital and lower case letters On first time startup of the navigation system When you use the navigat...

Страница 24: ...e unit settings then touch Next p Later you can change it in Regional set tings For details refer to Customizing the navi gation settings on page 47 The Route Preferences screen appears 9 If needed modify the default route planning options then touch Next p Later you can change it in Route Prefer ences settings For details refer to Customizing the navi gation settings on page 47 10 Touch Activate ...

Страница 25: ...een where you can create new profiles or edit the exist ing profiles If more drivers are using this product they can create their own profiles with their own settings If you select a new profile this pro duct restarts so that the new settings can take effect 8 Mutes the sound of the navigation system the voice guidance or beep sounds for ex ample 9 Switches among 2D 3D or 2D North up view modes a ...

Страница 26: ...e exiting freeway etc and its distance from the current position are displayed A smaller icon shows the type of the second next maneuver if it is near the next maneuver For details refer to Frequently shown route events on page 26 3 Shows the distance to the next guidance point maneuver 4 Shows the second maneuver arrow 5 Indicates the current location of your vehicle The apex of the triangular ma...

Страница 27: ...olor now showing your current position Browsing the data field The data fields are different when you are navi gating the current route and when you have no specified destination The data field pro vides the following information When the route is set Distance to final destination time needed to reach the final destination and estimated arrival time When the route is not set p You can change the v...

Страница 28: ...design styles are similar to those of the actual signs in place above or along the in dicated roads These signs display select desti nations and the road number of the road that the relevant lane leads to If you are approaching a complex intersection and the needed information exists the map is replaced with a 3D view of the junction Signposts Junction view p If the data for these items is not con...

Страница 29: ...oom in and raise the view angle to let you easily re cognize your maneuver at the next junc tion If the next turn is at a distance it will zoom out and lower the view angle to be flat so you can see the road in front of you When the route is not set Smart Zoom will zoom in if you drive slowly and zoom out when you drive at high speed Switching between 2D 3D and 2D North up views You can switch how...

Страница 30: ...right p Touching the key once modifies the view in large steps and touching and holding the key modifies it continuously and smoothly 4 Touch the following key Returns to the Map screen p If you press the MAP button you can return to the Map screen Scrolling the map to the position you want to see 1 Press the MAP button The Map screen appears 2 Touch and drag the map in the desired direction to sc...

Страница 31: ... Touch the following key and set the destination you are looking for Country By default your navigation system proposes the country where you are City By default your navigation system proposes the city town where you are You can select the city town using its postal code instead of its name Street If the street name is not available touch Go to City and select the city town This way the center of...

Страница 32: ...ong Route Parking At My Destination p When the route is not set they are searched around the current position p When the current position is not available either no GPS signal they are searched around the last known position 5 Touch the category you want Finally the results appear in a list 6 Touch the POI you want The searched location appears on the Map screen If you touch you can sort the resul...

Страница 33: ...long Route Searches along the current route and not around a given point This is useful when you search for a later stopover that results in a minimal detour only such as searching for upcoming gas stations or restaurants The result list will be ordered by the length of the necessary detour p This key is active only when the route is set 7 Select one of the main place categories e g Accommodation ...

Страница 34: ...p Nearby screen appears The preset search categories are as follows Car Repair Health Police Gas Stations 5 Touch the category you want Finally the results appear in a list 6 Touch the POI you want The searched location appears on the Map screen If you touch you can sort the results 7 Touch Select as Destination After a short summary of the route para meters a map appears showing the entire route ...

Страница 35: ...ter natives when planning the route on page 39 Selecting a destination from stored routes Storing routes you set frequently saves time and effort p This function is not available if no routes have been registered in Saved Routes For details refer to Storing a route in Saved Routes on page 43 1 Press the MAP button The Map screen appears 2 Touch the following key Displays the navigation menu on the...

Страница 36: ...eters before selecting a destination For details refer to Route Preferences settings on page 48 7 Touch Start Navigation Your navigation system starts the route gui dance p If needed you can select from different route alternatives or change the route plan ning method before starting navigation For details refer to Checking route alter natives when planning the route on page 39 Smart History Smart...

Страница 37: ...of the route para meters a map appears showing the entire route The route is automatically calculated p If needed you can change some of the route setting parameters before selecting a destination For details refer to Route Preferences settings on page 48 8 Touch Start Navigation Your navigation system starts the route gui dance p If needed you can select from different route alternatives or chang...

Страница 38: ...etails refer to Checking route alter natives when planning the route on page 39 Searching for a location by scrolling the map Specifying a location after scrolling the map enables you to set the position as destination waypoint 1 Press the MAP button The Map screen appears 2 Touch and drag the screen to scroll the map to the position you want 3 Touch the location that you want to se lect as your d...

Страница 39: ...Map screen appears 2 Touch the following key Displays the navigation menu on the Map screen 3 Touch Detours Alternatives then Alternative Routes The Alternative Routes screen appears You can see details of route alternatives Touch any of them to see it on the map If you cannot find a good alternative touch More Results and scroll down for other alterna tive routes with different route planning met...

Страница 40: ...dit the route by modifying the list of destinations adding a waypoint or changing a final destination for example 1 Press the MAP button The Map screen appears 2 Touch the following key Displays the navigation menu on the Map screen 3 Touch My Route The My Route screen appears 4 Edit the route by modifying the list of destinations p To add the newly selected location as a way point to your route t...

Страница 41: ...tire route The route is automatically calculated p If needed you can change some of the route setting parameters before selecting a destination For details refer to Route Preferences settings on page 48 6 Touch Start Navigation Your navigation system starts the route gui dance p If needed you can select from different route alternatives or change the route plan ning method before starting navigati...

Страница 42: ...te Summary screen appears 5 Touch the following key Displays the list of additional fea tures on the certain screen 6 Touch Simulation The simulation starts from the starting point of the route and using a realistic speed it leads you through the whole recommended route p During simulation you can use the follow ing control keys they disappear after a few seconds but you can open them again by tou...

Страница 43: ...n appears 3 Touch the following key Displays the navigation menu on the Map screen 4 Touch Route Summary The Route Summary screen appears 5 Touch the following key Displays the list of additional fea tures on the certain screen 6 Touch Save Route The Save Route screen appears 7 Touch the following key Saves the route as a new route under Saved Routes A confirmation message appears To change the na...

Страница 44: ...imit Sets the speed limit for this alert point if applicable Direction of Alert Sets the direction from which you expect the alert 6 Touch Save The location is saved as a new alert point For details refer to Warnings settings on page 50 p The warning for road safety cameras like speed cameras is disabled when you are in certain countries where road safety camera warning is prohibited However you a...

Страница 45: ...ealer for coverage details To fine tune this calculation you can set the minimum delay that can trigger a route recal culation or you can instruct the software to have you confirm the new recommended route before it takes effect Checking the traffic incidents on the map You can check the details of traffic incidents on the map p Road segments affected by traffic incidents are displayed with an alt...

Страница 46: ...n marker on the map touch it to open the Where Am I screen When you are driving without a planned route touch the current street or the arrows at the top section of the Map screen to open the Where Am I screen The screen provides the following infor mation Latitude and longitude coordinate of the current position in WGS84 for mat Address details of the current posi tion when available The nearest ...

Страница 47: ...httime use adjusts the display back light and enables or disables menu anima tions For details refer to Display settings on page 53 Traffic 8000NEX 7000NEX 6000NEX Enables or disables the TMC receiver and sets up the traffic function For details refer to Traffic settings on page 53 Weather Enables or disables the online weather fore cast option and the automatic download of weather information For...

Страница 48: ...al constraints are taken into account when planning a route Roads are used only if access for cars is allowed Private roads and resident only roads are used only if they are inevitable to reach the destination Walkways are excluded from routes Emergency All maneuvers available at intersections are taken into account Directional constraints are taken into account in the same way as travel in the op...

Страница 49: ... Economical Calculates a quick and save gas Off road Navigation You can enable or disable off road navigation which navigates between destinations in a straight line Highways You can decide whether to avoid freeways when you are driving a slow car or you are tow ing another vehicle Period Charge You can select whether to include toll roads with restricted time access that allow you to purchase a s...

Страница 50: ...le approaches the next maneu ver and it is repeated right before the man euver Verbose Voice instructions are given once relatively far from the next maneuver it is repeated as the vehicle approaches the next turn and it is repeated again right be fore the actual maneuver Announce Route Summary Whenever a route is calculated this naviga tion system can read out the quick summary of the route Annou...

Страница 51: ...from the hazard to re ceive the warning at These can be set indivi dually for the different warning types Navigation Map settings Map Display You can see the effect when you change a set ting Viewpoint You can adjust the basic zoom and tilt le vels to your needs Three levels are avail able Color Mode You can switch between daytime and night time color modes or let the software switch between the t...

Страница 52: ... from the POI cate gories Signposts Whenever adequate information is available lane information similar to the real ones on road signs above the road is displayed at the top of the map You can turn this feature on or off Junction View If you are approaching a freeway exit or a com plex intersection and the necessary informa tion exists the map is replaced with a 3D view of the junction Tunnel View...

Страница 53: ...be used by this system This system may not support all the listed units in some voice guidance lan guages You can also set other country speci fic units used to display different values in this system Display settings Menu Animations When animation is turned on keys on menus and keyboard screens appear in an animated way Screen transitions are also animated Traffic settings 8000NEX 7000NEX 6000NEX...

Страница 54: ...hone or smartphone first in order to be able to use online services which re quire a subscription The service coverage for each online service may vary depending on the content provider providing the ser vice Usage Reports settings Application Usage Information You can enable or disable the collection of anonymous statistical information on using this navigation system for later development purpos...

Страница 55: ...th devices You need to register your devices featuring Bluetooth wireless technology when you con nect it to this product for the first time A total of three devices can be registered Two regis tration methods are available Searching for nearby Bluetooth devices Pairing from your Bluetooth devices p If three devices are already paired Mem ory Full is displayed and pairing cannot be performed In su...

Страница 56: ... is displayed Touch the device name to disconnect After the device is successfully registered a Bluetooth connection is established from the system The profile icons in the registered device list screen are displayed and illuminated as fol lows Illuminates when your mobile de vice is successfully connected with the HFP Hands Free Profile Illuminates when your audio de vice is successfully connecte...

Страница 57: ...appears 3 Touch Auto Connect repeatedly until the desired setting appears On default Turns the automatic connection on Off Turns the automatic connection off If your Bluetooth device is ready for a Bluetooth wireless connection a connection to this product will automatically be estab lished If connection fails Auto connection failed Retry appears Touch Yes to reconnect To turn automatic connection...

Страница 58: ...es no specific ac tion is necessary to activate Bluetooth wire less technology For details refer to the instruction manual of your devices 2 Press the HOME button to display the Top menu screen 3 Touch the following keys in the follow ing order The Bluetooth screen appears 4 Touch Connection The following screen appears 5 Touch the name of the device that you want to connect Switching visibility T...

Страница 59: ...etooth device address 1 Press the HOME button to display the Top menu screen 2 Touch the following keys in the follow ing order The Bluetooth screen appears 3 Touch Device Information The Bluetooth device address is displayed Clearing the Bluetooth memory p This setting is available only when you stop your vehicle in a safe place and apply the parking brake CAUTION Never turn this product off whil...

Страница 60: ...s in the follow ing order The Bluetooth screen appears 3 Touch BT Software Update 4 Touch Start The data transfer screen is displayed p Follow the on screen instructions to finish updating the Bluetooth software Displaying the Bluetooth software version If this product fails to operate properly you may need to consult your dealer for repair In such cases you may be asked to specify the software ve...

Страница 61: ...ion screen On the App control side bar on the AppRadio Mode and MirrorLink screens Touch the following key Displays the Phone menu screen p The Phone Book screen appears when using this function for the first time The screen of the last used function appears from the next time Touch panel keys 4 2 3 5 1 6 7 8 1 Displays the preset dial screen 2 Switches to the phone book list 3 Switches to the mis...

Страница 62: ...hone book you can select the entry and make the call p The contacts on your phone will normally be transferred to this product automatically when the phone is connected If it is not use your phone menu to transfer the contacts The visibility of this product should be on when you use the Bluetooth menu For details refer to Switching visibility on page 58 1 Press the HOME button to display the Top m...

Страница 63: ...ers are included in an entry select one by touching the list 6 Touch the phone number you want to dial The dial screen appears 7 Dialing starts p To cancel the call touch 8 Touch the following key Ends the call The call ends Dialing from the history The most recent calls made dialed received and missed are stored in the call history list You can browse the call history list and call numbers from i...

Страница 64: ...e preset dial list 1 Press the HOME button to display the Top menu screen 2 Touch the following keys in the follow ing order The Preset Dial screen appears 3 Touch the desired entry on the list to make a call The dial screen appears 4 Dialing starts p To cancel the call touch 5 Touch the following key Ends the call The call ends Deleting a phone number 1 Press the HOME button to display the Top me...

Страница 65: ... 1 Touch the following key Answers an incoming call Rejects an incoming call The rejected call is recorded in the missed call history list For details refer to Dialing from the history on page 63 2 Touch the following key Ends the call The call ends Minimizing the dial confirmation screen p The dial confirmation screen cannot be minimized on the AV operation screen p AV sources cannot be selected ...

Страница 66: ...ch the following keys in the follow ing order The Bluetooth screen appears 3 Touch Ring Tone repeatedly until the desired setting appears On default Turns the ring tone on Off Turns the ring tone off Inverting names in the phone book When your device is connected to this pro duct the first and last names of your contacts may be registered to the phone book in reverse order You can use this functio...

Страница 67: ...ice recognition function launches and the voice control screen appears You can use the voice recognition function in the same way as using it on the iPhone p You can also launch the voice recognition function by pressing and holding the HOME button Indicates that this product is on standby for your voice commands Cancels the voice recognition function Notes for hands free phoning General notes Con...

Страница 68: ...n one phone number is registered under different names only the phone number is dis played If the phone number of the received call is not registered in the phone book the phone number of the received call appears The received call and the dialed number histories You cannot make a call to the entry of an unknown user no phone number in the re ceived call history If calls are made by operating your...

Страница 69: ... following settings Device Select the device to be connected Connection Select the connection meth od p Configure the settings correctly according to the device to be connected and the con nection method to be used For details refer to Information on the connections and functions for each de vice on page 71 p If you change the setting the confirmation screen appears Touch OK The setting will chang...

Страница 70: ...B iPod nano 6th generation iPod nano 5th generation iPod nano 4th generation iPod nano 3rd generation iPod with Lightning connector iPhone 5s iPhone 5c iPhone 5 iPod touch 5th generation iPod nano 7th generation Android device compatibility p Operation methods may vary depending on the Android device and the software ver sion of the Android OS p Depending on the version of the Android OS it may no...

Страница 71: ...n is not required CD IU201V CD IU201S Smartphone Setup Device iPhone iPod iPhone iPod iPhone iPod Connection Wireless via BT USB USB Bluetooth connection Bluetooth connec tion is required for using aha or Pandora Connection requirement Connect to USB port 1 for using aha or Pandora Connect to USB port 1 for using AppRadio Mode Available source En 71 Chapter 13 iPod iPhone or smartphone setup opera...

Страница 72: ...USB port 1 for using AppRadio Mode Connect to USB port 1 for using AppRadio Mode Available source iPod audio 1 iPod video aha 1 1 1 1 Pandora 1 1 1 1 AppRadio Mode 1 1 Remarks iPod is not available Please use the CarMe diaPlayer to play music or videos in AppRadio Mode 1 This connec tion and set tings are available on AVIC 5000NEX and AVIC X8610BS iPod is not available Please use the CarMe diaPlay...

Страница 73: ...using aha or Pandora Bluetooth connec tion is required for using aha or Pandora Bluetooth connec tion is required Connection requirement Connect to USB port 2 Connect to USB port 2 Available source aha 1 1 1 Pandora 1 1 1 AppRadio Mode 1 MirrorLink 1 Remarks This connection and settings are avail able on AVIC 8000NEX AVIC 7000NEX and AVIC 6000NEX En 73 Chapter 13 iPod iPhone or smartphone setup op...

Страница 74: ...r details refer to Manual tuning on page 75 For details refer to Seek tuning on page 75 9 Displays the preset channels For details refer to Selecting a preset channel from the preset channel list on page 76 a Recalls the preset channel stored to a key from memory with a single touch of the key Stores the current broadcast frequency to a key for later recall by continuing to touch the key For detai...

Страница 75: ...reen appears 3 Use the touch panel keys on the screen to control the radio For details refer to Using the touch panel keys on page 74 Selecting a band Touch the following key repeatedly until the desired band appears Switches between the following FM bands FM1 FM2 and FM3 Switches to AM band p This function is convenient for preparing different preset lists for each band Manual tuning Touch the fo...

Страница 76: ... three FM bands as well as six AM stations can be stored in memory Storing the strongest broadcast frequencies BSM best stations memory function automa tically stores the six strongest broadcast fre quencies under the preset tuning keys 1 to 6 and once stored there you can tune into them with the touch of a key p Storing broadcast frequencies with BSM may replace broadcast frequencies you have alr...

Страница 77: ...sensitivity for FM to level 4 AM Off default Turns the seek tuning setting off Level1 Sets the level of sensitivity for AM to level 1 Level2 Sets the level of sensitivity for AM to level 2 p The FM Level4 AM Level2 setting al lows reception of only stations with the strongest signals while lower settings allow reception of those with weaker sig nals Storing song information to an iPod iTunes Taggi...

Страница 78: ...ic as well as deep cuts into traditional genre iTunes Tagging provides you the opportunity to discover a wide range of content and the means to tag that con tent for later review and purchase from the iTunes Store Visual information related to content being played on your HD Radio receiver such as Album Art historical photographs still art from live broadcasts among other related content Using the...

Страница 79: ...ying when avail able Multicast channels Multicast channel number and song title Shows the numbers of multicast chan nels and the song titles p No Title is displayed if there is no corresponding information p The currently tuned multicast chan nel is displayed at the top of the list 3 Current time and date 4 Album artwork Shows the artwork for the current song when available p If the album artwork ...

Страница 80: ...pears Switches between the following FM bands FM1 FM2 and FM3 Switches to AM band p This function is convenient for preparing different preset lists for each band Manual tuning Touch the following keys to tune manu ally Moves down one step at a time Moves up one step at a time p This function is convenient for preparing different preset lists for each band Seek tuning Touch and hold one of the fol...

Страница 81: ... well as six AM stations can be stored in memory Storing the strongest broadcast frequencies The BSM best stations memory function automatically stores the six strongest broad cast frequencies under the preset tuning keys 1 to 6 and once stored there you can tune into them with the touch of a key p Storing broadcast frequencies with BSM may replace broadcast frequencies you have already saved p Pr...

Страница 82: ...f sensitivity for FM to level 4 AM Off default Turns the seek tuning setting off Level1 Sets the level of sensitivity for AM to level 1 Level2 Sets the level of sensitivity for AM to level 2 p The FM Level4 AM Level2 setting al lows reception of only stations with the strongest signals while lower settings allow reception of those with weaker sig nals Switching the seek mode You can select the met...

Страница 83: ...the follow ing order The System screen appears 3 Touch AV Source Settings The following screen appears 4 Touch Radio settings The following screen appears 5 Touch Blending repeatedly until the desired setting appears On default Switches to the analog broadcast of the same frequency automatically Off Does not switch to the analog broadcast of the same frequency automatically Storing song informatio...

Страница 84: ... 4 f 6 9 b l m 8 k j 8 i g h 7 Playback screen page 2 n o p e q r 1 Displays the source list For details refer to Selecting a front source on the source list on page 21 2 Displays the Time and date setting screen For details refer to Setting the time and date on page 189 3 Displays the Setting menu screen 4 Recalls equalizer curves For details refer to Using the equalizer on page 170 5 Selects a t...

Страница 85: ...s the subtitle language For details refer to Switching the subtitle language on page 89 j Switches the audio language For details refer to Switching the audio language on page 89 k Stops playback l Changes the wide screen mode For details refer to Changing the wide screen mode on page 191 m Moves ahead one frame frame by frame playback or slows down playback speed slow motion playback For details ...

Страница 86: ... Track number indicator Shows the number of the track currently play ing when available 5 Audio channel indicator Shows the current audio channel type such as Mch Multi channel 6 Digital sound format indicator Shows which digital sound format surround sound format has been selected 7 Sampling frequency indicator Shows the sampling frequency currently play ing 8 Title number indicator Shows the tit...

Страница 87: ... the following key repeatedly until the desired setting appears Turns random play on or off default Does not play tracks in random order Plays all tracks in the current repeat play range in random order p If you turn random play on when the re peat play range is set to the current track the repeat play range changes to the whole of the current disc auto matically Setting a repeat play range The re...

Страница 88: ... 10Key numeric keypad is available for Video CDs featuring PBC playback con trol only p Chapter search and time search are not available when disc playback has been stopped 1 Touch the following key Displays the screen for direct num ber search 2 Touch Title title Chapter chapter or 10Key numeric keypad 3 Touch 0 to 9 to input the desired number p To cancel an input number touch C To cancel the in...

Страница 89: ...images may be unclear during frame by frame playback Slow motion playback This lets you slow down the playback speed 1 Touch and hold r until an arrow icon is displayed during playback The arrow icon is displayed and forward slow motion playback begins p To return to normal playback touch d e 2 Touch r to adjust playback speed during slow motion playback Each time you touch r it changes the speed ...

Страница 90: ... and then touch The touch panel keys are displayed again 2 Touch the following key Starts playback from the selected menu item p The way to display the menu differs depend ing on the disc If you touch the touch panel keys disap pear and the icon is displayed You can select a menu item by touching it Switching the multi angle DVD display With DVDs featuring multi angle recordings scenes shot from m...

Страница 91: ...ped p The appearance of this key changes accord ing to the current setting Operating with the hardware buttons Press the TRK button You can skip tracks or chapters forward or backward Press and hold the TRK button You can perform fast reverse or fast for ward En 91 Chapter 16 Playing a disc Playing a disc ...

Страница 92: ...ils refer to Selecting a file from the list related to the song currently play ing link search on page 95 7 Switches the text display between tag in formation and file folder information For details refer to Reading the screen on page 93 For details refer to Switching the browse mode on page 94 8 Displays the Phone menu screen For details refer to Displaying the phone menu on page 61 9 Switches to...

Страница 93: ...currently playing Folder name Shows the name of the folder contain ing the file currently playing 2 Current time and date 3 Album artwork Album art of the current song is displayed if it is available 4 Playback condition indicator Indicates the current playback condition Playing files in random order Indicator Meaning Does not play files in random order Plays all files within the repeat range in r...

Страница 94: ...e screen to control the external storage device USB SD For details refer to Using the touch panel keys on page 92 p Playback is performed in order of folder numbers Folders are skipped if they con tain no playable files If there are no play able files in folder 01 root folder playback starts from folder 02 Switching the browse mode This product supports two types of browse modes Folder Browse mode...

Страница 95: ...to refine Refine the item until the desired song title or file name is displayed on the list p Touching All on the list includes all op tions in the current list For example if you touch All after touching Artists you can proceed to the next screen with all artists in the list selected p After you select Artists Albums or Genres go on to touch one of the lists to start playing the first song in th...

Страница 96: ...up menu for selecting a media file type to play on the disc or in the external storage device USB SD 2 Touch the item you want to set Music Switches the media file type to music com pressed audio Video Switches the media file type to video CD DA Switches the media file type to CD audio data CD DA Photo Switches the media file type to still image JPEG data Operating with the hardware buttons Press ...

Страница 97: ...panel keys again 7 Sets a repeat play range For details refer to Setting a repeat play range on page 99 8 Switches the subtitle language With DivX featuring multi subtitle recordings you can switch between subtitle languages during playback 9 Displays the Phone menu screen For details refer to Displaying the phone menu on page 61 a Skips files forward or backward b Switches the audio language With...

Страница 98: ...eys on page 97 Starting procedure for USB SD 1 Display the AV source selection screen For details of the operations refer to Dis playing the AV operation screen on page 20 2 Insert the SD memory card into the SD card slot or plug the USB storage device into the USB connector For details refer to Plugging in a USB sto rage device on page 16 For details refer to Inserting and ejecting an SD memory c...

Страница 99: ...d r until an arrow icon is displayed during playback The arrow icon is displayed and forward slow motion playback begins p To return to normal playback touch d e 2 Touch r to adjust playback speed during slow motion playback p There is no sound during slow motion play back p With some discs and external storage de vices USB SD images may be unclear during slow motion playback p Reversed slow motio...

Страница 100: ...the Phone menu screen For details refer to Displaying the phone menu on page 61 9 Skips files forward or backward a Sets a repeat play range For details refer to Setting a repeat play range on page 101 b Rotates the displayed picture 90 clock wise c Selects the previous folder or the next folder d Switches the media file type For details refer to Switching the media file type on page 101 e Switche...

Страница 101: ...ce USB SD can be played at random by only touching a single key Touch the following key repeatedly until the desired setting appears Turns random play on or off default Does not play files in random order Plays all files in the current repeat play range in random order p If you turn random play on when the re peat play range is set to the current file the repeat play range changes to the whole of ...

Страница 102: ...rvals of 10 sec onds 5sec JPEG images switch at intervals of 5 sec onds 15sec JPEG images switch at intervals of 15 sec onds Manual JPEG images can be switched manually Operating with the hardware buttons Press the TRK button You can skip files forward or backward Press and hold the TRK button You can search 10 JPEG files at a time p If the number of files in the folder from the file currently bei...

Страница 103: ...nnector is connected to this product with a interface cable CD IH202 CD IV202AV sold separately For details of the connections refer to the Installation Manual When you want to play audio and or video files on your iPod with a Lightning connec tor first install CarMediaPlayer on your iPod with a Lightning connector and then launch CarMediaPlayer while in AppRadio Mode For details about the CarMedi...

Страница 104: ...lay on page 105 e Sets a repeat play range For details refer to Setting a repeat play range on page 105 f Changes the audiobook speed For details refer to Changing the speed of audiobook playback on page 107 g Hides the touch panel keys Touching this area hides the touch panel keys p Touch anywhere on the LCD screen to display the touch panel keys again h Changes the wide screen mode For details r...

Страница 105: ...g an iPhone or iPod touch quit applications before connecting 3 Touch iPod on the AV source selection screen 4 Use the touch panel keys on the screen to control your iPod For details refer to Using the touch panel keys for audio on page 103 For details refer to Using the touch panel keys for video on page 103 p The video image of the iPod may have noise if the rear display outputs the video image ...

Страница 106: ...the song list 5 Touch the first letter of the title of the song or video you are looking for While searching touch panel key operation is not available p To refine the search with a different letter touch Cancel 6 Touch the title of the list that you want to play Repeat this operation until you find the de sired song or video 7 Start playback of the selected list p Depending on the generation or v...

Страница 107: ...hanges the playback speed default Plays back in normal speed Plays back faster than normal speed Plays back slower than normal speed Displaying lists related to the song currently playing link search 1 Touch the artwork to open a list of the names of songs on the album currently playing 2 Touch the name of the song you want to play to start playing that song p If part of the recorded information i...

Страница 108: ...hone menu screen For details refer to Displaying the phone menu on page 61 8 Skips files forward or backward 9 Switches between playback and pause Reading the screen 1 2 3 4 5 6 1 App name Shows the App name of the currently playing 2 Song title Shows the title of the song currently playing when available No Title is displayed if there is no corresponding information 3 Artist name Shows the artist...

Страница 109: ...ctronics com AppRadioMode For Canada http www pioneerelectronics ca AppRadioMode p Be sure to read Using app based connected content before you perform this operation For details refer to Using app based con nected content on page 218 Pioneer is not liable for any issues that may arise from incorrect or flawed app based content The content and functionality of the sup ported applications are the r...

Страница 110: ...pears p If you connect your device while an AppRadio Mode compatible application is already running the application operation screen will appear on this product 6 Touch the desired application icon The desired application is launched and the application operation screen appears 7 Operate the application 8 Press the HOME button to go back to the Top menu screen For iPhone with a Lightning connector...

Страница 111: ...Touch the desired application icon The desired application is launched and the application operation screen appears 7 Operate the application 8 Press the HOME button to go back to the Top menu screen Using the keyboard CAUTION For your safety the keyboard functionality is only available when the vehicle is stopped and the parking brake is engaged p This function is only available in AppRadio Mode ...

Страница 112: ... If this setting has not been set the setting screen automatically appears in the follow ing cases When entering AppRadio Mode after a Bluetooth connection using SPP Serial Port Profile has been established When a Bluetooth connection using SPP Serial Port Profile has been estab lished in AppRadio Mode 1 Press the HOME button to display the Top menu screen 2 Touch the following keys in the follow ...

Страница 113: ... you touch the display in this func tion Don t Touch mark appears on the upper right corner of the screen 1 Connect your iPhone p The cable connection method varies de pending on your device For details of the connections refer to the Installation Manual 2 Press the HOME button to display the Top menu screen 3 Touch APPS The image in your iPhone appears on the screen 4 Launch an application on you...

Страница 114: ...ars 4 Displays the menu screen p Depending on the type of MirrorLink device this key is not appears 5 Displays the Phone menu screen For details refer to Displaying the phone menu on page 61 6 Displays the current source p In MirrorLink mode App control side bar will appear p If you press the HOME button twice the App control side bar will disappear Press the HOME button twice again and the App co...

Страница 115: ... sounds please adjust the Audio Mix settings is displayed To output voice guidance for the navigation system touch Yes 1 Start up the AppRadio Mode or Mirror Link mode 2 Press the VOL button The audio mix menu will be displayed on the screen 1 2 3 1 Touch to mute Touch again to unmute 2 Sets whether to switch the sound mix func tion on or off Left tab The audio mix function is en abled mix on The ...

Страница 116: ... connect to the Internet via 3G EDGE LTE 4G or Wi Fi network to use the Pandora service Limitations Depending on the availability of the Internet you may not be able to receive the Pandora service The Pandora service is subject to change with out notice The service could be affected by any of the fol lowing firmware version of the iPhone firm ware version of the Pandora application changes to the ...

Страница 117: ...ng the screen 2 1 1 Current track information Shows the Pandora station name the tuner is currently tuned in to Track title Shows the title of the current track Artist name Shows the artist name for the track cur rently playing Album title Shows the title of the album of the cur rent track p is displayed if there is no corre sponding information 2 Play time indicator Shows the elapsed time remaini...

Страница 118: ... panel keys on page 116 For smartphone users 1 Unlock your smartphone 2 Connect your smartphone 8000NEX 7000NEX 6000NEX p Connect via USB Bluetooth or HDMI and Bluetooth For details of the Bluetooth connection refer to Registering your Bluetooth de vices on page 55 p The cable connection method varies de pending on your device For details of the connections refer to the Installation Manual 5000NEX...

Страница 119: ...ou can sort the items in the list in the order of the dates the items were cre ated p If you touch the station will be deleted A message prompting you to delete the sta tion appears Touch Yes The station will be deleted To cancel touch No Add station 1 Touch the following key Displays the selection screen 2 Touch Track from track or Artist from artist A new station is created To cancel adding a ne...

Страница 120: ...g into Facebook creating a Facebook account log ging into Twitter or creating a Twitter account Aha Radio is a service not affiliated with Pioneer More information is available at http www aharadio com A specific version of the Aha Radio applica tion must be installed on your iPhone or smartphone to enjoy Aha Radio content on this product Because the application for the iPhone or smartphone is not...

Страница 121: ...rting procedure When connecting an iPhone or smartphone to this product you must select the method for connecting your device Settings are required according to the connected device For details refer to Chapter 13 For iPhone with a 30 pin connector users 1 Unlock your iPhone 2 Connect your iPhone p Connect via USB or Bluetooth For details of the Bluetooth connection refer to Registering your Bluet...

Страница 122: ... page 120 For smartphone users 1 Unlock your smartphone 2 Connect your smartphone 8000NEX 7000NEX 6000NEX p Connect via USB Bluetooth or HDMI and Bluetooth For details of the Bluetooth connection refer to Registering your Bluetooth de vices on page 55 p The cable connection method varies de pending on your device For details of the connections refer to the Installation Manual 5000NEX X8610BS p Con...

Страница 123: ...Maestro module with the appropriate vehicle and head unit firmware Please note that you will need to power up the Pioneer product in advance to view the device number needed to flash the iDatalink Maestro module For details on how to check the device num ber refer to Checking the device number on page 123 Checking the device number 1 Install this product to your vehicle and then turn on the power ...

Страница 124: ...ing on the connected type of iDatalink adapter and the vehicle model 9 Switches between playback and pause SiriusXM Satellite Radio 1 3 8 4 5 7 b 9 6 2 a 1 Displays the source list For details refer to Selecting a front source on the source list on page 21 2 Selects a band 3 Displays the Setting menu screen 4 Recalls equalizer curves For details refer to Using the equalizer on page 170 5 Selects a...

Страница 125: ...nd displays vary depending on the connected type of iDatalink adapter and the vehicle model Phone Book screen 1 6 8 2 3 4 7 5 1 Switches to the voice recognition func tion 2 Switches to the phone book list 3 Switches to the missed received and dia led call lists 4 Switches the mode to enter the phone number directly 5 Functions and displays vary depending on the connected type of iDatalink adap te...

Страница 126: ...oming call Makes a phone call when a phone num ber is selected Switches between callers on hold 5 Ends a call Rejects an incoming call Cancels call waiting Dial confirmation screen 1 2 3 5 4 1 Switches the mode to enter the phone number directly 2 Turns private mode on or off 3 Minimizes the dial confirmation screen 4 Making a phone call 5 Ends a call En 126 Chapter 24 Using iDatalink ...

Страница 127: ... if you switch to another source while listening to a song on your Bluetooth audio player song playback may continues p Depending on the Bluetooth audio player you connected to this product operations on this product to control the player may differ from those explained in this manual p When you are talking on a cellular phone connected to this product via Bluetooth wireless technology song playba...

Страница 128: ...Genre Shows the genre of the current file when available p In the following cases file information will only be displayed after a file starts or resumes playing You connect a Bluetooth audio player compatible with AVRCP1 3 and op erate the player to start playing You select another file when play back is paused Starting procedure 1 Pull out the connecting cable for using AppRadio Mode p You cannot...

Страница 129: ...the repeat play range can be played at random by only touching a single key p This function is only available when the connected Bluetooth audio player supports AVRCP 1 3 Touch the following key repeatedly until the desired setting appears Turns random play on or off Setting a repeat play range The repeat play range can be changed by only touching a single key p This function is only available whe...

Страница 130: ... O S or F You will need this number to activate your sub scription 3 Activate the service either online or by phone The service can be activated from the web site below www siriusxm com activatenow Call SiriusXM Listener Care at 1 866 635 2349 to activate To service for SiriusXM Canada go to www xmradio ca and click on ACTIVATE RADIO at the top right corner of the page or call 1 877 438 9677 The S...

Страница 131: ...ca tor d Displays the preset channels For details refer to Selecting a preset channel from the preset channel list on page 133 e Recalls the preset channel stored to a key from memory with a single touch of the key Stores the current broadcast frequency to a key for later recall by continuing to touch the key For details refer to Storing broadcast channels on page 133 f Returns to live broadcast U...

Страница 132: ...ed when Chan nel 0 is selected Category name Shows the category name of the broad cast channel p RADIO ID is displayed when Chan nel 0 is selected Detailed information Shows the information of the content currently being played a Preset number indicator Highlights the selected preset item b Play time indicator Shows the elapsed playing time within the stored broadcast c Current content information...

Страница 133: ...displayed Storing broadcast channels With a touch of any of the preset tuning keys 1 to 6 you can easily store up to six broadcast channels for later recall also with the touch of a key p The broadcast channel may not be stored depending on the broadcast channel 1 Select the channel that you want to store in memory 2 Touch and hold a preset tuning key 1 to 6 The selected channel is memorized The n...

Страница 134: ...m the available categories The types of categories available depend on the types of channels available p It may take time to display the channel list depending on the SiriusXM reception con dition 1 Touch the following key Displays the list screen 2 Touch the category name you want The category in the hierarchy under the se lected channel list is displayed 3 Touch the desired channel 4 Touch the f...

Страница 135: ...and when Tune Start is turned on 1 Press the HOME button to display the Top menu screen 2 Touch the following keys in the follow ing order The System screen appears 3 Touch AV Source Settings The following screen appears 4 Touch SiriusXM settings The following screen appears 5 Touch Tune Start repeatedly until the desired setting appears On default Activates the Tune Start function Off Deactivates...

Страница 136: ...s channel Using category scan You can scan each channel in the selected ca tegory 1 Touch the following key Displays the list screen 2 Touch the desired category 3 Touch the following key Performs scan tuning in the se lected category The live broadcast for each channel in the current ca tegory plays for six seconds at a time Setting parental lock The SiriusXM Parental Control feature allows you t...

Страница 137: ...2 Touch the following keys in the follow ing order The System screen appears 3 Touch AV Source Settings The following screen appears 4 Touch SiriusXM settings The following screen appears 5 Touch Parental control The Parental Control screen appears 6 Enter the current passcode 7 Touch the following key Displays the Locked Channel screen 8 Touch the channel you want to lock appears and the channel ...

Страница 138: ...emorized to an alert list When a program that matches a keyword memorized to the alert list is broadcast a beep sounds and a message is displayed Touch Team1 or Team2 when setting 3 Touch Jump to switch to the station You can listen to the track p You can enable or disable alerts by setting the alert function p Notification may not be provided depending on the status of this product If you touch S...

Страница 139: ...e following keys in the follow ing order The System screen appears 3 Touch AV Source Settings The following screen appears 4 Touch SiriusXM settings The following screen appears 5 Touch Team Settings The League screen appears 6 Touch the desired league 7 Touch the desired team The team settings are enabled p If you touch and hold the list item the item is deleted from the list Restoring the Sirius...

Страница 140: ...ation to an iPod iTunes Tagging p For details refer to Storing song information to an iPod iTunes Tagging on page 189 Operating with the hardware buttons Press the TRK button You can move the preset channels up or down when the current channel is displayed You can skip files forward or backward when the play time indicator is displayed Press and hold the TRK button You can move channels up or down...

Страница 141: ...3 Displays the Setting menu screen 4 Recalls equalizer curves For details refer to Using the equalizer on page 170 5 Hides the touch panel keys Touching this area hides the touch panel keys p Touch anywhere on the LCD screen to display the touch panel keys again 6 Displays the Phone menu screen For details refer to Displaying the phone menu on page 61 7 Changes the wide screen mode For details ref...

Страница 142: ... the Setting menu screen 4 Recalls equalizer curves For details refer to Using the equalizer on page 170 5 Hides the touch panel keys Touching this area hides the touch panel keys p Touch anywhere on the LCD screen to display the touch panel keys again 6 Displays the Phone menu screen For details refer to Displaying the phone menu on page 61 7 Switches the operation screen For details refer to Swi...

Страница 143: ...u screen 2 Touch the following keys in the follow ing order The Video Setup screen appears 3 Touch Video Signal Setting The following screen appears 4 Touch AUX The pop up menu appears 5 Touch the item you want to set Auto default Adjusts the video signal setting automati cally PAL Sets the video signal to PAL NTSC Sets the video signal to NTSC PAL M Sets the video signal to PAL M PAL N Sets the v...

Страница 144: ...alizer on page 170 5 Hides the touch panel keys Touching this area hides the touch panel keys p Touch anywhere on the LCD screen to display the touch panel keys again 6 Displays the Phone menu screen For details refer to Displaying the phone menu on page 61 7 Changes the wide screen mode For details refer to Changing the wide screen mode on page 191 Reading the screen 1 1 Current time and date Sta...

Страница 145: ...y the connected external camera can be displayed 6 Display the AV source selection screen For details of the operations refer to Dis playing the AV operation screen on page 20 7 Touch AV on the AV source selection screen The image is displayed on the screen 8 Use the touch panel keys on the screen to control the external unit For details refer to Using the touch panel keys on page 144 Setting the ...

Страница 146: ...ing automati cally PAL Sets the video signal to PAL NTSC Sets the video signal to NTSC PAL M Sets the video signal to PAL M PAL N Sets the video signal to PAL N SECAM Sets the video signal to SECAM En 146 Chapter 29 Using AV input ...

Страница 147: ...m selection screen For details of the operations refer to Se lecting an item to play songs on page 147 5 Displays the playback list screen For details of the operations refer to Se lecting songs not to be played on page 148 6 Sets to the original BPM Beats Per Minute 7 Specifies the playback portion For details of the operations refer to Specifying the playback portion on page 148 8 Touch to selec...

Страница 148: ...ound effect is automati cally applied when switching to the next song Setting the flash pattern The flashing color changes with the changes in the sound and bass levels 1 Press the HOME button to display the Top menu screen 2 Touch the following keys in the follow ing order The System screen appears 3 Touch AV Source Settings The following screen appears 4 Touch MIXTRAX Settings 5 Touch Flash Patt...

Страница 149: ...AppRadio Mode screen when your vehicle approaches a guidance point such as an inter section 1 Press the HOME button to display the Top menu screen 2 Touch the following keys in the follow ing order The System screen appears 3 Touch Navigation Related Settings The following screen appears 4 Touch AV App Guide Mode repeat edly until the desired setting appears On default Switches from the AV operati...

Страница 150: ...setting 1 Press the HOME button to display the Top menu screen 2 Touch the following keys in the follow ing order The System screen appears 3 Touch Input Output settings The following screen appears 4 Touch AV Input The pop up menu appears Off default Deactivates the AV source Source Displays the video image output by the con nected external device Camera Displays the image output by the connected...
Страница 151: ...diately verify whether the display changes to a rear view camera image when the shift lever is moved to REVERSE R from another position p When the screen changes to full screen rear view camera image during normal driving switch to the opposite setting in Camera Polarity Setting rear view camera activation 1 Press the HOME button to display the Top menu screen 2 Touch the following keys in the fol...

Страница 152: ...e set to Cam era For details refer to Setting AV input on page 150 1 Press the HOME button to display the Top menu screen 2 Touch the following keys in the follow ing order The System screen appears 3 Touch Camera settings The following screen appears 4 Touch Camera View repeatedly until the desired setting appears Off default Turns the camera view setting off On Turns the camera view setting on I...

Страница 153: ...d by the rear view camera is limited Also the vehicle width and distance guidelines displayed on the rear view camera image may differ from the actual vehicle width and distance The guidelines are straight lines The image quality may deteriorate depending on the usage environment such as at night or in dark surroundings 1 Park your vehicle in a safe place and apply the parking brake 2 Using packin...

Страница 154: ...the HOME button to display the Top menu screen 2 Touch the following keys in the follow ing order The System screen appears 3 Touch Demo Mode repeatedly until the desired setting appears Off default Hides the demo screen On Displays the demo screen Selecting the system language The system language can be selected p The languages used in the program and voice guidance can be set on the Regio nal sc...

Страница 155: ...AppRadio Mode on the iPhone 1 Press the HOME button to display the Top menu screen 2 Touch the following keys in the follow ing order The System screen appears 3 Touch Keyboard The pop up menu appears 4 Touch the desired language After the language is selected the previous screen returns Setting the beep sound 1 Press the HOME button to display the Top menu screen 2 Touch the following keys in the...

Страница 156: ...he same time twice 5 Press the HOME button The adjustment results are saved 6 Press the HOME button once again The following screen appears Proceed to 16 point adjustment If you press and hold the HOME button the adjustment is canceled 7 Gently touch the center of the mark displayed on the screen The target indicates the order After you touch all marks the adjusted posi tion data is saved If you p...

Страница 157: ...s item Selects the adjustable next item Each time you touch the key the level of the selected item increases or decreases p Brightness Contrast Color and Hue can be adjusted from 24 to 24 p Dimmer can be adjusted from 1 to 48 p Temperature can be adjusted from 3 to 3 p The adjustments of Brightness and Con trast are stored separately when your vehi cle s headlights are off daytime and when your ve...

Страница 158: ...firmware update files 2 Connect a blank formatted SD mem ory card or USB storage device to your computer and then locate the correct up date file and copy it onto the SD memory card or USB storage device 3 Turn the source off For details refer to Turning off the AV source on page 21 4 Press the HOME button to display the Top menu screen 5 Touch the following keys in the follow ing order The System...

Страница 159: ...et that you are currently on 5 Speed Pulse Indicates the total number of speed pulses 6 Degree of learning Sensor learning situations for distance Distance right turns Right Turn left turns Left Turn and 3D detection 3D are indicated by the length of the bars p When the tires have been changed or chains have been fitted turning on the Speed Pulse allows the system to detect the fact that the tire ...

Страница 160: ...ppears 2 3 5 4 1 7 6 1 GPS Antenna Indicates the connection status of the GPS antenna the reception sensitivity and from how many satellites the signal is received Color Signal com munication Used in posi tioning Orange Yes Yes Yellow Yes No p When the GPS antenna is connected to this product OK is displayed When the GPS antenna is not connected to this product NOK is displayed p If reception is p...

Страница 161: ... while the vehi cle is stationary 5 Illumination When the headlights or small lamps of the vehicle are on ON is displayed When the small lamps of the vehicle are off OFF is displayed If the orange white lead is not connected OFF appears 6 Back Signal When the shift lever is shifted to R the signal switches to High or Low One of these is displayed depending on the vehi cle 7 iDataLink When the opti...

Страница 162: ...nd Rear to 0 when using a dual speaker system 5 Touch the following keys to adjust the left right speaker balance Moves towards the left Moves towards the right Each time you touch the keys the left right speaker balance moves towards the left or right p Left25 to Right25 is displayed as the left right speaker balance moves from the left to right p The default setting is L R 0 p You can also set t...

Страница 163: ...source levels SLA source level adjustment lets you adjust the volume level of each source to prevent ra dical changes in volume when switching be tween sources p Settings are based on the FM tuner volume level which remains unchanged p This function is not available when the FM tuner is selected as the AV source 1 Compare the FM tuner volume level with the level of the source you want to adjust 2 ...

Страница 164: ...00NEX X8610BS Required cable sold separately Smartphone Setup AV sources Device Connection iPod iPhone with a 30 pin connector CD IU201V iPhone iPod USB USB1 iPod1 aha Pandora CD IU201S iPhone iPod USB USB1 aha Pandora iPod1 AppRadio Mode iPod iPhone with a Lightning connector CD IV202AV CD IU52 Lightning to VGA Adapter iPhone iPod VGA adapter aha AppRadio Mode Pandora Bluetooth Audio p When a USB...

Страница 165: ...B port to which the iPod iPhone with a Light ning connector is connected The source level adjustment volume that is automati cally set varies depending on whether the iPod iPhone with a Lightning connector is connected to USB port 1 or USB port 2 p When a MirrorLink device is connected to USB port 2 the source level adjustment vo lume is automatically set to the same level as USB port 2 En 165 Cha...

Страница 166: ... p The default setting is On 4 Touch Cross Over The Cutoff screen appears 5 Touch the following keys to select Front or Rear Selects the adjustable previous speak er Selects the adjustable next speaker 6 Touch HPF to turn on 7 Drag the line graph horizontally to ad just the range of cut off frequency from 50 Hz to 200 Hz p The default setting is 100 Hz 8 Drag the tip of the slope to adjust the ran...

Страница 167: ...ears 3 Touch Listening Position The Listening Position screen appears 4 Touch the desired position Off default Changes the listening position setting to off Front Changes the listening position setting to front Front L Changes the listening position setting to front left Front R Changes the listening position setting to front right All Changes the listening position setting to all Adjusting the sp...

Страница 168: ...t speaker Rear Right Changes the speaker level of the rear right speaker Subwoofer Changes the speaker level of the subwoofer speaker If you touch Apply Auto EQ the result of A EQ TA Measurement will be applied to the speaker level setting p To use this function the vehicle s acoustics must be measured in advance Adjusting the time alignment By adjusting the distance from each speaker to the liste...

Страница 169: ...e between the se lected speaker and the selected listen ing position p 0 0 inch to 200 0 inch is displayed as the distance to be corrected is increased or decreased Front Left Changes the distance between the front left speaker and the selected listening position Front Right Changes the distance between the front right speaker and the selected listening po sition Rear Left Changes the distance bet...

Страница 170: ...ualizer curves that you can easily recall at any time Here is a list of the equalizer curves Equalizer curve S Bass is a curve in which only low pitched sound is boosted Powerful is a curve in which low and high pitched sounds are boosted Natural is a curve in which low and high pitched sounds are slightly boosted Vocal is a curve in which the midrange which is the human vocal range is boosted Fla...

Страница 171: ...r You can set the auto adjusted equalizer to suit the vehicle s acoustics To use this function the vehicle s acoustics must be measured in advance For details of the operations refer to Adjust ing the equalizer curve automatically Auto EQ on page 171 p To manually adjust the equalizer curve set Auto EQ TA to Off 1 Press the HOME button to display the Top menu screen 2 Touch the following keys in t...

Страница 172: ... power amp with an LPF low pass filter turn the LPF off before performing Auto EQ Also set the cut off frequency for the built in LPF of an active subwoofer to the highest fre quency The distance has been calculated by a computer to provide optimum delay to en sure accurate results Do not change this value The reflected sound within the vehicle is strong and delays occur The LPF on active subwoofe...

Страница 173: ...eater is turned on turn it off Noise from the fan in the air conditioner or heater may prevent correct Auto EQ 5 Switch the AV source to OFF For details of the operations refer to Dis playing the AV operation screen on page 20 6 Press the HOME button to display the Top menu screen 7 Touch the following keys in the follow ing order The Audio screen appears 8 Touch A EQ TA Measurement The A EQ TA Me...

Страница 174: ...akers and the Auto EQ measurement begins 13 Wait until the measurement is com pleted When Auto EQ is completed a message is dis played indicating that the measurement is completed p If the vehicle s acoustics cannot be mea sured correctly an error message will be displayed p The measurement time varies depending on the type of vehicle p To stop the measurement touch Stop 14 Store the microphone ca...

Страница 175: ...t displays Selects the desired preset background dis play custom Displays the background display image im ported from the external device For details refer to Changing to the back ground display image stored on the exter nal device USB SD on page 175 off Hides the background display Changing to the background display image stored on the external device USB SD You can change the background display ...

Страница 176: ...select an illumination color from the color list 1 Press the HOME button to display the Top menu screen 2 Touch the following keys in the follow ing order The Theme screen appears 3 Touch Illumination The following screen appears p You can also change the screen for settings by touching Theme Background or Clock on this screen 4 Touch the color you want Colored keys Selects the desired preset colo...

Страница 177: ...the memory The set color will be recalled from the memory the next time you touch the same key Selecting the theme color A theme color can be selected from 5 different colors 1 Press the HOME button to display the Top menu screen 2 Touch the following keys in the follow ing order The Theme screen appears 3 Touch Theme The following screen appears p You can also change the screen for settings by to...

Страница 178: ...creen 2 Touch the following keys in the follow ing order The Theme screen appears 3 Touch Splash Screen The following screen appears 4 Touch the item you want to set Preset images Selects the desired preset splash screen image custom Displays the splash screen image imported from the external device For details refer to Changing to the splash screen stored on the external device USB SD on page 178...

Страница 179: ...the engine while exporting the set tings 1 Insert an SD memory card into the SD card slot For details refer to Inserting and ejecting an SD memory card on page 15 2 Press the HOME button to display the Top menu screen 3 Touch the following keys in the follow ing order The Theme screen appears 4 Touch Export The Settings Export screen appears 5 Touch the desired item Illumination Selects the illumi...

Страница 180: ... the SD card slot For details refer to Inserting and ejecting an SD memory card on page 15 A message confirming whether to import the stored setting data appears 2 Touch Import Data import starts When the data is successfully imported an import complete message is displayed p The source is turned off and the Bluetooth connection is disconnected before the pro cess starts En 180 Chapter 33 Theme me...

Страница 181: ...red language then touch For details refer to Language code chart for DVDs on page 187 The subtitle language is set p If the selected language is not available the language specified on the disc is displayed p You can also switch the subtitle language by touching the switch subtitle languages key during playback p The setting made here will not be affected even if the subtitle language is switched ...

Страница 182: ... 5 Touch the desired language When you select Others a language code input screen is shown Input the four digit code of the desired language then touch For details refer to Language code chart for DVDs on page 187 The menu language is set p If the selected language is not available the language specified on the disc is dis played Setting the angle icon display The angle icon can be set so it appea...

Страница 183: ... the image in the shape of a letterbox with black bands on the top and bottom of the screen Pan Scan Cuts the image short on the right and left sides of the screen p When playing discs that do not have a pan scan system the disc is played back with Letter Box even if you select the Pan Scan setting Confirm whether the disc package bears the mark p The TV aspect ratio cannot be changed for some dis...

Страница 184: ...ed on the disc You can confirm it by looking at the disc package the included literature or the disc itself You cannot use parental lock with discs that do not feature a recorded parental lock level p With some discs parental lock operates to skip certain scenes only after which normal playback resumes For details refer to the disc s instructions Displaying your DivX VOD registration code If you w...

Страница 185: ...tup The following screen appears 4 Touch DivX VOD The DivX VOD screen appears 5 Touch Deregistration Code Your eight digit deregistration code is dis played p Make a note of the code as you will need it when you deregister from a DivX VOD provider Automatic playback of DVDs When a DVD disc with a DVD menu is in serted this product will cancel the menu auto matically and start playback from the fir...

Страница 186: ... the AV input 1 Press the HOME button to display the Top menu screen 2 Touch the following keys in the follow ing order The Video Setup screen appears 3 Touch Video Signal Setting The following screen appears 4 Touch Camera The pop up menu appears 5 Touch the item you want to set Auto default Adjusts the video signal setting automati cally PAL Sets the video signal to PAL NTSC Sets the video signa...

Страница 187: ...ingala sv 1922 Swedish da 0401 Danish lo 1215 Lao sw 1923 Swahili de 0405 German lt 1220 Lithuanian ta 2001 Tamil dz 0426 Dzongkha lv 1222 Latvian te 2005 Telugu el 0512 Greek mg 1307 Malagasy tg 2007 Tajik en 0514 English mi 1309 Maori th 2008 Thai eo 0515 Esperanto mk 1311 Macedonian ti 2009 Tigrinya es 0519 Spanish ml 1312 Malayalam tk 2011 Turkmen et 0520 Estonian mn 1314 Mongolian tl 2012 Tag...

Страница 188: ...order The Favorites screen appears 3 Touch the star icon that you want to add to the favorite menu The star icon for the selected menu is filled in To cancel the registration touch the star icon in the menu column again Removing a shortcut 1 Press the HOME button to display the Top menu screen 2 Touch the following keys in the follow ing order The Favorites screen appears 3 Touch and hold the star...

Страница 189: ...this product Depending on when the song information is stored information for the previous song or the song after the current song may also be stored Be sure to confirm the song before you purchase it p The iTunes Tagging function is available while digital broadcasts are being received p This function is available for the following iPod models iPhone 5s iPhone 5c iPhone 5 iPhone 4s iPhone 4 iPhon...

Страница 190: ...is played The information on the song on air is stored in this product While the information is being acquired is displayed When it is completed turns off and is displayed p The song information for up to 50 songs can be stored in this product Depending on when the song information is stored information for the previous song or the song after the current song may also be stored 7 Connect your iPod...

Страница 191: ...ly ideal for a cinema sized wide screen pic ture p This setting is for video only Normal A 4 3 picture is displayed normally giving you no sense of disparity since its propor tions are the same as those of the normal picture p This setting is for video and JPEG images Trimming An image is displayed across the entire screen with the horizontal to vertical ratio left as is If the horizontal to verti...

Страница 192: ...atible file types are MPEG 4 H 264 WMV MKV and FLV only AV The video and sound of AV are output to the rear display The video image and sound are output only when AV has both video and sound The video image and sound are output only when the corresponding settings on AV Input is Source For details refer to Setting AV input on page 150 SD The video and sound of the SD memory cards are output to the...

Страница 193: ...rs Entering the password On the password input screen you must enter the current password 1 Enter the password 2 Touch Go When the correct password is entered this product will be unlocked Deleting the password The current password and password hint can be deleted 1 Press the HOME button to display the Top menu screen 2 Touch the following keys in the follow ing order The System screen appears 3 T...

Страница 194: ...e only when you stop your vehicle in a safe place and apply the parking brake CAUTION Do not turn off the engine while restoring the set tings 1 Press the HOME button to display the Top menu screen 2 Touch the following keys in the follow ing order The System screen appears 3 Touch Restore Settings The following screen appears 4 Touch the item you want to initialize All settings Audio settings p T...

Страница 195: ... The audio or video skips This product is not firmly secured Secure this product firmly No sounds are produced The volume level will not rise Cables are not connected correctly Connect the cables correctly The system is performing still slow motion or frame by frame playback with DVD Video There is no sound during still slow motion or frame by frame playback with DVD Video The system is paused or ...

Отзывы: