2-21
Chapter 2 Maintenance
2.
Restore the panel to the original state. Turn On the Power holding down the numerical keys
"0", "1", and "3" on the Control Panel.
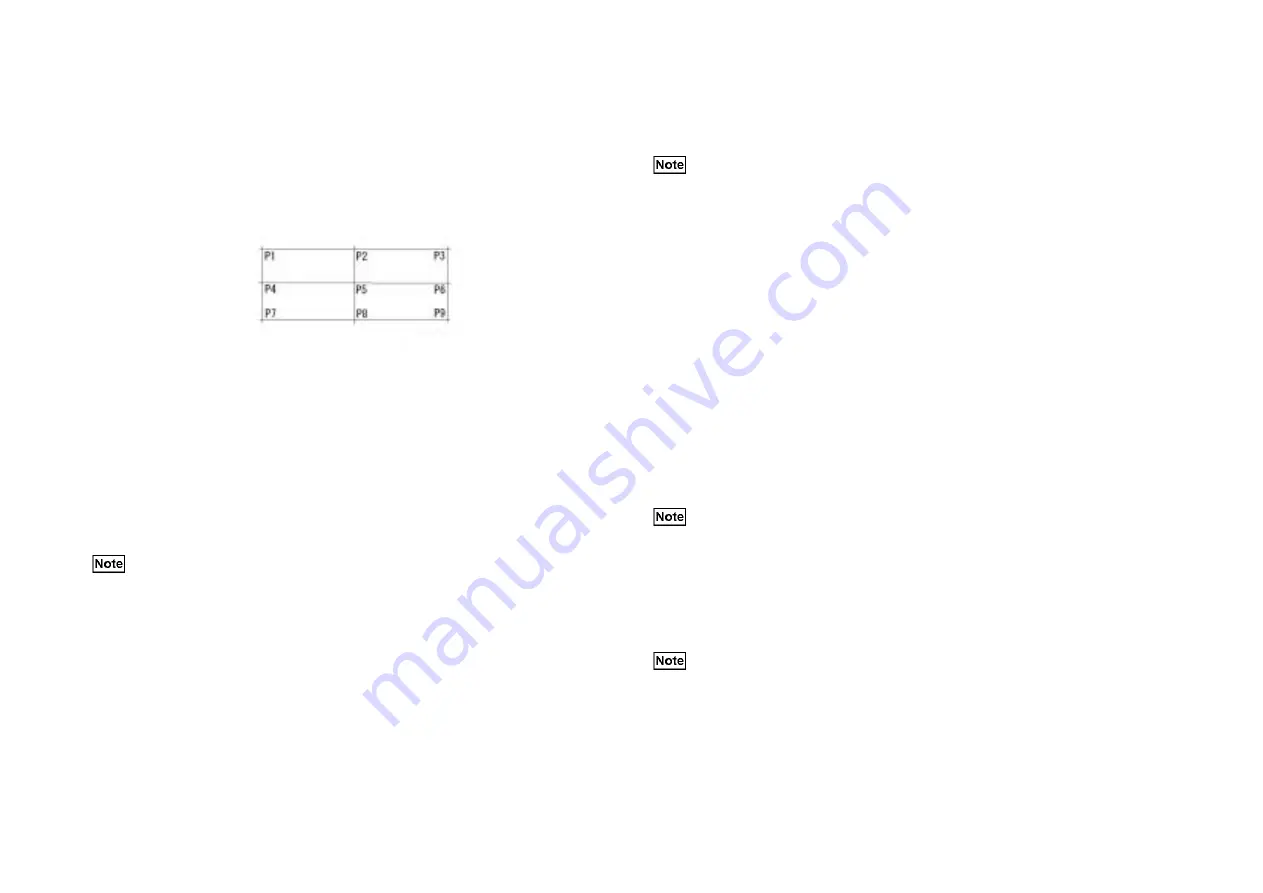
The following appears on the display. (Fig. 2)
(Fig. 1) j0mf40959
3.
Touch the intersections of the vertical and horizontal lines in the sequence of P1 to P9 with
the touch pen. (Hold the pen for about 1 minute and the proceed to the next intersection.)
After pressing down all the buttons, the machine will calculate the deviation and the
correction value on the coordinates. This automatic calculation takes about 0.1 second.
4.
Turn Power Off and on several seconds. UI will be available because the data was corrected
after booting.
5.
Restore the pen to its original place and return the Control Panel to the correct position.
ADJ1. 1. 14 Upgrading of the Printer Firmware
Purpose
Perform this procedure when upgrading the printer firmware, or when reinstalling printer
software is necessary for some trouble.
[NVM initialization/ Lo-ID when performing ROM_Ver.UP]
Condition: Lo-ID when NVM initialization/ ROM_Ver.UP is performed will appear from New
Developer to 1000 sheets (including the time for the installation). After new installation, or during
about 1.0Kpv right after replacing the developer material in the field, it is comparatively hard for
the developer material to develop.
If ROM_Ver.UP/NVM are initialized in this status, the density may be somewhat lighter because
the default value of the LD light quantity is set for stable status of the developer material (the status
for the material to develop with comparative ease: the status passing 1.5Kpv from the
initialization)
At this point, it is necessary to restore the density with the following procedure. After resetting the
appropriate LD light quantity NVM (752-375~378:YMCK) value higher to 400~450, turn Power
Off/On and reprint. (Or repeat turning Power Off/On + printing, or to repeat DC934_ADC
checking will restore the density as well.)
This servicing can restore the density to its status before ROM_Ver.Up/NVM has been initialized.
Procurement of Software
When upgrading the printer firmware, firmware utility and printer firm softwares are necessary.
Both are available from the following URL.
Digital Imaging Information Web
http://www.mgcsnet.ne.jp/
Installation Procedure of the Download Data
If the Power is turned Off during the adjustment, the data before the adjustment will be
functioned. Make sure to perform the adjustment to the last.
CE will perform the upgrade servicing in the DP-C321/C401.
When downloading both softwares from the homepage, it may take some ten minutes
(depending on environments). Download both softwares into PSW in advance before
paying a call on the customer.
Environments required for installation
The following environments for the personal computer are recommended.
OS: Windows98, or Windows NT4.0 (Service Pack3 or higher)
CPU: Pentium (100MHz) or higher
Memory: 32MB or higher
Hard disk capacity available: 200MB or higher
<Disk capacity required for installation>
300MB or higher capacity is necessary in the disk for installation.
Содержание Workio DP-C401
Страница 4: ...This page is intentionally left blank ...
Страница 5: ...Chapter 1 General ...
Страница 22: ...1 16 Chapter 1 General 1 3 Type of Paper ...
Страница 23: ...1 17 Chapter 1 General ...
Страница 24: ...Chapter 2 Maintenance ...
Страница 63: ...Chapter 3 Troubleshooting ...
Страница 118: ...3 44 Chapter 3 Troubleshooting I F PWB PL9 1 MCU PWB PL13 1 ...
Страница 378: ...3 304 Chapter 3 Troubleshooting Read Write Read Write Description Memory Spool 512 KB 32 MB 256 KB interval ...
Страница 445: ...Chapter 4 Parts List ...
Страница 527: ...4 80 Chapter 4 Parts List 17 RACK PL17 1 Rack Ref No Part No Description 7901 17E9471X Rack Caster Front j0mf51901 ...
Страница 548: ......


