Clip Management: Converting Clip Audio
67
Cl
ip
Man
age
men
t
Converting Clip Audio
The audio of an AVC-Intra clip can be converted between 16-
bit and 24-bit and recorded on a P2 card or hard disk.
◆
NOTE:
• Take care not to turn off the power or remove a card during
conversion. Otherwise the converted clip may be damaged.
• If the converted clip is damaged, delete it and perform conversion
again.
• An incomplete clip may be converted, but it cannot be reconnected.
• Conversion cannot be performed if a bad or unknown clip is
included.
• This unit can convert 16-bit 8-channel audio to 24-bit 8-channel
audio but cannot play channels 5 to 8 of the converted 24-bit audio.
• Data volume increases when a 16-bit clip is converted to 24-bit
audio. This may make the converted audio too large to be stored on
another card with the same memory capacity.
1
Open the thumbnail screen for the P2 card or hard
disk.
➝
For details on the thumbnail screen for the hard disk,
refer to “Displaying Clip Thumbnails on a Hard Disk”
(page 134).
2
Select a clip to convert.
◆
NOTE:
• The following clips cannot be converted. They are ignored even
if they are selected.
– Clips in formats other than AVC-Intra100 or AVC-Intra50.
– Clips with audio channels other than 2, 4, or 8 channels.
– Clips with audio channels with different duration (length of
clip).
– Duration is an odd number when a clip format is 50P/60P.
– Clips with 16-bit and 24-bit audio channels mixed.
3
Press the MENU button.
4
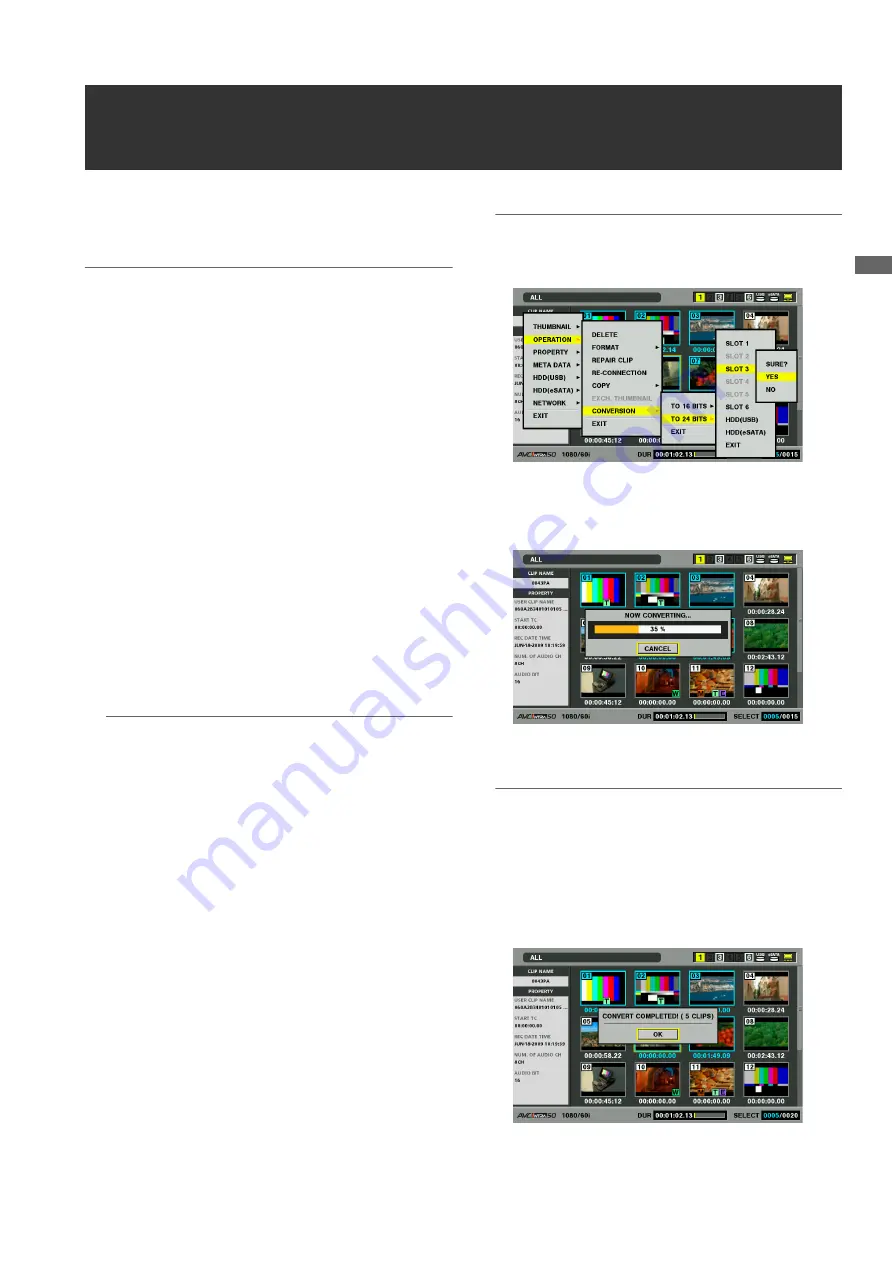
Use the cursor buttons to choose [OPERATION] –
[CONVERSION], select [TO 16 BITS] or [TO 24
BITS] from the list that appears, then select the
destination from the list and press the SET button.
Conversion cannot be performed if the original audio bits
of the selected clip are the same as the destination audio
bits.
➝
Refer to “Using This Unit With a Hard Disk” (page 126).
◆
NOTE:
• When converting clips on a hard disk, only a P2 card is
selectable as a destination storage medium.
5
Select [YES] and press the SET button.
This starts conversion of the clip.
After conversion, the number of converted clips is
displayed.
◆
NOTE:
• To interrupt conversion, press the SET button or the CANCEL
(SHIFT + EXIT) button to cancel the operation. The completely
converted clips are not deleted and remain stored in the card.
6
Press OK (SET button) when the completion
message appears.


