130
Connections: Using This Unit With a Hard Disk
3
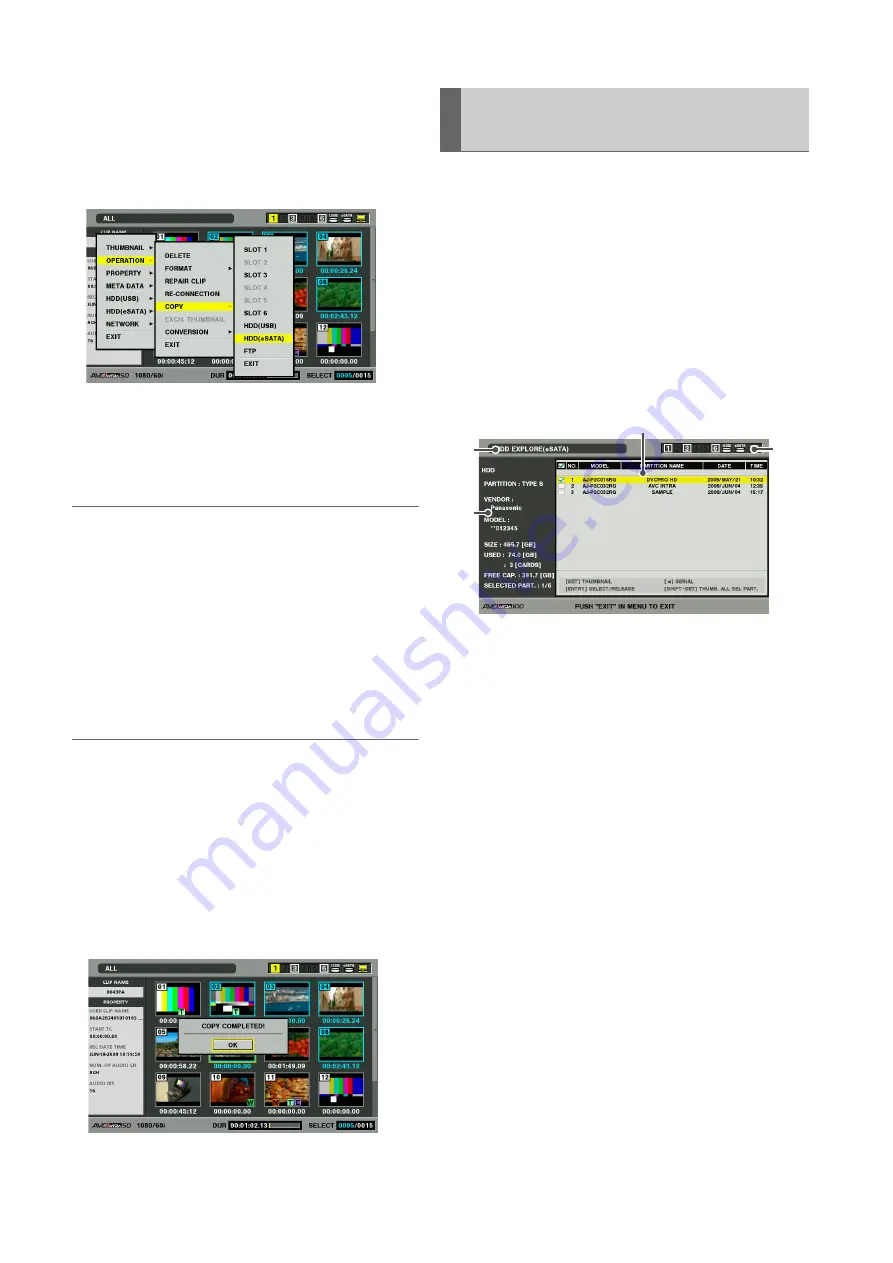
Press the MENU button.
4
Use the cursor buttons to select [OPERATION] –
[COPY] – [HDD (USB or eSATA)] and press the SET
button.
5
Select the location of the clip in the hard disk folder
or partition list that appears and press the SET
button.
◆
NOTE:
• A hard disk in the FAT format will display the following folders.
- Root folder
- Up to three levels of folders containing CONTENTS folder
• Copying is not possible on a TYPE S hard disk without a single
partition. To enable copying, format using a FAT format or
create a partition by exporting data.
6
Select [YES] and press the SET button.
The clip will now be copied. A progress bar appears
during copying.
◆
NOTE:
• To interrupt copying, use the cursor buttons to select CANCEL
and press the SET button. Then select [YES] in the confirmation
dialog that appears and press the SET button again. The
incomplete copy at the destination is deleted.
• When a clip is copied to a TYPE S hard disk, it will not be
possible to import data by card from the partition. The card
model number is then displayed as “UNKNOWN.”
When the copy operation ends, “COPY COMPLETED!”
appears.
Use the steps below to display hard disk information and
select hard disk partitions and folders. A selected partition
can also easily be used as a player in editing playlists.
1
Connect a hard disk.
2
Press the MENU button in the thumbnail screen.
3
Use the cursor buttons to select [HDD] (USB or
eSATA)] – [EXPLORE] and press the SET button.
1)
Display status
Indicates that the hard disk explorer screen is
displayed.
Displaying Hard Disk Information
(Explorer Screen)
2)
1)
3)
4)


