– 60 –
Chapter 4 Operation — Basic operation of the menu
- Press the <EXIT> button.
- Press the cursor operation button.
- Place the cursor on [EXIT] at the top and press the <SET> button or the jog dial button.
3
Select the item to set.
1) Turn the jog dial button to move the cursor to the item to set.
The cursor can also be moved by pressing the cursor operation button.
2) Press the jog dial button or the <SET> button.
A check mark is displayed at the left of the set item. (Fig. 1)
f
To return to one level higher, perform the following operation.
- Press the <EXIT> button.
- Press the cursor operation button.
- Place the cursor on [EXIT] at the top and press the <SET> button or the jog dial button.
4
Press the <MENU> button to close the menu.
f
Depending on the operating item, it will automatically return to the previous screen.
@
@
NOTE
t
In the screen to set the numeric value (Fig. 2), the value is changed fast by turning the jog dial button in the direction to change with the button
pressed and fixing it or press and hold the cursor operation button.
When operating by touching the LCD monitor
Operate by touching the LCD monitor.
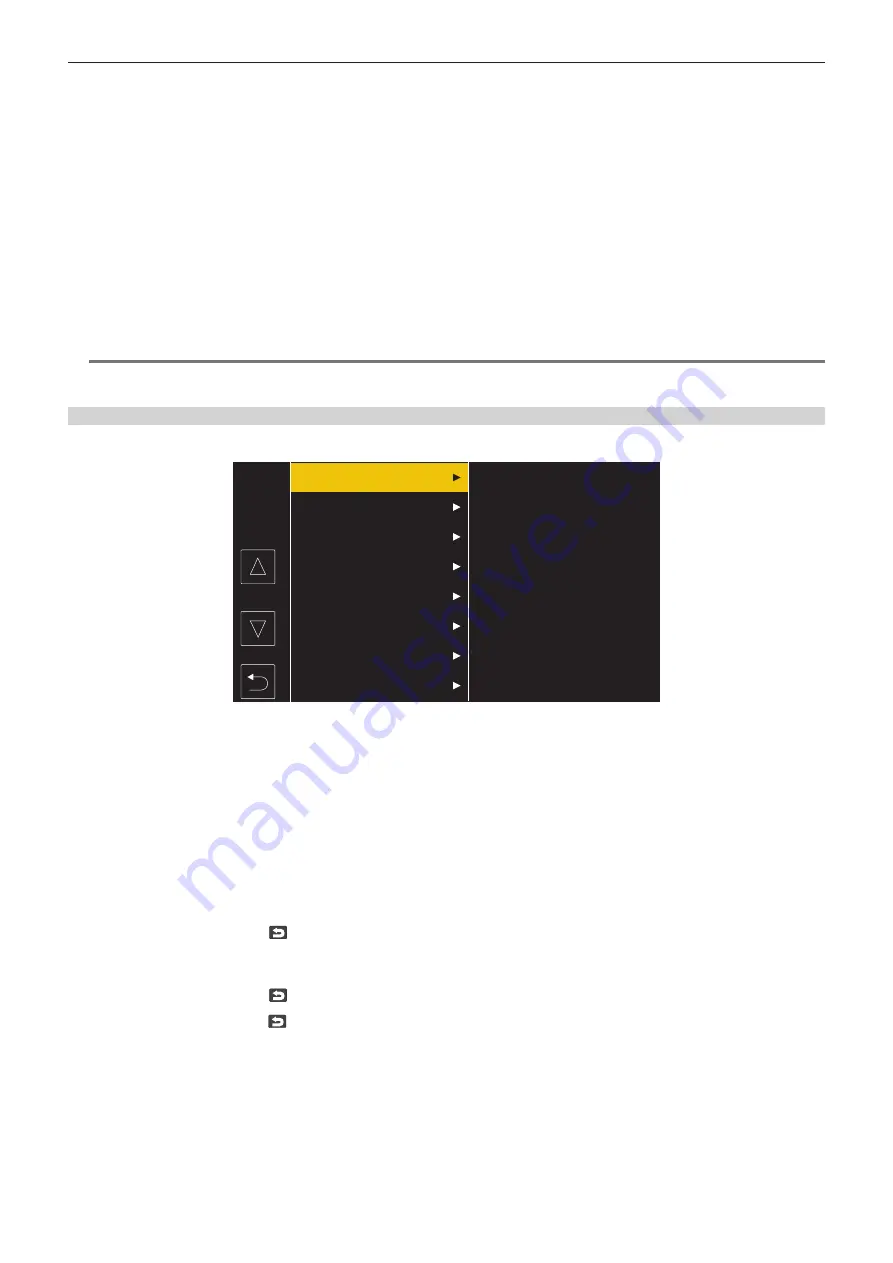
CAMERA
SCENE FILE
AUDIO
VIDEO OUT/LCD/VF
RECORDING
NETWORK
SYSTEM
OTHERS
1
Press the <MENU> button when not recording.
The menu is displayed.
2
Select the menu to set.
f
Touch the menu to set. The lower level menu is displayed.
f
The confirmation screen is displayed depending on the menu.
f
Perform the similar operation if there is next level.
f
In some menus, a screen to set the numeric value is displayed in the camera image.
To change the numeric value, touch [
`
]/[
{
] and change the setting value.
f
In some menus, a message is displayed if a menu cannot be executed.
f
Touch [
`
]/[
{
] to toggle the pages.
The button icons cannot be touched if there are no more pages.
f
To return to one level higher, touch
.
3
Select the item to set.
f
Touch the item to set. A check mark is displayed at the left of the set item.
f
To return to one level higher, touch
.
4
Exit from the menu by touching
, or pressing the <MENU> button.
f
Depending on the operating item, it will automatically return to the previous screen.
Содержание AJ-CX4000
Страница 12: ...Before using the camera read this chapter Chapter 1 Overview ...
Страница 179: ...This chapter describes about the output image Chapter 7 Output ...
Страница 187: ...This chapter describes how to use the camera by connecting to a network Chapter 9 Network Connection ...
Страница 204: ...Maintenance of the camera and error message are described Chapter 10 Maintenance ...
Страница 212: ...This chapter describes the dimensions specifications and connector signals Chapter 11 Specification ...
Страница 223: ...Web Site https www panasonic com Panasonic Corporation 2019 ...


