– 172 –
Chapter 6 Playback — Thumbnail operation
8
When the confirmation message is displayed, select [SET].
Progress bar is displayed, and the copy of the clip starts.
[OVERWRITE?] is displayed when there is a same P2 clip in the copy destination. Select [SET] when overwriting the clip, and select
when not
overwriting the clip.
f
To cancel the copy midway, select [CANCEL].
9
When the completion message is displayed, select
. (Fig. 5)
@
@
NOTE
t
Clips in MOV format cannot be copied.
t
The copy is not possible when the volume of the selected clip is larger than the available memory card capacity of the destination.
t
The copy is not possible when the copy destination memory card is write protected.
t
The copy is not possible when it will exceed the maximum number of clips.
t
The P2 clip exceeding 4 GB cannot be copied to a memory card of 32 GB or less.
t
The P2 clip recorded over multiple memory cards cannot be copied to a same memory card.
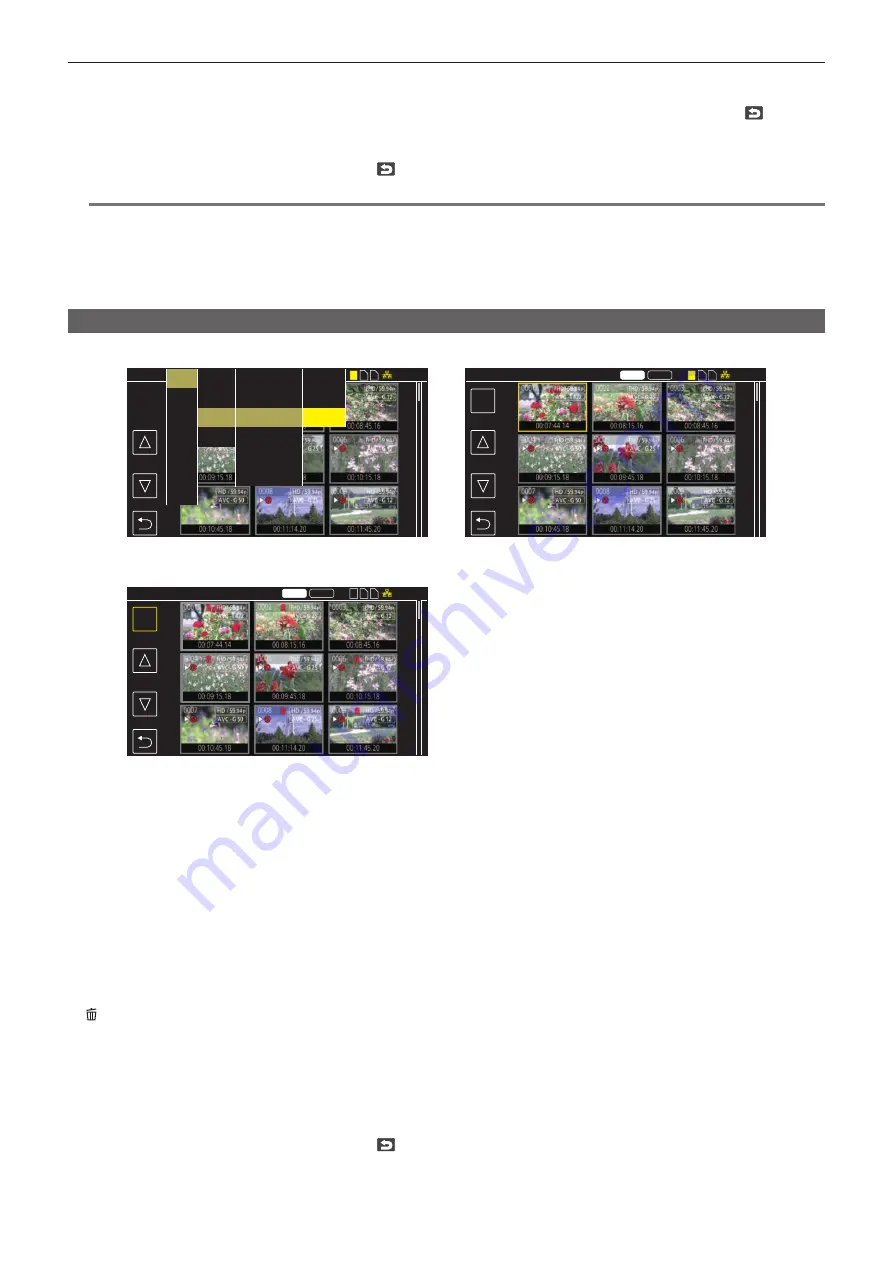
Deleting clips
Deletes the clip.
DEL
DEL
MOV
14.6V
14.6V
14.6V
1
2 3
1
2 3
1 2 3
P2
MOV
P2
MOV
ALL SLOT
OTHERS
ALL SLOT
DELETE
ALL SLOT
DELETE
Fig. 1
Fig. 2
Fig. 3
AUDIO
VIDEO OUT/LCD/VF
RECORDING
NETWORK
SYSTEM
OTHERS
THUMBNAIL
COPY
CLIP
DISPLAY
PLAYBACK
EXIT
COPY
REPAIR
INFORMATION
DELETE
PROTECT
EXIT
ALL
SELECT
EXIT
1
Press the <THUMBNAIL> button.
The thumbnail screen is displayed.
2
Press the <MENU> button while the thumbnail screen is displayed.
The menu is displayed.
3
Select the [THUMBNAIL] menu
→
[CLIP]
→
[DELETE].
4
Select [SELECT]. (Fig. 1)
The thumbnail screen is displayed. (Fig. 2)
f
When [ALL] is selected, all the clips displayed in the thumbnail screen are deleted.
The clip that is not displayed in the thumbnail screen is not deleted.
5
Select the clip to delete in the thumbnail screen.
is displayed on the selected clip.
6
Select [DEL]. (Fig. 3)
f
This can also be selected by pressing and holding the jog dial button.
7
When the confirmation message is displayed, select [SET].
Progress bar is displayed, and the deleting of the clip starts.
f
To cancel midway, select [CANCEL].
8
When the completion message is displayed, select
.
Содержание AJ-CX4000
Страница 12: ...Before using the camera read this chapter Chapter 1 Overview ...
Страница 179: ...This chapter describes about the output image Chapter 7 Output ...
Страница 187: ...This chapter describes how to use the camera by connecting to a network Chapter 9 Network Connection ...
Страница 204: ...Maintenance of the camera and error message are described Chapter 10 Maintenance ...
Страница 212: ...This chapter describes the dimensions specifications and connector signals Chapter 11 Specification ...
Страница 223: ...Web Site https www panasonic com Panasonic Corporation 2019 ...


