


- 20 -
2. Setting Up
5
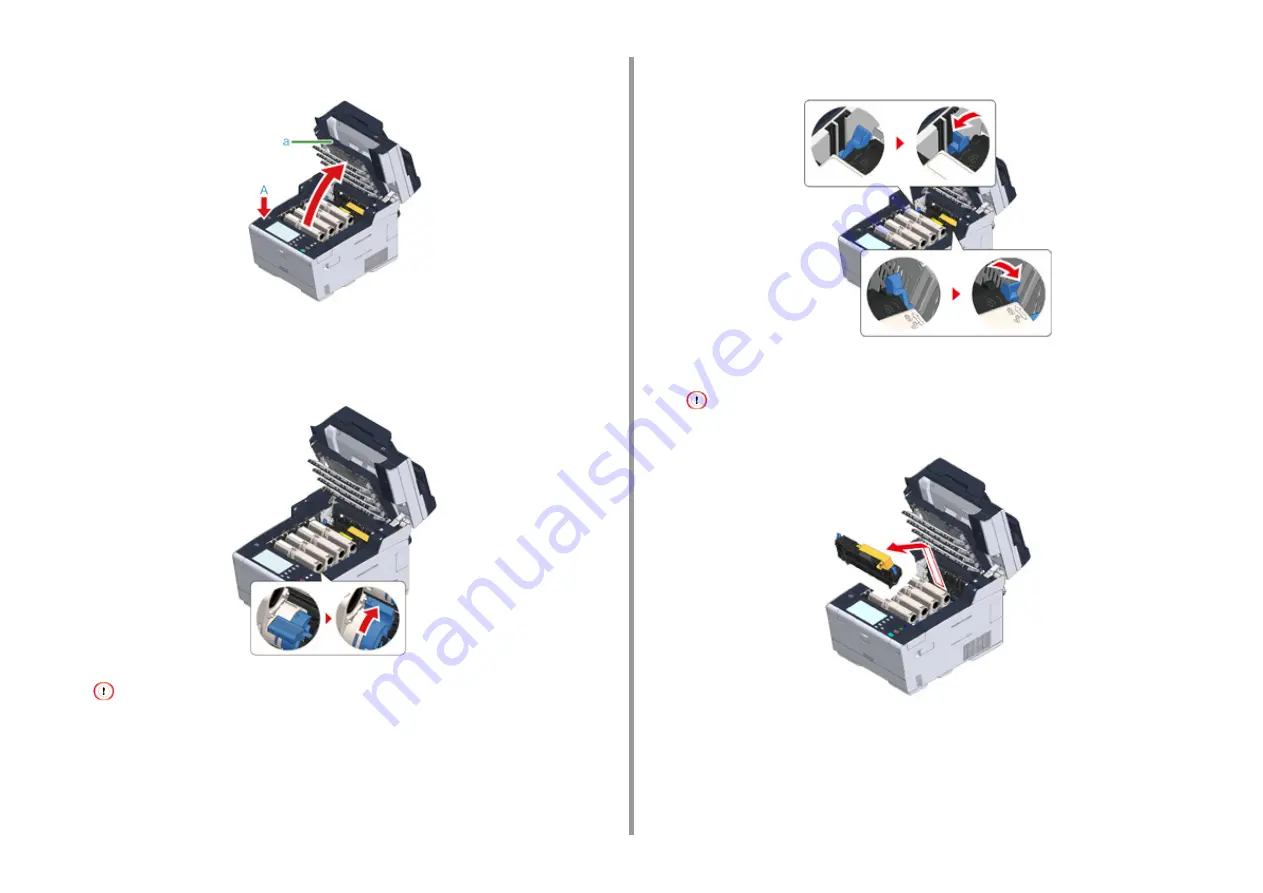
Press the button (A) and open the output tray (a) until it stops.
6
Pinch the tip of blue lever of the toner cartridge and turn forward until the tip
aligns on the lug of the cartridge.
Turn the levers of all 4 toner cartridges.
If you close the output tray without turning the blue lever, it may cause a malfunction. Be sure to turn the blue
lever until its top aligns on the lug in the back of the toner cartridge.
7
Pull the locking levers on the fuser unit toward you to unlock.
8
Hold the fuser unit handle and lift the fuser unit out of the machine.
While removing the fuser unit, be careful not to hit it to the LED head.
Содержание MC573dn
Страница 1: ...MC573 ES5473 MFP User s Manual...
Страница 12: ...12 1 Before starting ENVIRONMENTAL INFORMATION...
Страница 17: ...17 2 Setting Up Side view when the additional tray unit is installed...
Страница 22: ...22 2 Setting Up 13 Hold the handle B to close the scanner unit...
Страница 35: ...35 2 Setting Up 1 Plug the power cord into the power connector 2 Plug the power cord into the outlet...
Страница 41: ...41 2 Setting Up 7 Replace the paper cassette into the machine Push the paper cassette until it stops...
Страница 80: ...80 2 Setting Up 10 Click Complete 11 Click Next If the following dialog is displayed click Yes...
Страница 108: ...4 Copy Copying Cancelling Copying Specifying the Number of Copies Descriptions of Screens for Copy...
Страница 132: ...132 6 Print 5 Change the settings in each tab to suit your needs 6 Click OK 7 Click Print on the Print screen...
Страница 145: ...7 Fax Basic Operations of Fax Functions Setting for Receptions Descriptions of Screens for Fax...
Страница 148: ...148 7 Fax A fax that is being sent is displayed on the top of the list 5 Press Yes on a confirmation screen...
Страница 227: ...46472402EE Rev5...


