Media types, material and sizes on the printer
Introduction
One of the features of the Océ PlotWave 900 printer is the automatic media change
function. This function enables the printer to switch to another roll of the same media
when there is not enough media on the current roll to finish the print run. Specify media
type and the media size after you load media, as described in
‘Replace/Load a roll of media’
. The Océ PlotWave 900 supports both DIN and ANSI media formats. See
‘Preferred Océ media types and sizes’
for an overview of all materials that can
be used on the Océ PlotWave 900 printer.
Set media type
1.
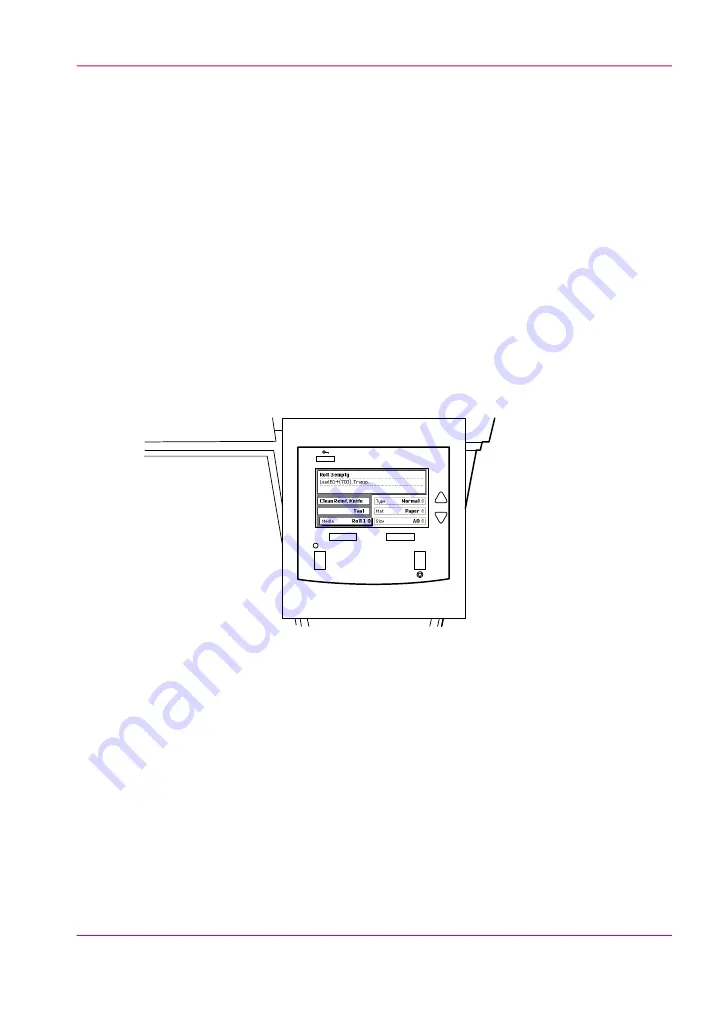
Press the “Online” key on the printer operator panel to put the printer offline. The message
“Offline” is displayed in the status window. The focus shifts to the Media option (indi-
cated by the shadow effect).
Ready to print
[18] The printer operator panel in offline mode
2.
Use the arrow keys to select the roll for which you have just loaded new media.
3.
Press the right selection key to activate the ‘Type’ option. The dotted line around the
current selection changes into a solid line and the small selection triangles next to the
specified material are no longer dimmed.
4.
Use the arrow keys to select the type you just loaded.
5.
Press the “Online” key to put the printer online again. The printer now knows which
type is used for the specified roll.
Set media material
1.
Press the “Online” key on the printer operator panel to put the printer offline. The message
“Offline” is displayed in the status window.
Chapter 2 - Get to know the Océ PlotWave 900 system
37
Media types, material and sizes on the printer
Содержание PlotWave 900
Страница 1: ...o Oc PlotWave 900 Serious Power User manual Operating information...
Страница 11: ...Chapter 1 Introduction...
Страница 28: ...Chapter 1 Introduction 28 Working area...
Страница 29: ...Chapter 2 Get to know the Oc Plot Wave 900 system...
Страница 44: ...Chapter 2 Get to know the Oc PlotWave 900 system 44 Online Offline button...
Страница 45: ...Chapter 3 Define your workflow with Oc Express WebTools...
Страница 128: ...Chapter 3 Define your workflow with Oc Express WebTools 128 Delete a Smart Inbox...
Страница 129: ...Chapter 4 Use the Oc PlotWave 900 to print...
Страница 142: ...Chapter 4 Use the Oc PlotWave 900 to print 142 Print a job from the Smart Inbox...
Страница 143: ...Chapter 5 Use the Oc PlotWave 900 scanner to copy...
Страница 169: ...Chapter 6 Use the Oc TDS600 scanner to copy...
Страница 197: ...Chapter 7 Use Oc Mobile Printing and Scanning...
Страница 210: ...Chapter 7 Use Oc Mobile Printing and Scanning 210 Save a scanned document on your mobile device...
Страница 211: ...Chapter 8 Special copy and scan jobs...
Страница 238: ...Note You can use horizontal and vertical shift at the same time Chapter 8 Special copy and scan jobs 238 Shift the image...
Страница 241: ...Chapter 9 The Folder Reinforcement unit and Belt unit...
Страница 255: ...Chapter 10 Oc Double Decker Pro...
Страница 262: ...Chapter 10 Oc Double Decker Pro 262 How to set the media separation method...
Страница 263: ...Chapter 11 System maintenance...
Страница 291: ...Chapter 12 Solve problems...
Страница 328: ...Chapter 12 Solve problems 328 Other problems...
Страница 329: ...Chapter 13 Support...
Страница 335: ...Chapter 14 License management...
Страница 347: ...Chapter 15 Account management...
Страница 356: ...Chapter 15 Account management 356 Enable account management in the Oc Express WebTools...
Страница 357: ...Chapter 16 Software options...
Страница 359: ...Chapter 17 Network and Security set tings...
Страница 361: ...Appendix A System specifications...
Страница 379: ...Appendix B Reader s comment sheet...
Страница 393: ...Working area printing system 27 Z Zoom Setting 162 Zoom factor Zoom factor 185 393 Index...
Страница 394: ...2...
Страница 395: ...2...


