111
How to Load Media
A: Load Media Roll On a Media Shaft And Install the Shaft in the Supply Position
1.
Place an empty media shaft on a suitable flat work area, positioned as shown, so that
the hex key is inserted on the right side of the shaft to lock and unlock the core locks.
[58]
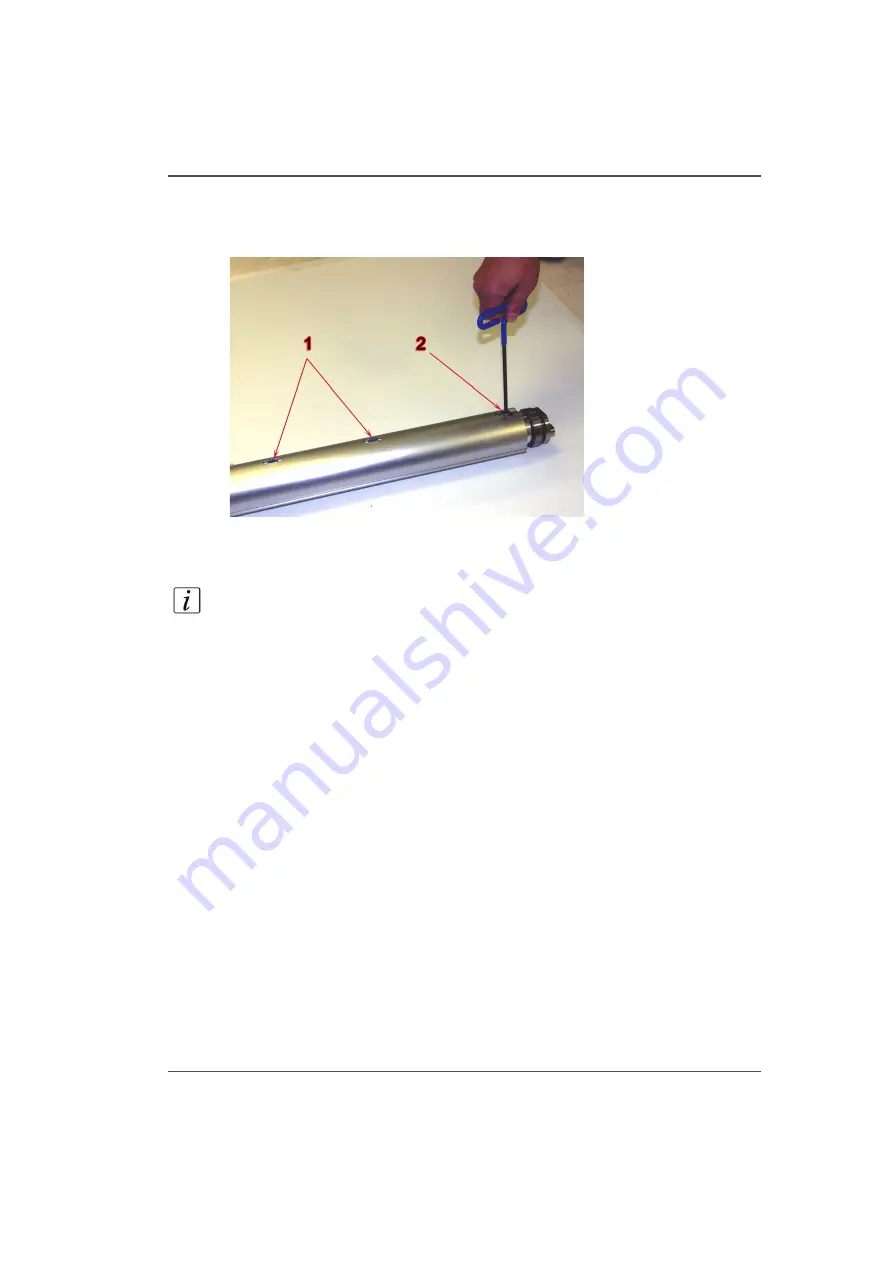
[58] Unlock the Media Shaft Core Locks
2.
Unlock the media shaft core locks (1) with the supplied 5mm hex key (2).
3.
Slide a new roll of media onto the supply shaft.
Note:
The default thread path for the supply media is referred to as "Print side out"
when the media unrolls from the bottom of the shaft towards the printer (see section
C "Thread the Media"). If you need to print with the "Print side in", you must
position the media so that it unrolls from the top of the shaft and also make sure the
correct icon is selected in the Roll Media Manager menu.
4.
Roughly center the roll and then insert the shaft into the Supply (bottom) position on
the printer.
5.
Accurately center the media using the supplied ruler. Media should be centered
within 1mm on the ruler.
6.
Lock the supply media shaft core locks with the 5mm hex key.
B: Load an Empty Core On a Media Shaft and Install the Shaft in the Take-up
Position
1.
Place the empty take-up media shaft on a suitable work surface and unlock the media
shaft locks with the 5mm hex key.
2.
Slide an empty media core that is at least as long as the supply media width onto the
take-up shaft.
3.
Roughly center the core and then insert the shaft into the Take-up (top) position on
the RMO unit.
4.
Center the core using the supplied ruler so that the take-up media can be aligned to
the supply media roll when it is later threaded.
5.
Lock the take-up media shaft core locks with a 5 mm hex key.
Содержание Arizona 250 GT
Страница 1: ...Arizona 250 GT Oc User manual User Manual Revision D...
Страница 6: ...6 Table of Contents...
Страница 7: ...7 Chapter 1 Introduction...
Страница 16: ...16 Chapter 1 Introduction Product Compliance...
Страница 17: ...17 Chapter 2 Product Overview...
Страница 21: ...21 Chapter 3 Safety Information...
Страница 45: ...45 Chapter 4 How to Navigate the User Interface...
Страница 47: ...47 Operator Interface Hardware Illustration 33 33 Vacuum System Hardware 34 34 Carriage Area Hardware...
Страница 51: ...51 Operator Interface Hardware Thermal fluid heater Purge pump Purge valve Printheads jetting...
Страница 70: ...70 Chapter 4 How to Navigate the User Interface Installation and Upgrade Module...
Страница 71: ...71 Chapter 5 How to Operate the Arizona 250 GT...
Страница 96: ...96 Chapter 5 How to Operate the Arizona 250 GT Underlay Board to Reduce Artifacts...
Страница 97: ...97 Chapter 6 How to Operate the Roll Media Option...
Страница 122: ...122 Chapter 6 How to Operate the Roll Media Option How to Determine Media Advance Correction...
Страница 123: ...123 Chapter 7 How to Use the Static Suppression Upgrade Kit...
Страница 127: ...127 Chapter 8 Ink System Management...
Страница 134: ...134 Chapter 8 Ink System Management How to Change Ink Bags...
Страница 135: ...135 Chapter 9 Error Handling and Troubleshooting...
Страница 139: ...139 Chapter 10 Printer Maintenance...
Страница 172: ...172 Chapter 10 Printer Maintenance How to Clean the Rubber Capstan...
Страница 173: ...173 Appendix A Application Information...
Страница 176: ...176 Appendix A Application Information Application Resources on the Web Site...


