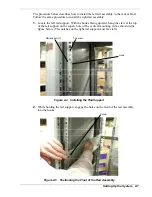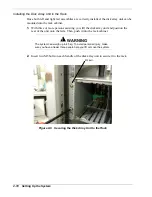
3.
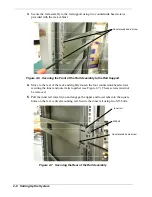
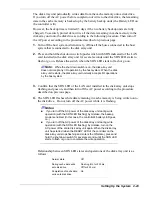
Secure the rail assembly to the rail support using two countersunk head screws
provided with the rack cabinet.
Countersunk head screw
Figure 2-6 Securing the Front of the Rail Assembly to the Rail Support
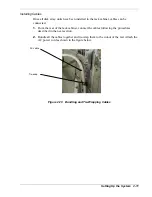
4.
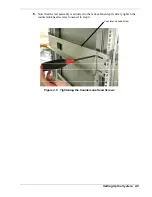
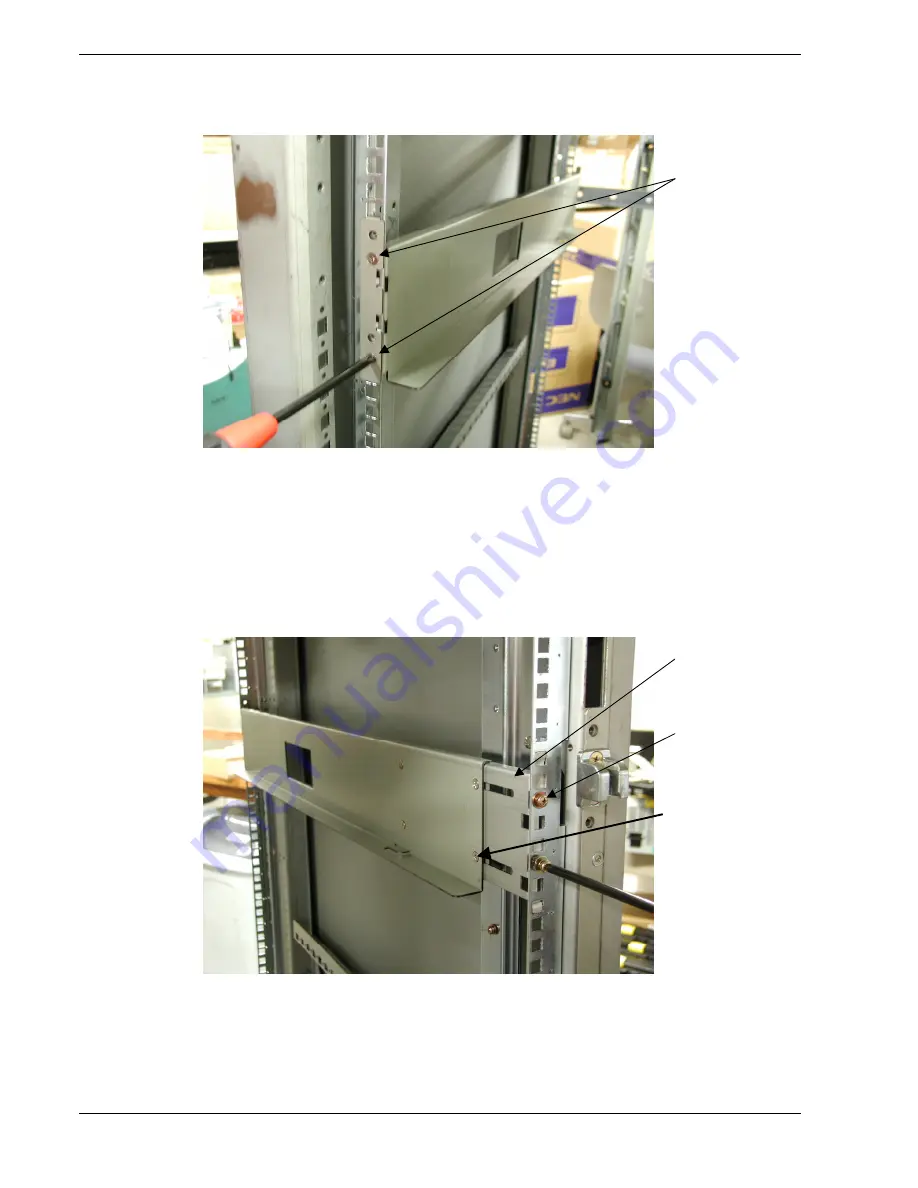
Move to the rear of the rack and slightly loosen the four countersunk head screws
securing the inner and outer rails together (see Figure 2-7). These screws must not
be removed.
5.
Pull the inner rail toward you and engage the upper and lower tabs into the square
holes on the rear vertical mounting rail. Secure the inner rail using two M5 bolts.
Inner rail
M5 bolt
Countersunk head screw
Figure 2-7 Securing the Rear of the Rail Assembly
2-8 Setting Up the System
Содержание VERSA S1300 Series
Страница 1: ... U s e r s G u i d e NEC Storage S1300 ...
Страница 2: ......
Страница 4: ......
Страница 8: ...vi Contents ...
Страница 18: ...xvi Using This Guide ...
Страница 19: ...1 System Overview Overview System Chassis System Features ...
Страница 54: ...A B Figure 2 3 Installing the Rack Mounting Kit 2 6 Setting Up the System ...
Страница 73: ...3 Upgrading the System Overview Adding Hard Disk Drives Adding Disk Enclosures ...
Страница 86: ...3 14 Upgrading the System ...
Страница 107: ...A Appendix Technical Specifications Creating a Logical Disk How to Change the Topology and Data Transfer Rate ...
Страница 114: ...A 8 Appendix ...
Страница 117: ...xx ...
Страница 118: ... ...

