5.
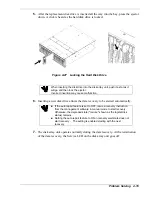
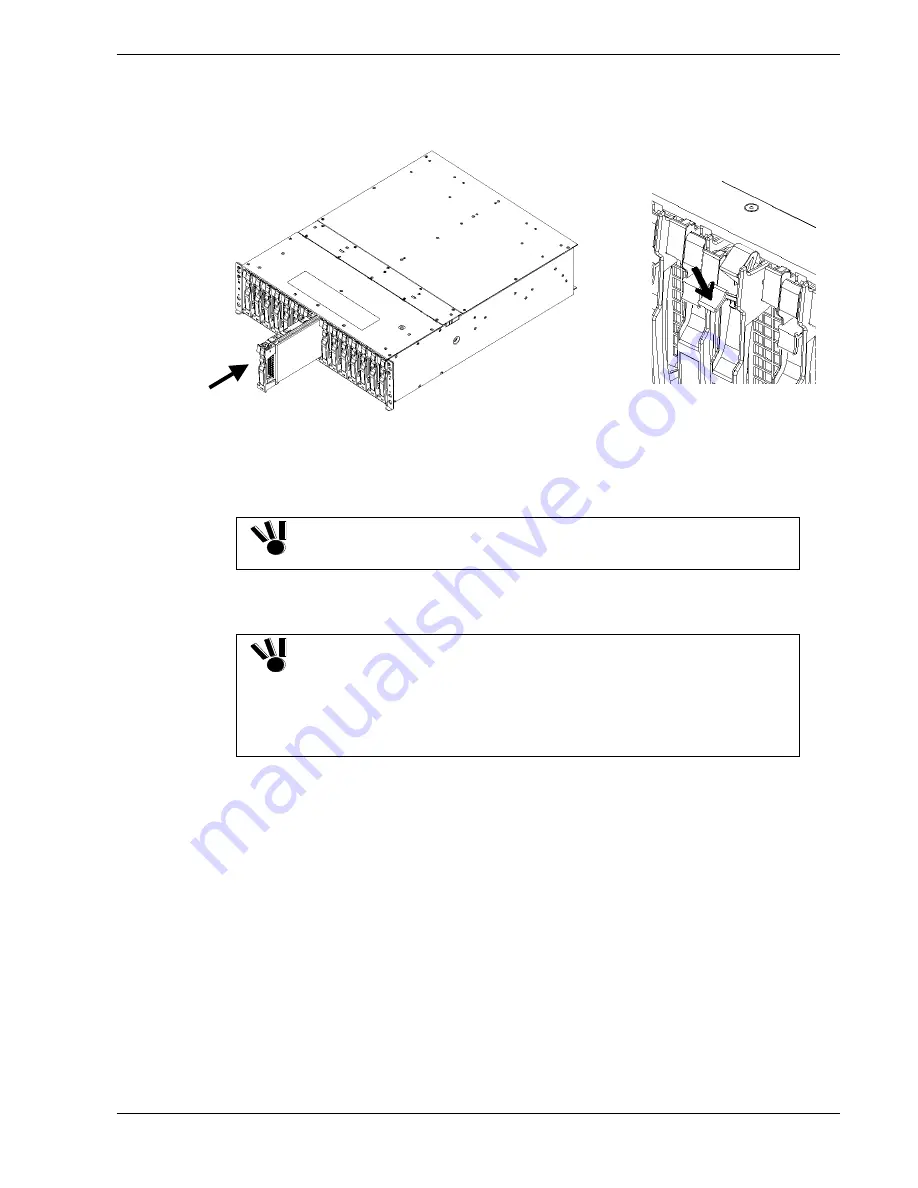
After the replacement disk drive is inserted all the way into the bay, press the ejector
down. A click is heard as the hard disk drive is locked.
Figure 4-27 Locking the Hard Disk Drive
When inserting the disk drive into the disk array unit, push it as far as it
will go and then lock the ejector.
Incorrect insertion may cause malfunction.
6.
Inserting a new disk drive allows the data recovery to be started automatically.
If the auto repair feature is set to OFF, issue a recovery instruction
from the management software in manual mode to start recovery.
Otherwise, the degraded state ("reduce" shown as the logical disk
status) remains.
Setting the auto repair feature to ON in recovery wait state does not
start recovery. The setting is enabled starting with the next
recovery.
7.
The disk array unit operates normally during the data recovery. At the termination
of the data recovery, the Service LED on the disk array unit goes off.
Problem Solving 4-19
Содержание VERSA S1300 Series
Страница 1: ... U s e r s G u i d e NEC Storage S1300 ...
Страница 2: ......
Страница 4: ......
Страница 8: ...vi Contents ...
Страница 18: ...xvi Using This Guide ...
Страница 19: ...1 System Overview Overview System Chassis System Features ...
Страница 54: ...A B Figure 2 3 Installing the Rack Mounting Kit 2 6 Setting Up the System ...
Страница 73: ...3 Upgrading the System Overview Adding Hard Disk Drives Adding Disk Enclosures ...
Страница 86: ...3 14 Upgrading the System ...
Страница 107: ...A Appendix Technical Specifications Creating a Logical Disk How to Change the Topology and Data Transfer Rate ...
Страница 114: ...A 8 Appendix ...
Страница 117: ...xx ...
Страница 118: ... ...

