System Power
Your disk array unit is equipped with 2 hot-swappable power supplies providing
redundancy: if one supply fails, the other one takes over. The power supplies can be
easily installed or removed from the unit without turning system power off.
A
B
F
D
C
E
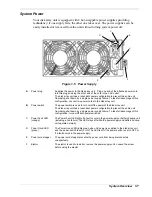
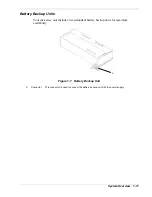
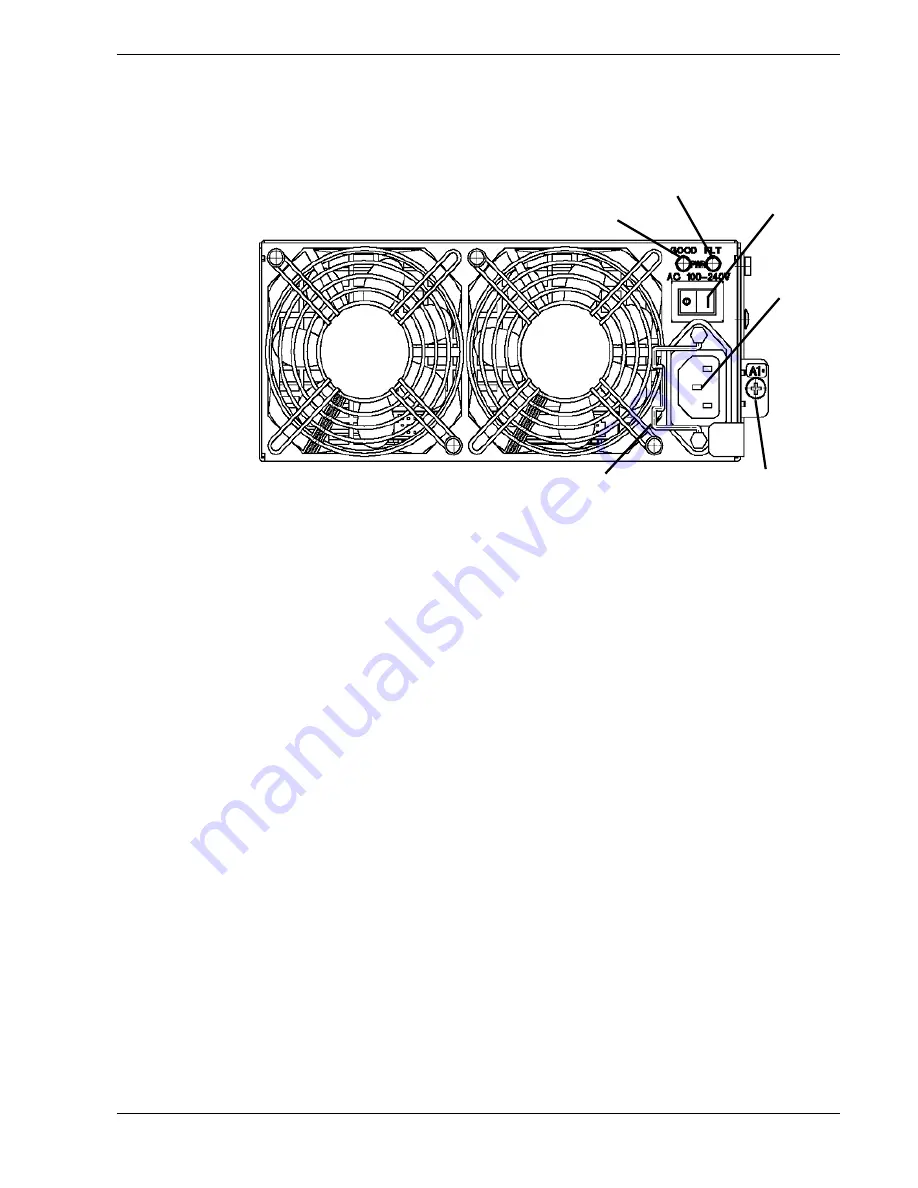
Figure 1-5 Power Supply
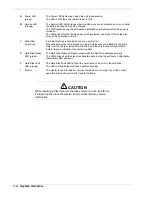
A
Power plug
Supplies the power to the disk array unit. Plug one end of the attached power cord
into this plug and plug the other end of the cord into an AC outlet.
The disk array unit has a redundant power configuration to prevent the entire unit
from being shut down by a single power supply failure. To take full advantage of this
configuration, connect two power cords to the disk array unit.
B
Power switch
The power switch is used to turn on/off the power of the disk array unit.
The disk array unit has a redundant power configuration to prevent the entire unit
from being shut down by a single power supply failure. To take full advantage of this
configuration, turn on/off both power switches.
C
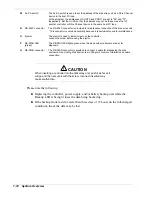
Power Fault LED
(orange)
The Power Fault LED lights if a fault occurs in the power supply or battery backup unit
(including a fan failure). The LED stays off while the power supply and battery backup
unit operate normally.
D
Power Good LED
(green)
The Power Good LED lights green when AC power is supplied to the disk array unit
and the power switch is set to ON. The LED is off if the power switch is set to OFF or
if a fault occurs in the power supply.
E
Power cord stopper
The power cord stopper prevents the power cord from being disconnected
unexpectedly.
F
Ejector
The ejector is used to install or remove the power supply unit. Loosen the screw
before using the ejector.
System Overview 1-7
Содержание VERSA S1300 Series
Страница 1: ... U s e r s G u i d e NEC Storage S1300 ...
Страница 2: ......
Страница 4: ......
Страница 8: ...vi Contents ...
Страница 18: ...xvi Using This Guide ...
Страница 19: ...1 System Overview Overview System Chassis System Features ...
Страница 54: ...A B Figure 2 3 Installing the Rack Mounting Kit 2 6 Setting Up the System ...
Страница 73: ...3 Upgrading the System Overview Adding Hard Disk Drives Adding Disk Enclosures ...
Страница 86: ...3 14 Upgrading the System ...
Страница 107: ...A Appendix Technical Specifications Creating a Logical Disk How to Change the Topology and Data Transfer Rate ...
Страница 114: ...A 8 Appendix ...
Страница 117: ...xx ...
Страница 118: ... ...

