Disassembly and Reassembly 3-41
!
CAUTION
To prevent damage to the latch, align the system board with
the outside edge of the chassis before closing the latch.
4.
Push the latch closed. This slides the board the rest of the way into the
system unit and secures it into the connector on the riser board.
!
CAUTION
If the board does not slide when you push the latch, slide the
board out of the unit a bit and check the alignment position
(see the previous figures). Push the latch closed.
If the system board is aligned correctly, you might need to push the outside
edges of the board to fully seat it into the connector on the riser board.
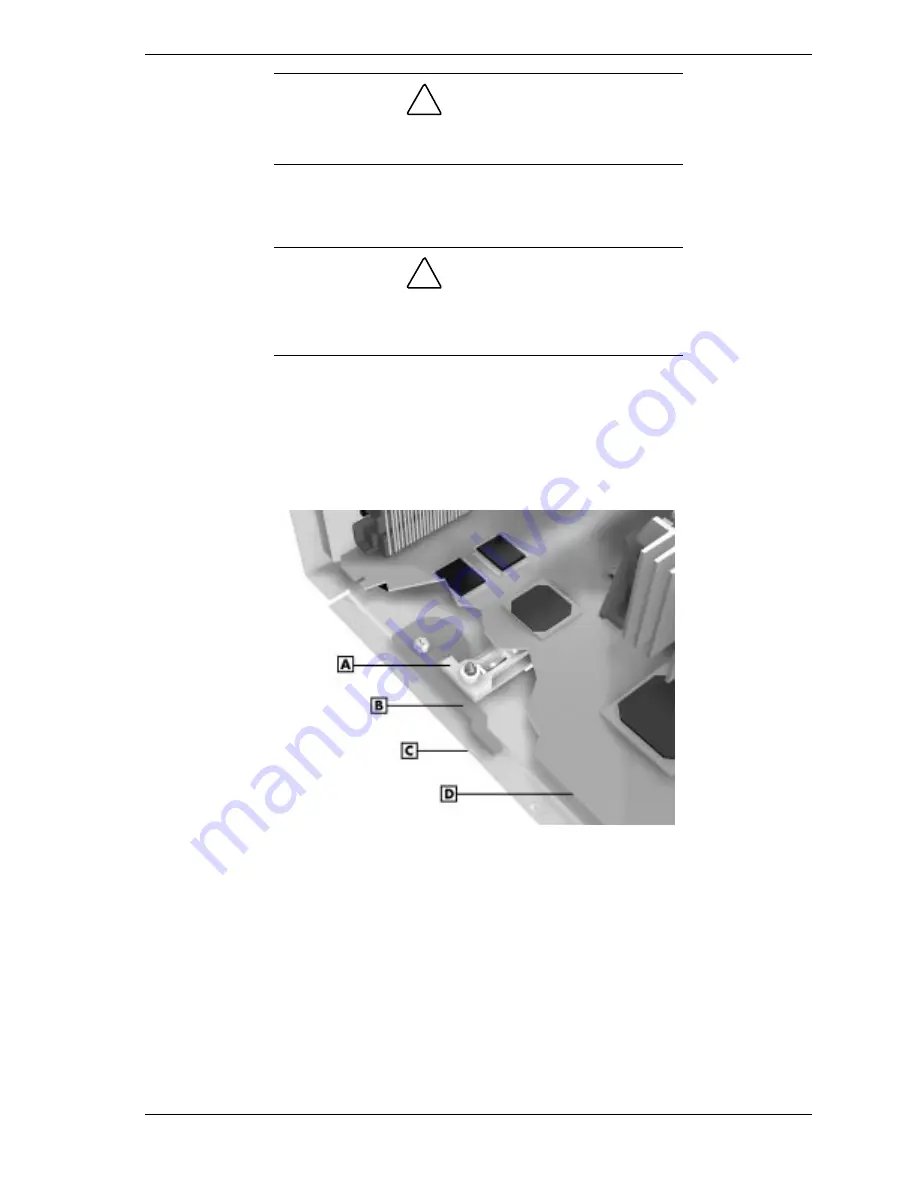
Check the position of the chassis latch. The system board is secured when
the latch is parallel with the outside edge of the board.
Secured Position of Latch — Small Desktop
A – Rail
C – Edge of Chassis
B – Latch Closed
D – Edge of System Board
5.
Replace the cover (see “Replacing the Small Desktop or Desktop Cover”).
Removing the System Board — Desktop
Use this procedure to remove the system board from a desktop system.
1.
Remove the system unit cover (see “Removing the Small Desktop or
Desktop Cover”).
2.
Locate the left side bracket (see the figure on the following page).
Содержание POWERMATE ES 5200 - SERVICE
Страница 18: ...1 System Overview Configurations Features Components ...
Страница 168: ...4 System Board Connectors Jumpers and Sockets Components Resources ...
Страница 204: ...5 Riser Board Riser Board Connectors Small Desktop Riser Board Connectors Desktop Riser Board Connectors Minitower ...
Страница 222: ...7 Preventive Maintenance System Cleaning Keyboard Cleaning Mouse Cleaning ...
Страница 226: ...8 Troubleshooting Checklist Diagnostics ...
Страница 237: ...9 NEC CSD Information Services Service Telephone Numbers Technical Support Product Information ...
Страница 300: ...Regulatory Statements FCC Statement Note for Canada Battery Replacement Battery Disposal ...


