


XMS Configuration Guide
5-3
Verifying the XMS’s Database Settings
4.
Verify that the
S
ERVER
N
AME
and the
D
ATABASE
NAME
fields are accurate on the
Xmedia Server Control Panel’s
Database
settings page.
The server and database names can be obtained by opening the
SQL S
ERVER
M
ANAGEMENT
S
TUDIO
.
a.
Open the
SQL S
ERVER
M
ANAGEMENT
S
TUDIO
by selecting
S
TART
> P
ROGRAMS
>
M
ICROSOFT
SQL S
ERVER
2008 R2>SQL S
ERVER
M
ANAGEMENT
S
TUDIO
.
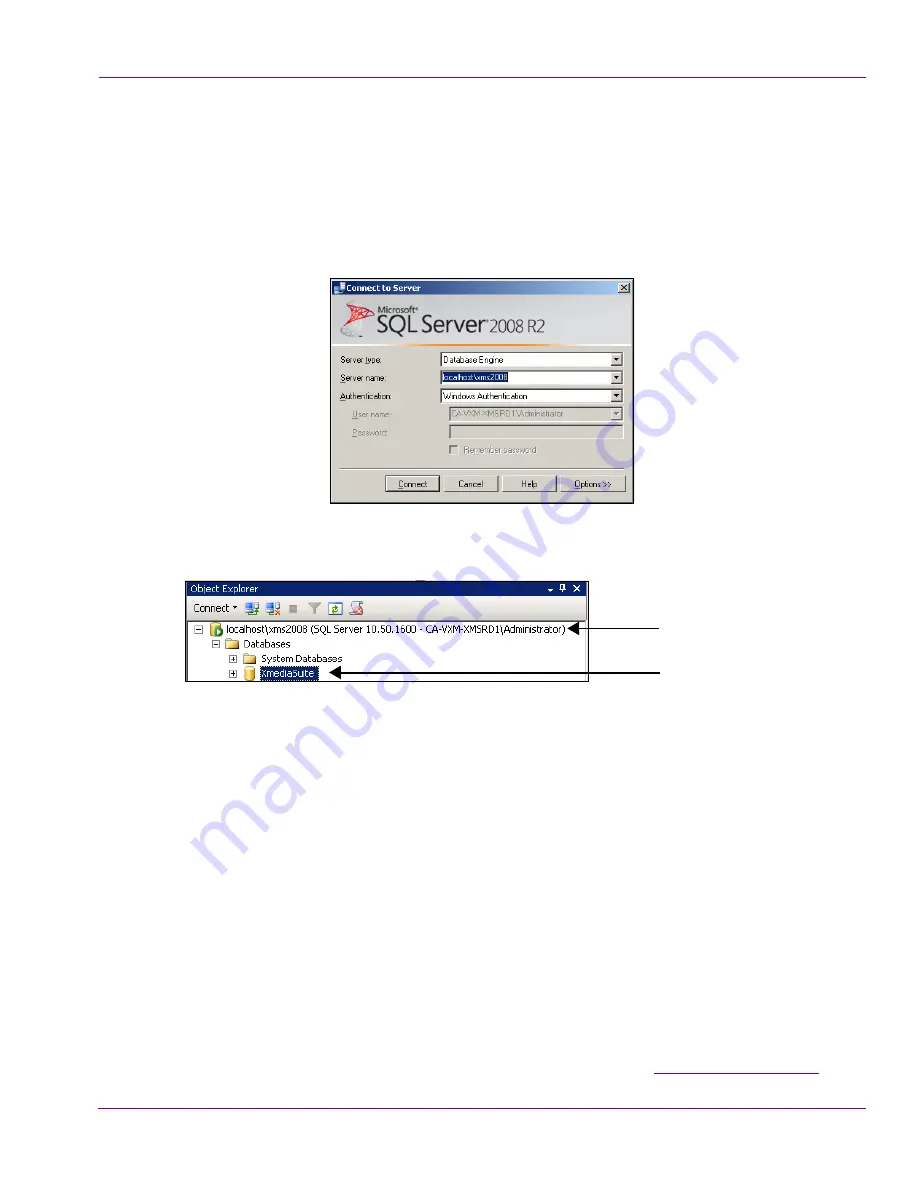
b.
Click
C
ONNECT
in the
C
ONNECT
TO
S
ERVER
window.
c.
In the
Object Explorer
panel of the
Microsoft SQL Server Management Studio
window, expand the
D
ATABASES
folder to display the name of the database.
d.
Verify that the server name and database name match those specified on the
Xmedia Server Control Panel’s
Database
settings page.
5.
Verify that the
U
SER
NAME
and
P
ASSWORD
fields are accurate.
The
U
SER
NAME
and
P
ASSWORD
provides a security measure to ensure that only the
qualified user (i.e. the system administrator) has permission to connect, write, and read
to the database.
By default these fields are both set to
sa
. Contact your system administrator if the
U
SER
N
AME
or
P
ASSWORD
appear to be different than the default.
6.
Verify that
C
ONNECTION
P
OOLING
is enabled and set to
10
.
When this setting is enabled, the value specified establishes the number of
connections in the connection pool. Having a connection pool helps the Xmedia Server
service its clients in a timely fashion. When this setting is disabled, it will not use a
connection pool to the database and it will have only a single connection.
7.
Click the
T
EST
C
ONNECTION
button to verify the validity of the settings and the
connection to the database.
If the
T
EST
DATABASE
CONNECTION
pop-up window again reports a failed connection,
contact Miranda’s Technical Support department for assistance (
).
Server name
Database name