


28
MaxPac Dual/Triple-Screen 8230 XRA2/3-Series User Operation and Maintenance Guide
4) Remove the failed drive and replace it with a good drive of the same type and capacity
(remember that we only removed the drive above in order to simulate a catastrophic failure
scenario).
5) Power the system up again all the way into windows.
6) Double-click
the
Connect to 3DM 2
icon on your desktop and login to the ensuing webpage
using your administrator password (note that you may need to contact your IT department in
order to obtain this password).
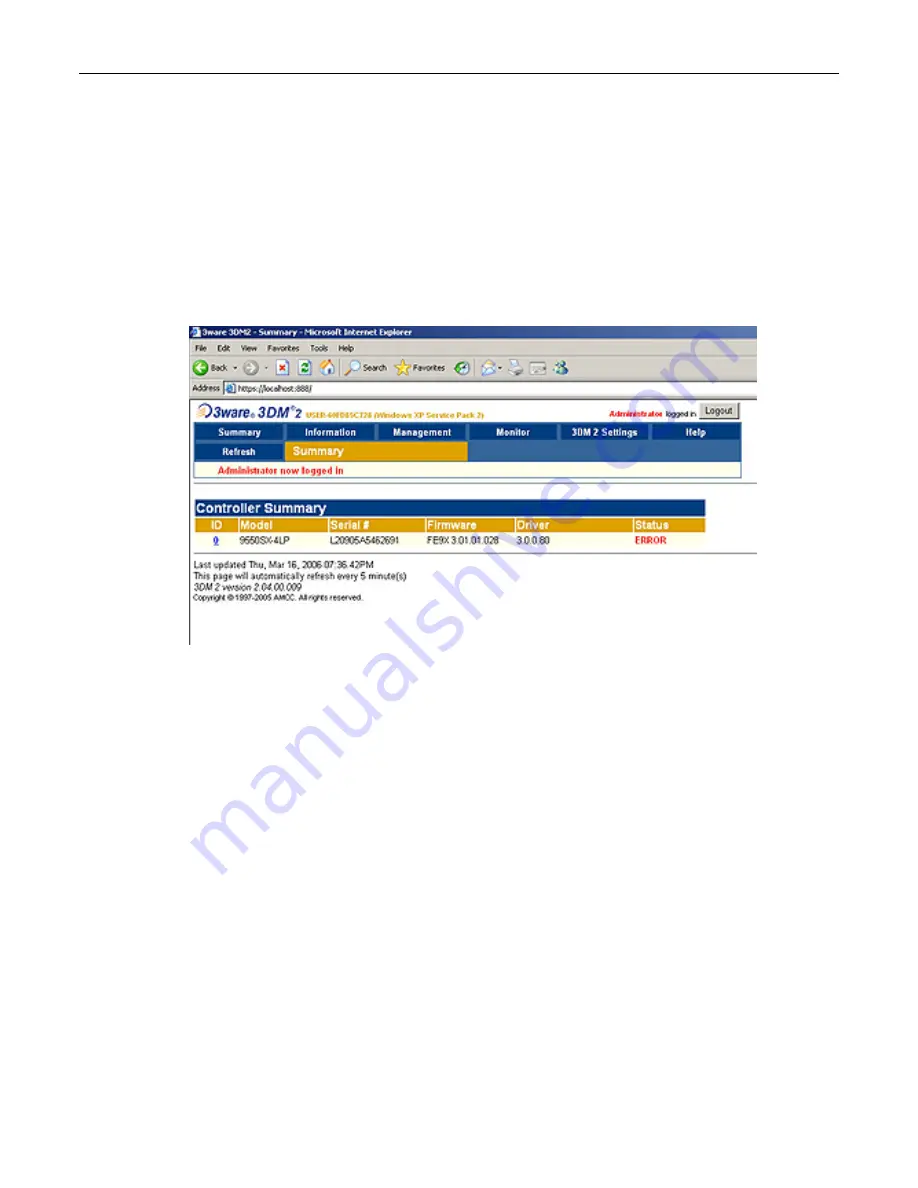
7) After you have logged in as the administrator, you will see a status of ERROR in the 3DM 2
interface (Figure 2-38).
Figure 2-38.
8) Observe that the system reports the two good drives as being in a DEGRADED unit as shown
in Figure 2-39.
9) Depending on the past history of the disk (whether or not it was previously part of a 3ware RAID
array) the system may report that the new disk is INOPERABLE as illustrated in Figure 2-39.
Alternatively, the system may report the new disk as being AVAILABLE as illustrated in Figure 2-40.
Assuming that the new disk is reported as being INOPERABLE, click the checkbox associated with
that unit (
Unit 1
in this example) and then click the
Delete Unit
button. Observe that the system will
present you with a confirmation dialog as shown in Figure 3-39. Click the OK button, and observe
that the new disk is now reported as being AVAILABLE as illustrated in Figure 2-40.
10) Click the checkbox associated with the two good drives (shown as
Unit 0
in this example) and also
click the checkbox associated the new replacement drive (shown as
Port 1
in this example) and
then click the
Rebuild Unit
button associated with the two good drives as illustrated in Figure 2-41.
11) Observe the ensuing pop-up dialog box as shown in Figure 2-42. Click the checkbox associated
with the new drive, and then click the
OK
button.
Содержание 8230 XRA2 series
Страница 6: ......
Страница 35: ...MaxPac Dual Triple Screen 8230 XRA2 3 Series User Operation and Maintenance Guide 29 Figure 2 39 Figure 2 40...
Страница 36: ...30 MaxPac Dual Triple Screen 8230 XRA2 3 Series User Operation and Maintenance Guide Figure 2 41 Figure 2 42...
Страница 90: ...84 MaxPac Dual Triple Screen 8230 XRA2 3 Series User Operation and Maintenance Guide Figure A 39 Figure A 40...


