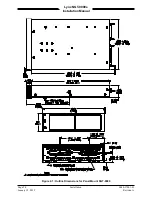
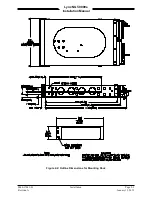
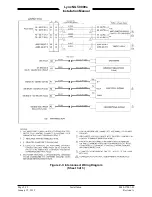
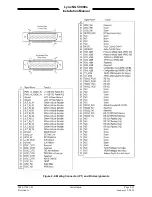


Lynx NGT-9000s
Installation Manual
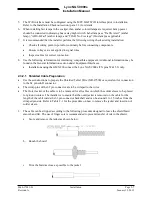
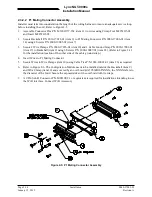
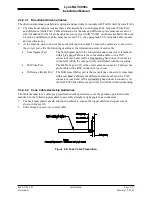
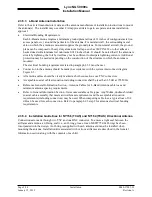
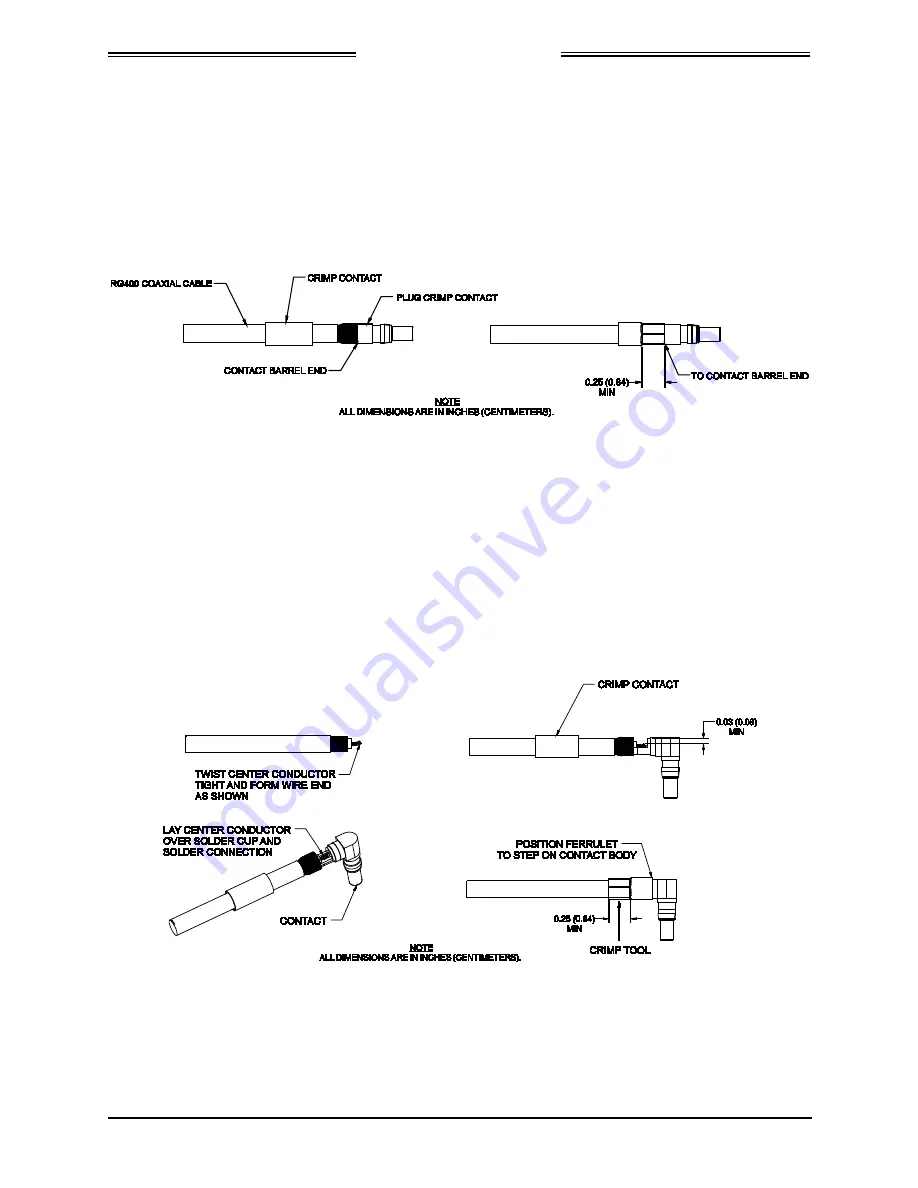
2.3.2.3.3 Straight Coax Contact Assembly
Refer to Figure 2-9 for the following instructions.
1.
Slide Plug Crimp Contact (item 23 of install kit) over inner insulator. The copper shield must be over
the Contact sleeve.
2.
Slide Crimp Contact to contact barrel end of Plug Crimp Contact.
3.
Use Crimp Hand Tool P/N M22520/5-01 and Insert P/N M22520/5-05 to crimp Contact.
Figure 2-9: Straight Coax Contact Shield Termination
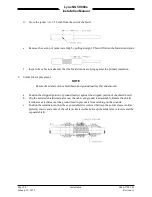
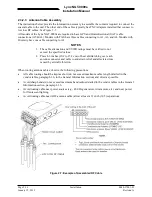
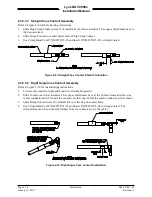
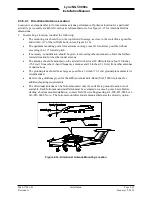
2.3.2.3.4 Right Angle Coax Contact Assembly
Refer to Figure 2-10 for the following instructions.
1.
Twist center conductor tight and bend wire end slight upwards.
2.
Slide Contact over inner insulator. The copper shield must be over the Contact sleeve and the coax
center conductor must be inside the connector solder cup. Solder the center conductor to the contact.
3.
Slide Crimp Contact (item 18 of install kit) over the step on contact body.
4.
Use Crimp Hand Tool P/N M22520/5-01 and Insert P/N M22520/5-05 to crimp Contact. The
crimped area must be on the side furthest from the connector (over the cable).
Figure 2-10: Right Angle Coax Contact Installation
Page 2-18
Installation
0040-17001-01
January 15, 2015
Revision A


