


Lynx NGT-9000
Installation Manual
3.8 CALIBRATION SETUP
This procedure is used to calibrate the unit and must be completed prior to performing the Installation
Checkout for first time installations. The Log Sheet provided in Appendix C should be filled out during
this procedure and maintained with the aircrafts permanent records.
These procedures assume the following:
•
Power is being supplied to the aircraft and the unit.
•
The Lynx MAT is active on the MPC.
•
The MPC is connected to the unit via the USB interface
•
The MPC and unit are communicating.
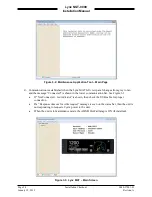
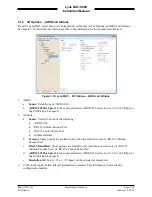
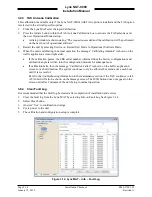
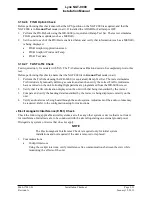
3.8.1 Audio Calibration and Test
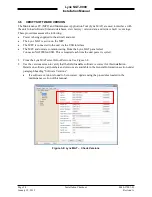
1.
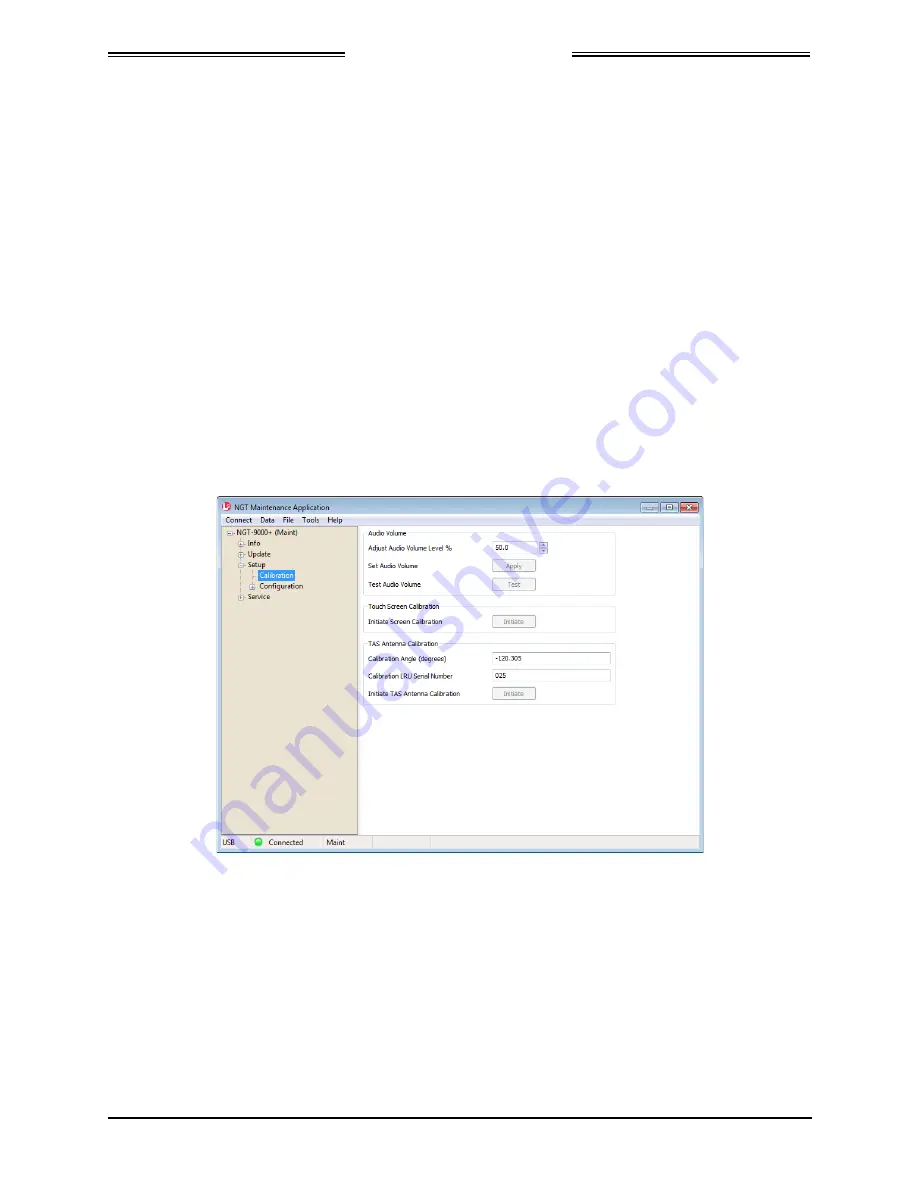
From the Lynx MAT select Setup
Z
Calibration. See Figure 3-13.
2.
Set the Audio Volume Level % and click on the Apply button.
3.
Click “Test” to listen to the audio level selected.
4.
Repeat step 2 and 3 until audio volume is set to the level desired.
•
The audio test may need evaluation with both low and high cockpit noise present.
Figure 3-13: Lynx MAT – Setup - Calibration
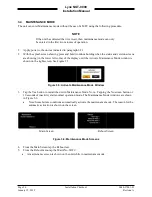
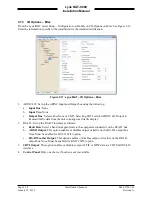
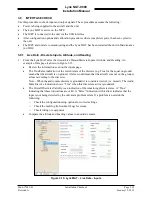
3.8.2 Screen Calibration
When performing this calibration the user must be as accurate as possible. For best results a stylus is
recommended.
1.
From the Lynx MAT select Setup
Z
Calibration.
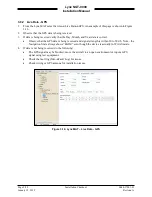
2.
Press the Initiate button within the “touch Screen Calibration” box on the Lynx MAT and observe
that the maintenance screen on the unit is showing the calibration screen.
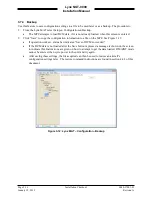
3.
In the Calibration screen touch and release each target shown. (Four calibration targets and two
verification targets). Each target must be touched within 15 seconds of the last touch or a Calibration
Timeout message is shown. The unit returns to the main screen.
0040-17001-01
Installation Checkout
Page 3-17
Revision A
January 15, 2015


