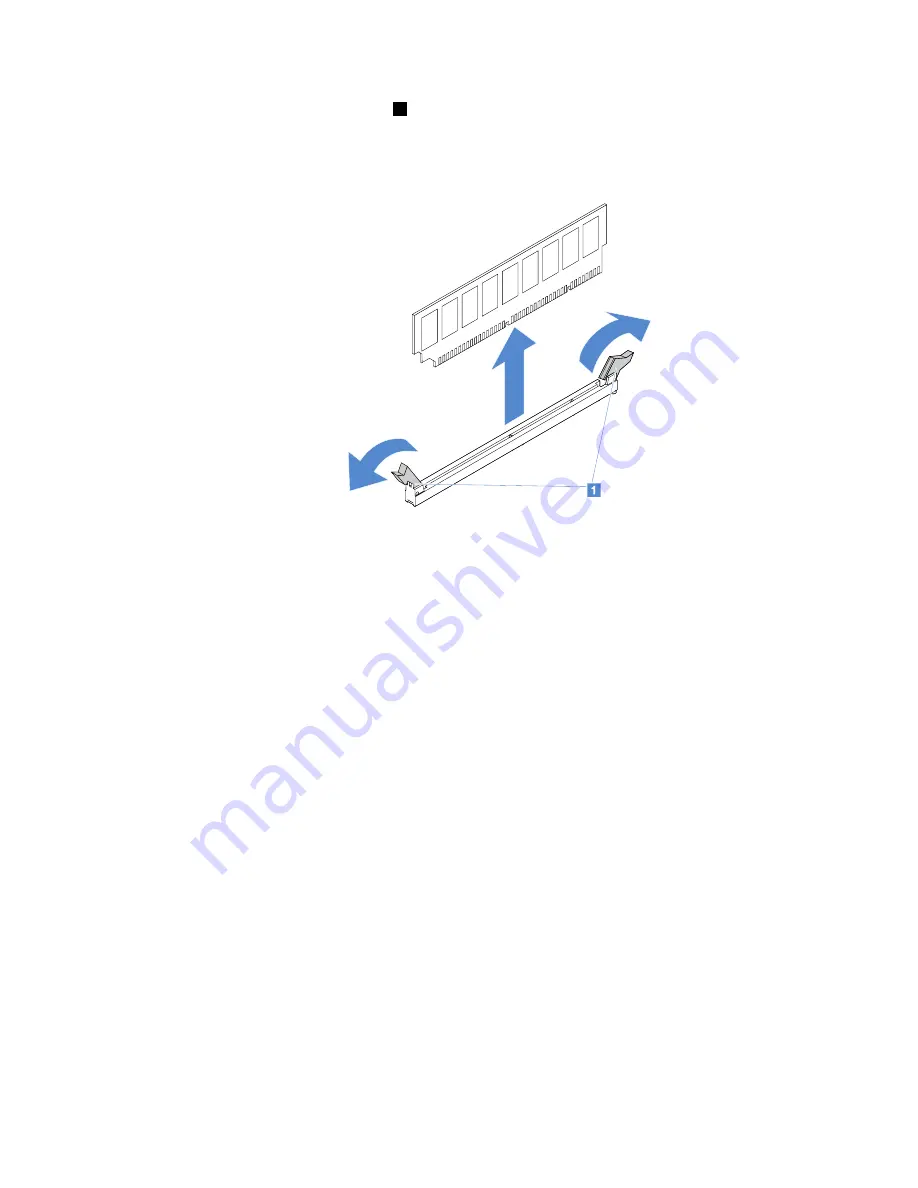
Step 4.
Carefully open the retaining clips
1
on each end of the DIMM slot and remove the DIMM.
Attention:
To avoid breaking the retaining clips or damaging the DIMM slots, handle the clips
gently.
Figure 26. DIMM removal
Step 5.
Install a new DIMM if you have installed only one DIMM. See “Installing a DIMM” on page 99.
DIMM installation guidelines
The following tips describe the types of DIMMs that the server supports and other information that you
must consider when you install DIMMs.
• Confirm that the server supports the DIMM that you are installing. Go to:
http://www.lenovo.com/ serverproven/
• When you install or remove DIMMs, the server configuration information changes. When you restart the
server, the system displays a message indicating that the memory configuration has been changed. You
can use the Setup Utility program to view the server configuration information. See “Using the Setup
Utility program” on page 28.
• The server supports only industry-standard DDR4, 2133 MHz, PC4-17000 (single-rank or dual-rank),
unbuffered DIMMs with error correcting code (ECC).
• The server supports a maximum of four single-rank or dual-rank unbuffered DIMMs.
• The maximum operating speed of the server is determined by the slowest DIMM in the server.
• If you install a pair of DIMMs in DIMM slots 3 and 1, the size and speed of the DIMMs that you install in
DIMM slots 1 and 3 must match each other. However, they do not have to be the same size and speed as
the DIMMs that are installed in DIMM slots 4 and 2.
• You can use compatible DIMMs from various manufacturers in the same pair.
• To determine the type of a DIMM, see the label on the DIMM. The information on the label is in the
format x GB nRxx PC4-xxxxxx-xx-xx-xx. The “nRxx” indicates whether the DIMM is single-rank (n=1) or
dual-rank (n=2).
• The amount of usable memory is reduced, depending on the system configuration. A certain amount
of memory must be reserved for system resources. To view the total amount of installed memory
Removing and installing server components
97
Содержание x3250 m6
Страница 1: ...Lenovo System x3250 M6 Installation and Service Guide Machine Types 3633 and 3943 ...
Страница 6: ...iv Lenovo System x3250 M6 Installation and Service Guide ...
Страница 18: ...4 Lenovo System x3250 M6 Installation and Service Guide ...
Страница 60: ...46 Lenovo System x3250 M6 Installation and Service Guide ...
Страница 100: ...86 Lenovo System x3250 M6 Installation and Service Guide ...
Страница 516: ...502 Lenovo System x3250 M6 Installation and Service Guide ...
Страница 678: ...664 Lenovo System x3250 M6 Installation and Service Guide ...
Страница 685: ...Taiwan Class A compliance statement Appendix E Notices 671 ...
Страница 695: ......
Страница 696: ......


