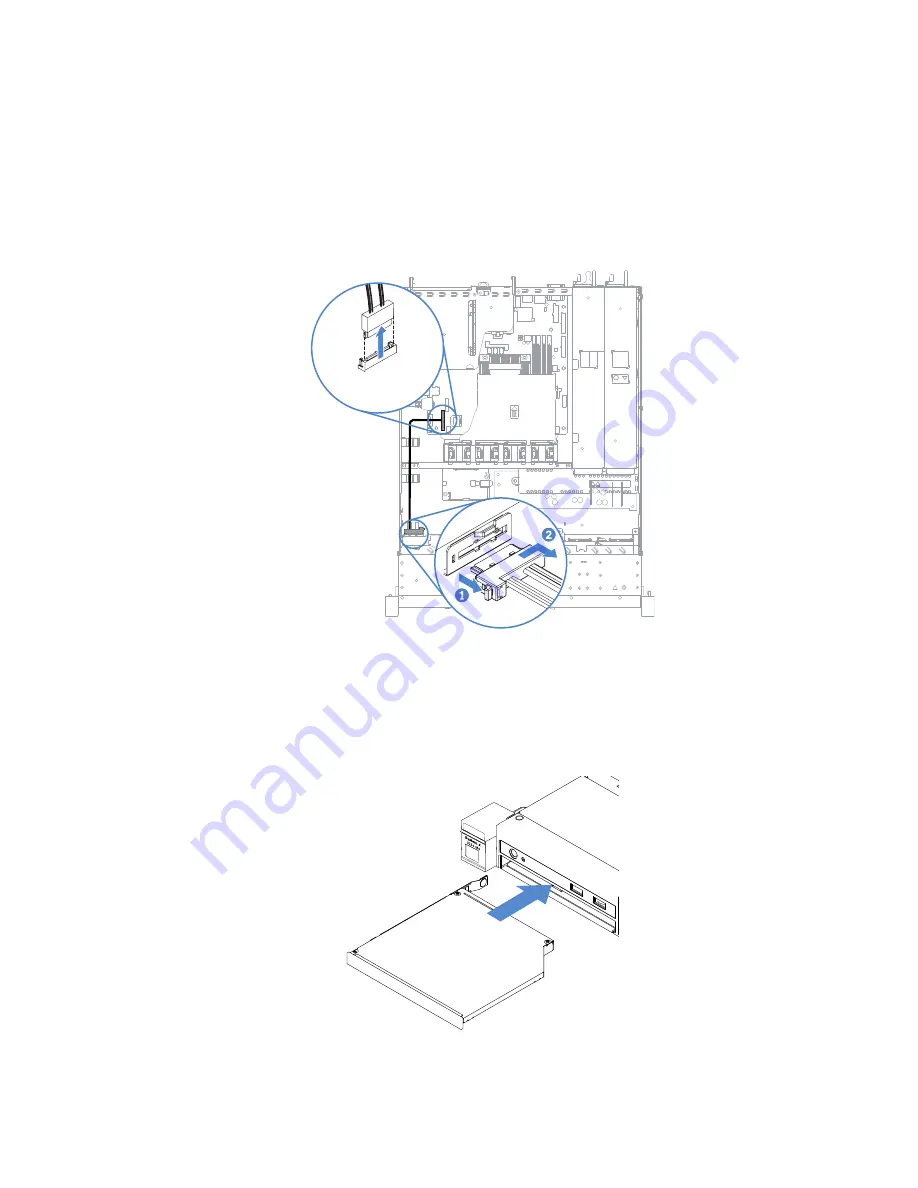
Step 5.
Disconnect the optical drive cable.
a.
Disconnect the optical drive cable from the system board.
b.
Press the connector latch (on the left of the cable connector) as shown, grasp the cable
connector, and slide it to the right. Then, remove the optical drive cable from the connector
bracket on the chassis.
Attention:
Do not disconnect the optical drive cable by using excessive force.
Figure 37. Optical drive cable disconnection
Step 6.
Attach the drive retention clip that you removed from the optical drive to the side of the optical
drive filler. See “Installing the optical drive” on page 109. Then, slide the optical drive filler into
the optical drive bay until the optical drive filler clicks into place.
Figure 38. Optical drive filler installation
108
Lenovo System x3250 M6 Installation and Service Guide
Содержание x3250 m6
Страница 1: ...Lenovo System x3250 M6 Installation and Service Guide Machine Types 3633 and 3943 ...
Страница 6: ...iv Lenovo System x3250 M6 Installation and Service Guide ...
Страница 18: ...4 Lenovo System x3250 M6 Installation and Service Guide ...
Страница 60: ...46 Lenovo System x3250 M6 Installation and Service Guide ...
Страница 100: ...86 Lenovo System x3250 M6 Installation and Service Guide ...
Страница 516: ...502 Lenovo System x3250 M6 Installation and Service Guide ...
Страница 678: ...664 Lenovo System x3250 M6 Installation and Service Guide ...
Страница 685: ...Taiwan Class A compliance statement Appendix E Notices 671 ...
Страница 695: ......
Страница 696: ......


