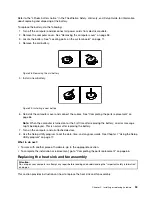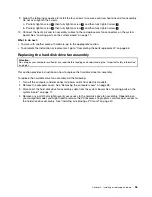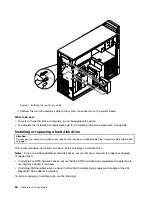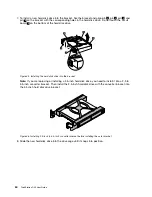
5. The rear fan assembly is attached to the chassis by four rubber mounts. Remove the rear fan assembly
by breaking or cutting the rubber mounts and gently pulling the rear fan assembly out of the chassis.
Note:
The new rear fan assembly will have four new rubber mounts attached.
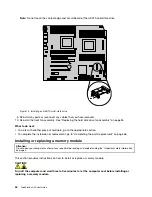
Figure 32. Removing the rear fan assembly
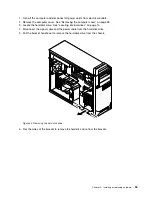
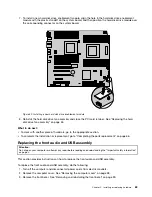
6. Install the new rear fan assembly by aligning the new rubber mounts with the corresponding holes in
the chassis and push the rubber mounts through the holes. Pull on the tips of the rubber mounts
until the rear fan assembly is secured in place.
Chapter 5
.
Installing or replacing hardware
57
Содержание ThinkStation D30
Страница 1: ...ThinkStation D30 User Guide Machine Types 4353 and 4354 ...
Страница 6: ...iv ThinkStation D30 User Guide ...
Страница 12: ...x ThinkStation D30 User Guide ...
Страница 28: ...16 ThinkStation D30 User Guide ...
Страница 45: ...Figure 8 Installing a padlock Chapter 4 Security 33 ...
Страница 48: ...36 ThinkStation D30 User Guide ...
Страница 80: ...68 ThinkStation D30 User Guide ...
Страница 94: ...82 ThinkStation D30 User Guide ...
Страница 104: ...92 ThinkStation D30 User Guide ...
Страница 130: ...118 ThinkStation D30 User Guide ...
Страница 138: ...126 ThinkStation D30 User Guide ...
Страница 142: ...130 ThinkStation D30 User Guide ...
Страница 144: ...Ukraine RoHS India RoHS RoHS compliant as per E Waste Management Handling Rules 2011 132 ThinkStation D30 User Guide ...
Страница 146: ...134 ThinkStation D30 User Guide ...
Страница 150: ...138 ThinkStation D30 User Guide ...
Страница 151: ......
Страница 152: ......


