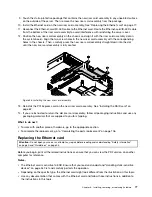
9. Touch the static-protective package that contains the new riser card assembly to any unpainted surface
on the outside of the server. Then, remove the new riser card assembly from the package.
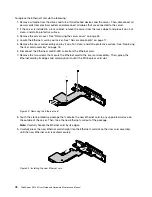
10. Install the Ethernet card on the new riser card assembly. See “Replacing the Ethernet card” on page 77.
11. Reconnect the Ethernet-card/ID-LED cable to the Ethernet card. Route the Ethernet-card/ID-LED cable
from the bottom of the riser card assembly to avoid interference with reinstalling the server cover.
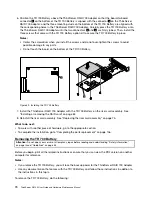
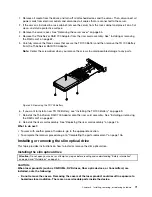
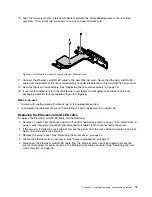
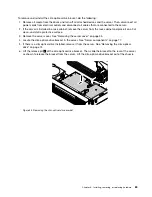
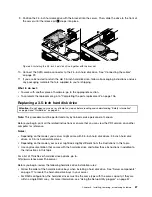
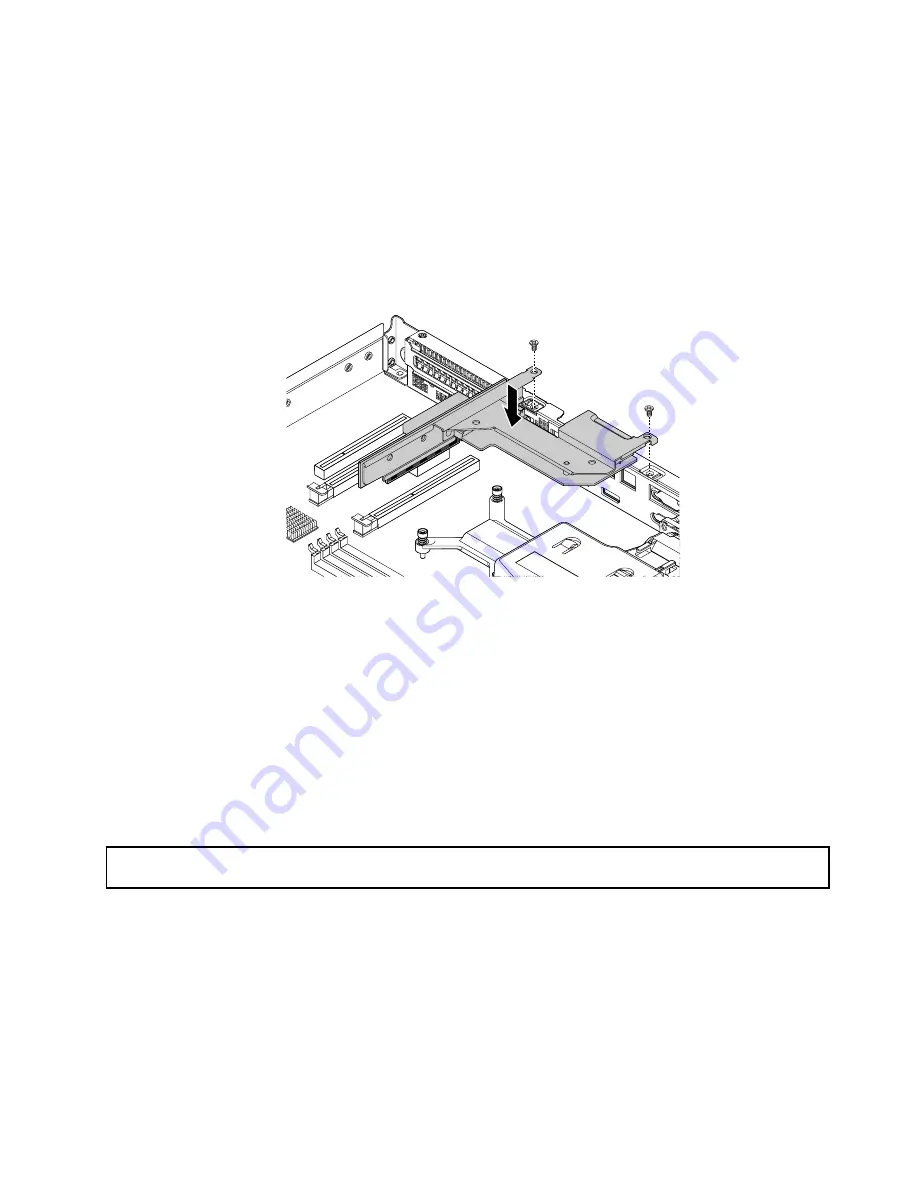
12. Position the new riser card assembly on the chassis and align it with the riser card assembly slot on
the system board. Align the two screw holes in the new riser card assembly with the corresponding
holes in the chassis. Then, carefully press the new riser card assembly straight down into the slot
until the new riser card assembly is fully seated.
Figure 48. Installing the new riser card assembly
13. Reinstall the PCI Express card on the new riser card assembly. See “Installing the RAID card” on
page 62.
14. If you are instructed to return the old riser card assembly, follow all packaging instructions and use any
packaging materials that are supplied to you for shipping.
What to do next:
• To work with another piece of hardware, go to the appropriate section.
• To complete the replacement, go to “Completing the parts replacement” on page 106.
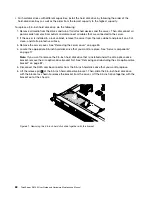
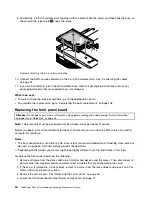
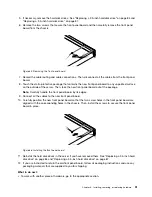
Replacing the Ethernet card
Attention:
Do not open your server or attempt any repair before reading and understanding “Safety information”
on page iii and “Guidelines” on page 53.
Before you begin, print all the related instructions or ensure that you can view the PDF version on another
computer for reference.
Notes:
• The Ethernet card is sensitive to ESD. Ensure that you read and understand “Handling static-sensitive
devices” on page 54 first and carefully perform the operation.
• Depending on the specific type, the Ethernet card might look different from the illustrations in this topic.
• Use any documentation that comes with the Ethernet card and follow those instructions in addition to
the instructions in this topic.
Chapter 6
.
Installing, removing, or replacing hardware
77
Содержание ThinkServer RS140
Страница 1: ...ThinkServer RS140 User Guide and Hardware Maintenance Manual Machine Types 70F2 70F3 70F8 and 70F9 ...
Страница 16: ...4 ThinkServer RS140 User Guide and Hardware Maintenance Manual ...
Страница 18: ...6 ThinkServer RS140 User Guide and Hardware Maintenance Manual ...
Страница 48: ...36 ThinkServer RS140 User Guide and Hardware Maintenance Manual ...
Страница 122: ...110 ThinkServer RS140 User Guide and Hardware Maintenance Manual ...
Страница 128: ...116 ThinkServer RS140 User Guide and Hardware Maintenance Manual ...
Страница 132: ...120 ThinkServer RS140 User Guide and Hardware Maintenance Manual ...
Страница 145: ......
Страница 146: ......


