Attention:
An unoccupied drive bay or PCI card slot without a cover, shield, dummy tray, filler, or any
other protection might impact the EMI integrity and cooling of the server, which might result in overheating
or component damage.
Removing and reinstalling the rack handles
Before you begin, print all the related instructions or ensure that you can view the PDF version on another
computer for reference.
Note:
Depending on the model, your server might look slightly different from the illustration in this topic.
To remove and reinstall the rack handles, do the following:
1. Remove all media from the drives and turn off all attached devices and the server. Then, disconnect all
power cords from electrical outlets and disconnect all cables that are connected to the server.
2. If the server is installed in a rack cabinet, remove the server from the rack cabinet and place it on a flat,
clean, and static-protective surface.
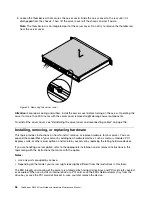
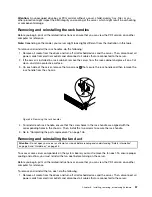
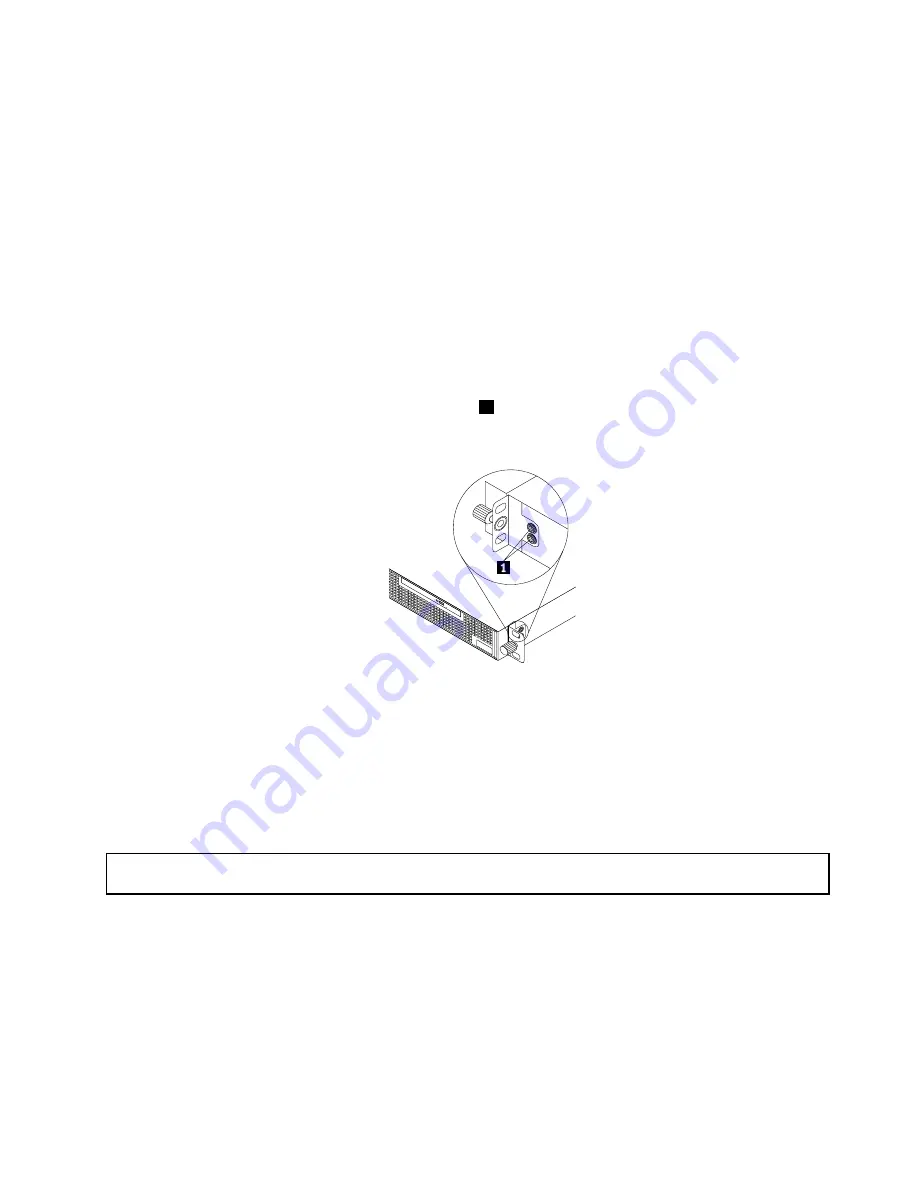
3. On each side of the server, remove the two screws
1
that secure the rack handle and then remove the
rack handle from the chassis.
Figure 26. Removing the rack handles
4. To reinstall each rack handle, ensure that the screw holes in the rack handle are aligned with the
corresponding holes in the chassis. Then, install the two screws to secure the rack handle.
5. Go to “Completing the parts replacement” on page 106.
Removing and reinstalling the fan duct
Attention:
Do not open your server or attempt any repair before reading and understanding “Safety information”
on page iii and “Guidelines” on page 53.
To access some server components on the system board, you must remove the fan duct. To ensure proper
cooling and airflow, you must reinstall the fan duct before turning on the server.
Before you begin, print all the related instructions or ensure that you can view the PDF version on another
computer for reference.
To remove and reinstall the fan duct, do the following:
1. Remove all media from the drives and turn off all attached devices and the server. Then, disconnect all
power cords from electrical outlets and disconnect all cables that are connected to the server.
Chapter 6
.
Installing, removing, or replacing hardware
57
Содержание ThinkServer RS140
Страница 1: ...ThinkServer RS140 User Guide and Hardware Maintenance Manual Machine Types 70F2 70F3 70F8 and 70F9 ...
Страница 16: ...4 ThinkServer RS140 User Guide and Hardware Maintenance Manual ...
Страница 18: ...6 ThinkServer RS140 User Guide and Hardware Maintenance Manual ...
Страница 48: ...36 ThinkServer RS140 User Guide and Hardware Maintenance Manual ...
Страница 122: ...110 ThinkServer RS140 User Guide and Hardware Maintenance Manual ...
Страница 128: ...116 ThinkServer RS140 User Guide and Hardware Maintenance Manual ...
Страница 132: ...120 ThinkServer RS140 User Guide and Hardware Maintenance Manual ...
Страница 145: ......
Страница 146: ......


