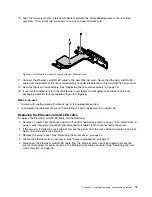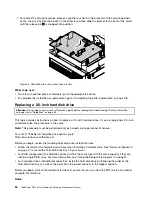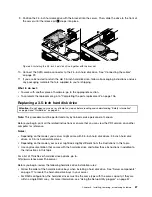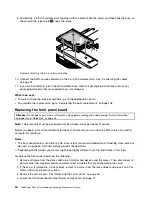
6. Grasp the top of the system fan with your index finger and thumb and then lift the system fan out of
the server.
Figure 67. Removing the system fan
7. Touch the static-protective package that contains the new system fan to any unpainted surface on the
outside of the server. Then, remove the new system fan from the package.
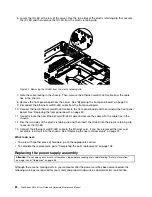
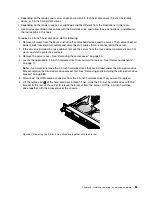
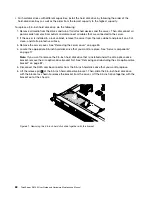
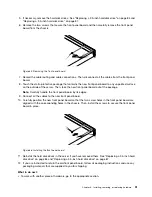
8. Note the orientation of the new system fan and ensure that rear side of the system fan with the system
fan cable is facing the rear of the server. Then, press the new system fan straight down until it is
seated into place.
Figure 68. Installing the system fan
9. Connect the system fan cable to the system board. See “System board components” on page 32.
Note:
If you are replacing the system fan 1 that is near the rear of the server, reinstall the riser card
assembly to the system board. See “Replacing the riser card assembly” on page 75.
10. If you are instructed to return the old system fan, follow all packaging instructions and use any
packaging materials that are supplied to you for shipping.
What to do next:
Chapter 6
.
Installing, removing, or replacing hardware
93
Содержание ThinkServer RS140
Страница 1: ...ThinkServer RS140 User Guide and Hardware Maintenance Manual Machine Types 70F2 70F3 70F8 and 70F9 ...
Страница 16: ...4 ThinkServer RS140 User Guide and Hardware Maintenance Manual ...
Страница 18: ...6 ThinkServer RS140 User Guide and Hardware Maintenance Manual ...
Страница 48: ...36 ThinkServer RS140 User Guide and Hardware Maintenance Manual ...
Страница 122: ...110 ThinkServer RS140 User Guide and Hardware Maintenance Manual ...
Страница 128: ...116 ThinkServer RS140 User Guide and Hardware Maintenance Manual ...
Страница 132: ...120 ThinkServer RS140 User Guide and Hardware Maintenance Manual ...
Страница 145: ......
Страница 146: ......

