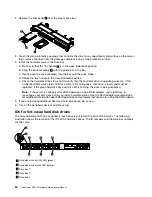
1
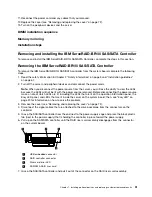
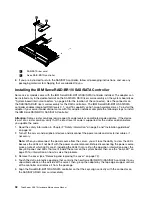
USB embedded connector
2
RAID controller connector
3
Riser card error LED
4
SAS/SATA RAID riser card
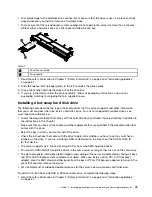
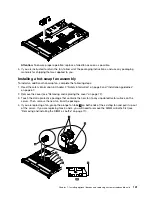
6. Insert the SAS/SATA controller
2
into the connector on the SAS/SATA RAID riser card assembly
1
until it is firmly seated.
Attention:
Incomplete insertion might cause damage to the server or the controller.
000000
000000
000000
000000
000000
0
0
0
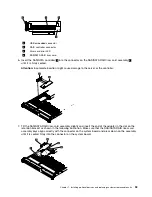
7. Tilt the SAS/SATA RAID riser-card assembly slightly and insert the end of the adapter in the slot on the
retention bracket as shown in the following illustration. Make sure that the SAS/SATA RAID riser-card
assembly keys align correctly with the connector on the system board and press down on the assembly
until it is seated firmly into the connector on the system board.
Chapter 7
.
Installing optional devices and replacing customer replaceable units
93
Содержание ThinkServer RD210
Страница 1: ...ThinkServer RD210 Hardware Maintenance Manual ThinkServer RD210 Types 3795 3796 3818 and 3819 ...
Страница 2: ......
Страница 3: ...ThinkServer RD210 Hardware Maintenance Manual ThinkServer RD210 Types 3795 3796 3818 and 3819 ...
Страница 7: ...Korean Class A warning statement 172 Copyright Lenovo 2005 2010 vii ...
Страница 8: ...viii ThinkServer RD210 Hardware Maintenance Manual ...
Страница 22: ...14 ThinkServer RD210 Hardware Maintenance Manual ...
Страница 26: ...18 ThinkServer RD210 Hardware Maintenance Manual ...
Страница 70: ...62 ThinkServer RD210 Hardware Maintenance Manual ...
Страница 74: ...66 ThinkServer RD210 Hardware Maintenance Manual ...
Страница 142: ...134 ThinkServer RD210 Hardware Maintenance Manual ...
Страница 172: ...164 ThinkServer RD210 Hardware Maintenance Manual ...
Страница 179: ...Japanese Voluntary Control Council for Interference VCCI statement Japanese recycling statements Appendix A Notices 171 ...
Страница 181: ......
Страница 182: ...Part Number 40M2493 Printed in USA 1P P N 40M2493 40M2493 ...

