background image

MDC-5000 Series


Chapter 2 Radar Basic Operation 

0093153004-00 

2-11 

Changing method of CFAR and MAN 

By joystick 

Move cursor on the MAN or CFAR display (whichever is shown) at right side of [RAIN] on the top 

of the display. 

Press ENT key to alternate CFAR and MAN. 


By Function key operation 

1

      When the Selection of RAIN control mode is registered with a FUNCTION key (RAIN knob, F1, F2 

or F3 key), when a FUNCTION key is pressed, CFAR and MAN RAIN changes alternately. 


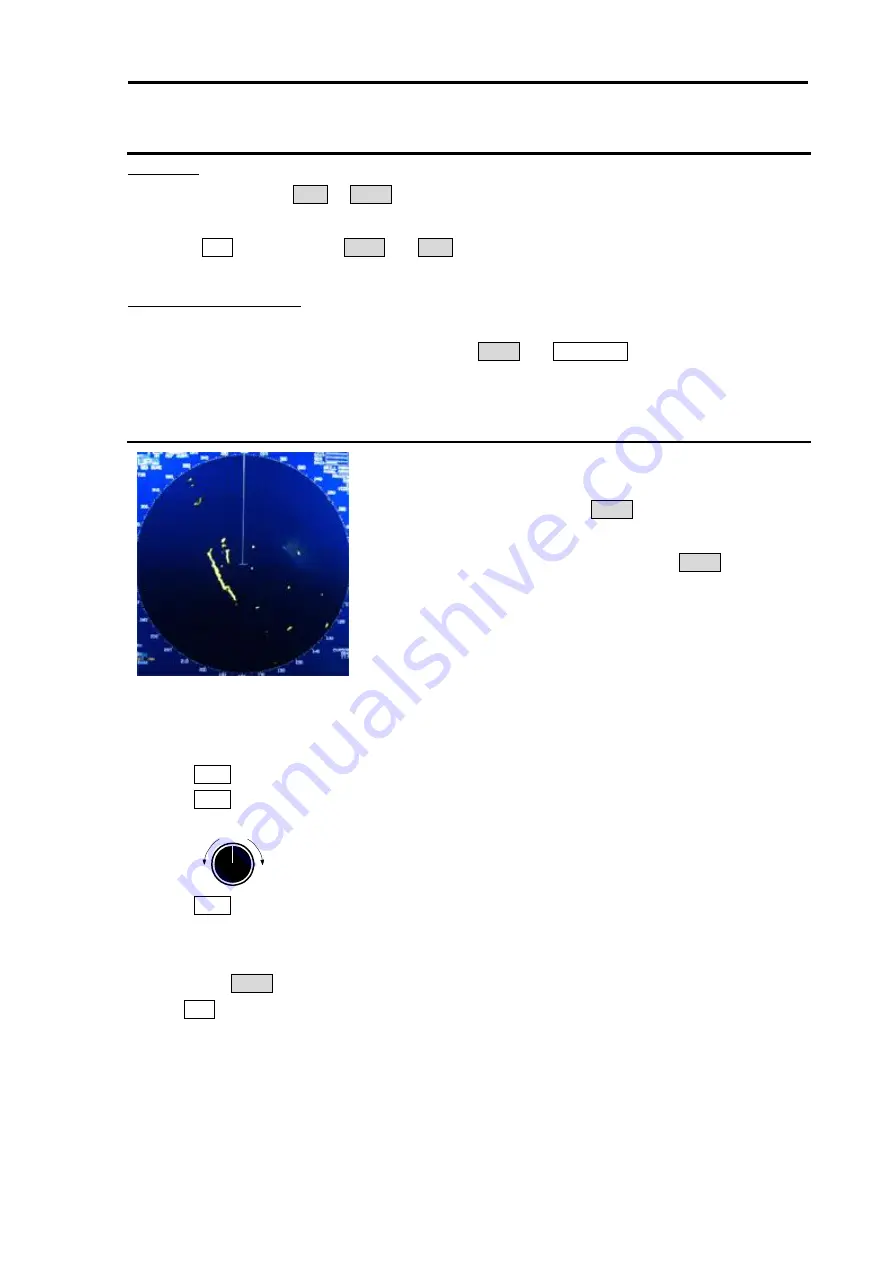
CFAR (Constant False Alarm Rate) adjustment 

CFAR function is used to suppress of sea, rain and snow clutter 

easily. 

CFAR  function  is  active  when  CFAR  is  indicated  at  the  upper 

right side of the display. 

Level of CFAR is indicated on the left side of CFAR indication. 


Turn RAIN knob clockwise to increase anti-clutter effect. 

Turn RAIN knob counterclockwise to decrease anti-clutter effect. 

Strong

Weak

RAIN


Turn RAIN knob to get even low (weak) clutter while watching the display. 


Note: 

• In the case of CFAR mode, the gain adjustment is not possible. 

Adjust SEA knob to suppress remaining sea clutter.   

• Turning the knob to the right shows the targets hidden in the rain/snow image, but care shall be taken 

that small target may be hidden and not displayed if over adjusted. 

• If there are strong echo targets such as in the harbor or channel, CFAR tends to suppress targets 

excessively. In that case, change CFAR to MAN and use MAN SEA in addition. 


After CFAR adjustment 

Содержание MDC-5004

Страница 1: ......

Страница 2: ......

Страница 3: ......

Страница 4: ......

Страница 5: ...No is indicated at the lower right side on the cover and at the left or right side of the footer region of each page 2017 Koden Electronics Co Ltd All rights reserved No part of this publication may be reproduced transmitted translated in any from by any means without the written permission of Koden Electronics Co Ltd The technical descriptions contained in this publication are subject to change w...

Страница 6: ...ones and some parts may be omitted Koden is not liable for damages and troubles arisen from misunderstanding of the contents in this manual Koden is not liable for any damages caused by earthquake lightning wind and flood damage and fire for which Koden is not responsible and actions by third parties other accidents customer s unintended error abuse and the use under other abnormal conditions Kode...

Страница 7: ...here is a risk of death or serious injury caused by electric shock when not dealt with it correctly Caution Symbol This symbol denotes that there is a risk of slight injury or damage of device when not dealt with it correctly Prohibition Symbol This symbol denotes restriction of the specified conduct Description of the restriction is displayed near the mark IMPORTANT Important Symbol This mark ind...

Страница 8: ...or death may occur due to high voltage Make sure main power is off and a label Work In Progress is attached to the breaker powering the system Caution related to dust Inhaling dust may cause A respiratory disease When cleaning the inside of equipment be careful not to inhale dust Wearing a safety mask is recommended When choosing equipment location Do not install the equipment where it is excessiv...

Страница 9: ...pacemakers are sensitive even under the low energy electromagnetic wave Any personnel with such a device should keep away from the electromagnetic wave generating position at all times Specified power density and distance from the radar in accordance with the provision as specified in IEC 60945 Model name Transmission power Antenna length 100W m2 50W m2 10W m2 MDC 5004 4kW 3 feet Antenna 0 9 m 1 3...

Страница 10: ...romagnétiques de faible énergie Tout membre du personnel avec un tel dispositif devrait se tenir à l écart des générateurs d ondes électromagnétiques en tout temps Spécification de densité de la puissance et de la distance du radar conformément à la disposition comme spécifié dans la IEC 60945 Nom Modèle Puissance de transmission longueur d antenne 100W m2 50W m2 10W m2 MDC 5004 4kW Antenne 3 pied...

Страница 11: ...he maximum gain indicated for that type are strictly prohibited for use with this device FRENCH Le présent émetteur radio identifier le dispositif par son numéro de certification ou son numéro de modèle s il fait partie du matériel de catégorie I a été approuvé par Industrie Canada pour fonctionner avec les types d antenne énumérés ci dessous et ayant un gain admissible maximal et l impédance requ...

Страница 12: ...tallation et d utilisation ainsi que toutes les conditions d utilisation spéciales pour assurer la conformité aux limites SAR et ou RF Par exemple la distance de conformité doit être clairement indiquée dans le manuel de l utilisateur IC RSS GEN Sec 8 4 Warning Statement Required for license exempt devices ENGLISH This device complies with Industry Canada license exempt RSS standard s Operation is...

Страница 13: ...t obtenir des renseignements canadiens sur l exposition aux radiofréquences et la conformité D autres renseignements connexes peuvent également être inclus FCC Part 15 19 Warning Statement THIS DEVICE COMPLIES WITH PART 15 OF THE FCC RULES OPERATION IS SUBJECT TO THE FOLLOWING TWO CONDITIONS 1 THIS DEVICE MAY NOT CAUSE HARMFUL INTERFERENCE AND 2 THIS DEVICE MUST ACCEPT ANY INTERFERENCE RECEIVED IN...

Страница 14: ...g the equipment off and on the user is encouraged to try to correct the interference by one or more of the following measures Reorient or relocate the receiving antenna Increase the separation between the equipment and receiver Connect the equipment into an outlet on a circuit different from that to which the receiver is connected Consult the dealer or an experienced radio TV technician for help ...

Страница 15: ...mage Caution related to remaining high voltage A high voltage may remain in the capacitor for several minutes after system is powered off Before inspecting inside wait at least 5 minutes after powering off or discharging the remaining electricity in an appropriate manner Then start the work The information displayed in this unit is not provided directly for your navigation For your navigation be s...

Страница 16: ...ting operation such as arcing at its initial operation after long period of storage and make the operation more difficult 1 Extend preheat time as long as possible preferably 20 to 30 minutes 2 Set the pulse width to the shortest one and start the operation When the operation in the shortest pulse is stable then go to operation in longer pulse and repeat the similar step until the operation reache...

Страница 17: ...ection rules may be different depending on each municipal district Obey the directions of each district Disposal of this radar This radar shall be disposed according to the municipal regulations or rules A high energy density lithium ion battery is installed in this radar Improper disposal of a lithium ion battery is discouraged as the battery has a possibility of short circuiting If it gets wet t...

Страница 18: ...s started up factory default settings These alarms are disengaged by pressing OFF key temporarily however the alarms are activated again next time the radar is start up Disengage the alarm detection function on start up by the following Once set the alarm is not detected next time the radar is started up Press MENU key to display Menu Select ALARM ALARM ON OFF I O HDG INPUT OFF and press ENT key S...

Страница 19: ...pter 1 Display and Operation 1 1 1 1 Radar Display 1 1 Upper left corner 1 1 Upper right corner 1 2 Lower left corner 1 2 Lower right corner 1 2 INFO DISP 1 3 Alarm status 1 4 MAP INFO 1 4 1 2 Operation Unit 1 6 1 3 Menu usage 1 8 Turn MENU on and off 1 8 Select menu item 1 8 1 4 Cursor Access usage 1 9 Chapter 2 Radar Basic Operation 2 1 2 1 Power ON OFF 2 1 Power ON 2 1 Power OFF 2 1 2 2 Change ...

Страница 20: ... 13 2 10 Select Display Mode 2 14 For H UP Head up mode 2 14 For C UP Course up mode 2 15 For N UP North up mode 2 16 For relative motion RM and true motion TM 2 17 Reset true motion 2 18 2 11 Ground and Sea stabilization 2 19 SEA Sea stabilization 2 19 GND Ground stabilization 2 19 2 12 Measurement of distance by RR and VRM 2 20 Display Range Rings RR 2 20 Measurement Range VRM Variable Range Mar...

Страница 21: ...2 42 CURSOR setting menu 2 42 2 30 Setup own ship outline 2 43 Setup ship outline 2 43 2 31 FERRY MODE 2 44 2 32 Display setup 2 45 2 33 1 ALL PPI mode 2 45 2 33 2 ROTATION MARGIN H UP C UP 2 45 2 33 3 INFO DISP 2 46 Chapter 3 Alarm 3 1 Collision avoidance 3 1 3 1 Echo alarm 3 1 How to set echo alarm area Fan type 3 1 3 2 Map area alarm 3 3 How to edit map area 3 3 How to move map area 3 4 How to ...

Страница 22: ...outline 4 7 HDG line 4 7 Turn indicator 4 7 OS display 4 7 OS MMSI 4 7 AIS filter 4 8 AIS auto active 4 8 Types of AIS target symbol 4 9 4 3 TT ATA 4 12 Limitations of the TT function 4 12 Enable TT function 4 13 Manual acquisition 4 13 Delete TT target 4 14 Delete all TT targets 4 14 Types of tracked target symbol 4 15 Chapter 5 Nav tool 5 1 5 1 Guard line 5 1 5 2 HL blink 5 2 5 3 Stern line 5 2 ...

Страница 23: ...enu operation 7 1 7 1 SYSTEM MENU 7 1 7 2 Change UTC LOCAL time 7 1 7 3 Sound setting 7 2 Sound ON OFF 7 2 Sound frequency 7 2 Key click ON OFF 7 2 External buzzer setting 7 2 7 4 LANGUAGE select 7 3 7 5 DISPLAY INFOMATION DISP INFO 7 3 7 6 HELP window ON OFF 7 4 7 7 MAINTENANCE MENU 7 4 7 8 BACKUP of Setup data Cannot be used while transmitting 7 5 Internal save of setup data 7 5 External save of...

Страница 24: ...0 1 10 1 Antenna and Scanner unit 10 1 10 2 Processor and Operation unit 10 3 10 3 External view and dimensions 10 4 Chapter 11 Appendix 11 1 11 1 Menu tree 11 1 11 2 Special key operations 11 11 11 3 Details of the data input format 11 13 11 4 Details of TT tracking data output 11 23 11 5 Details of the radar data output 11 24 11 6 Interface specification 11 27 11 6 1 J3 J5 and J6 serial data inp...

Страница 25: ...r dedicated LSI Large Scale Integration Stable indication and reliable acquisition of small targets Clear distinction between a moving target and land by true trail display Provision of multi targets TT ATA information and AIS information Various models for selection of optimum radar for your needs Simple and easy operation by user friendly rotating knobs and joystick Capable of adjusting gain ant...

Страница 26: ...OR KIT 10 Operation manual MDC 5000 OM E 11 Installation manual MDC 5000 IM E 12 Quick reference MDC 5000 QR E MDC 5006 5012 5025 No Name Type 1 Antenna 2 Scanner RB807 6kW MDC 5006 RB808 12kW MDC 5012 RB809 25kW MDC 5025 3 Processor unit MRM 110 4 Operation unit with connecting cable MRO 110 5 Connecting cable CW 845 15M 6 DC power cable CW 259 2M 7 Spare parts SP MRM 110 8 Installation material ...

Страница 27: ...6 pin water resistant connector cable for data 9 CW 376 5M With a 6 pin water resistant connector and one end plain cable for data 10 CW 387 5M With a 8 pin water resistant connector and one end plain cable for AIS 11 CW 561 10M 30M With 12 pin water resistant connectors at both ends cable for remote display 12 CW 576 0 5M With a 10 pin water resistant connector and D Sub connector analog RGB Alar...

Страница 28: ... This page intentionally left blank ...

Страница 29: ...er 1 Display and Operation 1 1 Radar Display Upper left corner Heading line EBL2 Range Rings VRM1 VRM2 Alarm status Upper left corner Lower left corner Lower right corner Range scale Range Rings MODE Off center Pulse width TX Standby CURSOR EBL1 Upper right corner ENH UTC ...

Страница 30: ...ive mark MENU display box EBL1 bearing EBL2 bearing Cursor position data VRM1 distance VRM2 distance INFO DISP display box VRM active mark VRM1 VRM2 TUNE setting PROCESS setting VIDEO mode setting Interference Rejection setting ENHANCE setting Own ship data Date and Time Heading STW or SOG Own ship position Picture mode setting Sea mode setting Rain mode setting Gain mode setting ENH UTC ...

Страница 31: ...T key Four INFO DISP windows appear and various navigation data will be shown Move cursor on the INFO box at lower left of the INFO DISP window and press ENT key All INFO DISP windows disappear In addition WIND CRS SPD or SET DRIFT window can be displayed Refer to 2 33 3 INFO DISP OWN SHIP INFO TGT INFO AIS DAY INFO DEPTH TEMP WAY POINT INFO TGT INFO TT ...

Страница 32: ...arm Refer to 3 2 Map area alarm Nav line cross alarm Refer to 3 3 Nav line cross Alarm icons are displayed only when alarm function is active and they are not displayed when alarm function is inactive Alarm icons are displayed in red color while alarm is detected MAP INFO During Map data 1 edit MAP INFO window is displayed at UPPER area of the Info Display 1 COAST LINE NAV LINE ROUTE EVENT MKR and...

Страница 33: ...MDC 5000 Series Chapter 1 Display and Operation 0093153004 00 1 5 This page intentionally left blank ...

Страница 34: ...BL2 or display brilliance 8 OFFSET lamp Status lamp of offset EBL mode on 9 RAIN knob Reduce rain clutter and FUNCTION key operation 10 SEA knob Reduce sea clutter and FUNCTION key operation 11 GAIN knob Adjust receiver gain and FUNCTION key operation 12 FUNCTION keys F1 F3 Quick short cut menu access 13 VRM1 key VRM1 on and off 14 VRM2 key VRM2 on and off 15 PANEL key Control panel brilliance adj...

Страница 35: ...ey Start manual TT acquisition 21 ENT key Key most often used to make a selection 22 RANGE key Change radar range scale 23 SP LP key Change transmission pulse width 24 OFF CENT key Off center mode on and off 25 MODE key Change display mode HU NU CU 26 OFF key Hide heading line stop alarm sound etc 27 JOYSTICK Make MENU selection and move cursor ...

Страница 36: ...ng the joystick up or down 4 Move the joystick to the right after making selection in sub menu and value of selected item will show 5 Select desired value then press ENT key Note Pay attention that ENT key must be pressed for selected item to take effect 6 Move joystick to the left to return to previous menu To exit from menu press MENU key again Example of menu display Note Menu setup value is st...

Страница 37: ...able during transmission therefore they are the shaded menu 1 4 Cursor Access usage Basic radar functions can be operated by using the joystick and ENT key without using menu This function is effective for the operation with USB Mouse Trackball from the remote place Move cursor on a grey item with joystick or USB Mouse Trackball then press ENT key or click the left button of the USB Mouse Trackbal...

Страница 38: ... This page intentionally left blank ...

Страница 39: ...of the display Wait for 120 sec 1 or 180 sec 2 until preheating countdown time has disappeared and status changes from WAIT to STANDBY at the upper left of the display 1 MDC 5004 5006 5012 2 MDC 5025 The brilliance of the display is set to the previous value of the last power off Note The power source shall not be turned off until operational window is displayed Power OFF Keep pressing POWER ON OF...

Страница 40: ...ay brilliance can also be changed in five steps by pressing EBL knob Operation unit Brilliance 1 Press PANEL key 2 The PANEL adjustment window will appear in the upper left of the display 3 Turn VRM knob clockwise to increase the lighting of the panel brilliance Turn VRM knob counterclockwise to decrease the lighting of the panel brilliance The panel brilliance can also be changed in five steps by...

Страница 41: ...ox at the upper left corner of the display using joystick and press ENT key Radar system will start transmission The status of STANDBY changes to TRANSMIT Transmission OFF Press STBY TX key or select the TRANSMIT box at the upper left corner of the display using joystick and press ENT key to stop transmission The status of TRANSMIT returns to STANDBY at upper left of the display Operation of STBY ...

Страница 42: ...NU 1 Press MENU key to display Menu Select MAINTENANCE STARTUP TUNE TUNE select MAN or AUTO and press ENT key Optimized value setup method Adjustment shall be performed based on stable echo object such as from land Land is used in following explanation 1 Set RAIN and SEA at 0 2 Set lower GAIN until land echo almost disappears 3 Select MAINTENANCE STARTUP TUNE AUTO ADJ or MAN ADJ VALUE will show th...

Страница 43: ...nge key to zoom out the picture and to observe a wider area Press Range key to zoom in the picture to magnify and to observe closer to Antenna position Model specific ranges are as shown below Model name MDC 5025 Max output 25 kW MDC 5012 Max output 12 kW MDC 5006 Max output 6 kW MDC 5004 Max output 4 kW Range NM 0 125 0 25 0 5 0 75 1 5 3 6 12 24 32 48 64 96 32NM and 64NM is for 6kW 12kW only 96NM...

Страница 44: ...ain target recognition In the short distance area where anti SEA is effective recognize target by adjusting MAN SEA When suppressing RAIN clutter rain or snow adjust GAIN knob and RAIN knob side by side GAIN state is displaying in the upper right of the display Selection of MAN GAIN and AUTO GAIN By joystick 1 Move cursor on the MAN or AUTO display whichever is shown at right side of GAIN on the t...

Страница 45: ...ncrease receiving gain Turn GAIN knob counterclockwise to decrease receiving gain Up Down Gain Note Decrease gain for shorter range and dense targets Increase gain for long range targets and small target however take care in not using too much gain and losing targets in the surrounding noise Own ship Land Result picture after adjustment a GAIN knob Own ship Land Own ship Land ...

Страница 46: ...ress false echoes and ground clutter in short distance However adjustment of GAIN should be used beyond effective coverage of anti SEA If target echoes are masked by excessive false echoes within anti SEA effective area then adjust MAN SEA to confirm it Excessive anti SEA may lose echoes from small ships and buoys So return to appropriate anti SEA level for normal use Note Small targets become har...

Страница 47: ...manually By using SEA knob suppress this effect and make targets seen easier SEA state is displayed in the upper right of the display 1 Turn SEA knob clockwise to increase anti sea clutter effect Turn SEA knob counterclockwise to decrease anti sea clutter effect 2 Turn SEA knob clockwise until even low weak SEA clutter is displayed by observing the display 3 Adjust SEA knob from time to time to ge...

Страница 48: ...all target becomes harder to detect when RAIN is used together with SEA Therefore please adjust them carefully The echo process refer to 2 22 Echo process is useful to reject rain clutter Be careful when the echo process is active high speed targets are harder to detect than stationary ones The performance of radar detection range is degraded by rain as shown in the figure below The details of the...

Страница 49: ... is indicated at the upper right side of the display Level of CFAR is indicated on the left side of CFAR indication 1 Turn RAIN knob clockwise to increase anti clutter effect Turn RAIN knob counterclockwise to decrease anti clutter effect Strong Weak RAIN 2 Turn RAIN knob to get even low weak clutter while watching the display Note In the case of CFAR mode the gain adjustment is not possible Adjus...

Страница 50: ...urning RAIN knob clockwise Adjust RAIN so that sea clutter is lightly visible 4 Intensity of RAIN clutter is affected by weather Adjust by RAIN knob according to weather change by watching the display Note In typical environment RAIN should be turned all the way down via RAIN knob and no white level should be indicated by RAIN window Turning the knob to the right shows profiles of the targets hidd...

Страница 51: ...e has high gain sensitivity and is effective for detecting small targets Two different pulse widths are set by default in the following ranges 0 75NM 1 5NM 3NM and 6NM Ranges 0 25NM and below and 12NM 4kW 6NM and above are setup with same pulse width in SP and LP Note Refer to 2 27 Pulse width to set pulse width 4kW Range NM 0 125 0 25 0 5 0 75 1 5 3 6 12 24 48 SP mode S1 S1 S1 S1 S2 M2 L1 L2 L2 L...

Страница 52: ...de Heading line is always oriented toward the top of the display This mode is based on the bow of the ship and is suitable to monitor targets because targets are seen as they are in navigating own ship When heading signal is connected H UP works by stabilized mode STAB H UP Note This is a presentation mode stabilized in azimuth with fixed origin in which the radar image is oriented up toward the t...

Страница 53: ... used to navigate towards a specified course It easily shows any deviation of own ship from the specified course Note This is an azimuth stabilized presentation in which the bearing scale can be oriented so that own ship s course on the bearing scale is vertically above the own ship The heading line points from the own ship to own ship s referenced heading on the bearing scale If own ship s headin...

Страница 54: ...the display A north oriented representation makes it easy to reference with a chart Note This is an azimuth stabilized presentation in which north on the bearing scale remains fixed vertically above the own ship The heading line points from the own ship to own ship s referenced heading on the bearing scale The true bearing of any target on the display is measured from north ...

Страница 55: ...UPTM N UPTM indicates the motion of the target with respect to the specified bearing Fixed targets that do not move in any direction stay on the display and all the moving targets move on the display Note The heading always continues to move So no true motion TM is available for H UP Relative motion RM The antenna position is fixed and the other surrounding targets move on the display This is usef...

Страница 56: ...er of the range scale own ship position is to reset to the course over water or to the opposite direction of the course over ground Reset true motion Antenna position own ship position can be manually reset when in true motion operation at any given point by following procedure Press MENU key to display Menu Select DISPLAY TM RESET and press ENT key 75 Antenna position 75 Antenna position Antenna ...

Страница 57: ...speed can be entered manually Manual speed input 1 Press MENU key to display Menu Select MAINTENANCE I O STW STW MAN and press ENT key 2 Select MAINTENANCE I O STW MAN set manual speed and press ENT key 3 Press MENU key to close Menu 4 Move cursor on the upper right side of the speed info of the display 5 Press ENT key to get ready for speed entry Enter speed by using joystick 6 Press ENT key to s...

Страница 58: ... specified distance from reference point They are used as a rough indication of the distance to a target 1 Press MENU key to display Menu Select NAV TOOL RR ON and press ENT key Note RR display can be changed directly in the upper left of the display by moving cursor and pressing ENT key Note When NAV TOOL BRG TRUE REL TRUE is selected 0 of the range rings indicates North direction While when REL ...

Страница 59: ... changes the range quickly 3 Another press of VRM1 key will make the circle disappear 4 Press VRM2 key to activate the dotted line circle of VRM2 Operation procedure and distance display are the same as VRM1 5 If you want to display both VRM1 and VRM2 simultaneously press VRM1 key and VRM2 key Then both the dashed line circle and the dotted line circle are displayed 6 Switching between VRM1 and VR...

Страница 60: ...ring line using EBL knob to adjust the line on the desired target The bearing value changes at the same time and you can read the bearing of the target Note Turning EBL knob while pressing it changes the bearing quickly Clockwise Counter clockwise EBL knob 3 Another press of EBL1 key and the dashed line disappears and the bearing value on the lower left of the display also disappears 4 Press EBL2 ...

Страница 61: ...offset the color of OFFSET lamp at the lower right of EBL knob changes from green to red and the TM or RM mark is added right of the numerical figures TM means true motion and RM means relative motion of OFFSET EBL1 and EBL2 The motion selection can be changed by NAV TOOL EBL EBL1 OFFSET or EBL2 OFFSET select RM or TM and press ENT key 4 Press EBL knob again and the base point returns to the refer...

Страница 62: ...ing scale and CURSOR The settings available in the true bearing with the true north of 000 degree and in the relative bearing with the heading of 000 degree 1 Press MENU key to display Menu Select NAV TOOL BRG TRUE REL TRUE or REL and press ENT key EBL PI ERBL and CURSOR can be changed directly on the display by using joystick Relative mode True mode ...

Страница 63: ...number setting 1 NAV TOOL PI CURSOR select NORMAL 1 2 3 4 5 6 or 7 and press ENT key NORMAL PI line number is equal to range of range ring Variable range is min equal to range ring one max 50 of selected range 1 to 7 Designated number of PI is displayed Variable range is min 0 max about 1 6 times of selected range Operation 1 Press VRM knob and PI lines are displayed Bearing is displayed by figure...

Страница 64: ...E BROWN USER1 or USER2 BKGND PPI BLACK BLUE USER1 or USER2 BKGND DATA BLACK BLUE USER1 or USER2 DATA WHITE GREY USER1 or USER2 OTHERS 1 SCALE NORMAL DARK USER1 or USER2 OS TOOL 2 NORMAL USER1 or USER2 TGT NORMAL USER1 or USER2 COAST LINE NORMAL USER1 or USER2 NAV LINE NORMAL USER1 or USER2 ROUTE NORMAL USER1 or USER2 EVENT MKR NORMAL USER1 or USER2 AREA NORMAL USER1 or USER2 PAST TRK NORMAL USER1 ...

Страница 65: ...ting the each item and after adjusting each item with joystick press ENT key You can change the following item s color ECHO TRAIL BKGND PPI BKGND DATA DATA SCALE OS TOOL TGT COAST LINE NAV LINE ROUTE EVENT MKR AREA PAST TRK MONITORED ROUTE LAT LON LINE CURSOR CHART LAND DEPTH R G B Black 0 0 0 Blue 0 0 255 Green 0 255 0 Light blue 0 255 255 Red 255 0 0 Pink 255 0 255 Yellow 255 255 0 White 255 255...

Страница 66: ...Select the mode day or night by pressing DAY NIGHT key brightness of which you would like to change 2 Press MENU key to display Menu Select BRILL select ECHO TRAIL BKGND OS TOOL TGT MAP CURSOR DATA and MENU ALERT After adjusting each item with joystick press ENT key Color and brightness settings reset If you want to return the color and brightness settings back to default value please use followin...

Страница 67: ...lay REL and true display TRUE are available At the start of trail TRAIL characters at lower left of the display change to yellow When trail time has passed character color turns white Note The trail by its nature records and displays past images The trail does not display right after transmission is started In addition after the change of TIME or after the change of two or more steps in RANGE the ...

Страница 68: ...ion SHAPE Three types of trail shapes available as shown below TRAIL LEVEL This is to set up echo level of trail to be recorded 1 records all signal levels returned as a trail 15 records only the strongest signal levels as a trail CLEAR This is to delete all current trails and restart new trails RANGE KEEP OFF deletes trails when changing range ON does not delete trails when changing range If sets...

Страница 69: ...his mode displays the trail of the moving target over a specified time interval independently from own ship s movement This mode is used to monitor the bearing and speed of the target No trails of fixed targets such as land are shown using this display The amount of movement of all ships own ship Target 1 and Target 2 are drawn as trails The land does not move so its trail is not shown Target 1 Co...

Страница 70: ...on OPPOSITE Off centering to the stern direction 1 Press MENU key to display Menu Select DISPLAY OFF CENT POINT and press ENT key after selecting the off center point CURSOR or OPPOSITE 2 Off centering is executed by pressing OFF CENT key or move cursor to set value of ON or OFF of OFF CENT at the upper left part of the display and press ENT key 3 The difference of CURSOR and OPPOSITE are as follo...

Страница 71: ...L T REL RAIN TRAIL TRAIL TIME SEA DISPLAY STAB MODE TRAIL RESET GAIN ALARM TM RESET TARGET C UPRESET NAV TOOL FERRY MODE ECHO ALARM MAP ECHO ALARM EDIT SYSTEM VECT T REL MAPAREA ALARM VECT TIME NAV LINECROSS CPA TCPA AUTO ACQ AREA AUTO ACQ AREA EDIT OS PAST TRK RESET AIS TT DELETE RR TT ALL DELETE BRG T REL GUARD LINE OS PAST TRK REC SHIPOUTLINE TARGET TRACK STERN LINE MAPDISP BARGEICON CHART EVEN...

Страница 72: ... in internal memory 1 Press MENU key to display Menu Select ECHO PICTURE MODE press ENT key after making your selection The setting value can be selected from PICTURE1 PICTURE2 PICTURE3 NEAR FAR HARBOR ROUGH SEA RAIN or PURE Initial setting of PICTURE MODE PROCESS ENHANCE IR VID PICTURE1 OFF OFF 1 3 PICTURE2 C2 2 OFF 2 PICTURE3 C2 1 OFF 1 PROCESS Refer to 2 22 Echo process ENH Refer to 2 23 Echo e...

Страница 73: ...o suppress the sea and rain snow clutter will be stronger in the order of C1 C2 C3 Process mode A1 A2 A2 mode will display the hardly distinguished target of video signal for a long time than A1 mode Note For confirmation of an image that may be hidden between the waves and the image of a fast ship that appears at a different position for each scan the image may be displayed weaker than the actual...

Страница 74: ...ow of OFF 1 2 3 or 4 of ENHANCE at the upper right part of the display Press ENT key repeatedly until the desired choice appears Note The setting value can be selected from OFF 1 2 3 and 4 and the larger value applies stronger enhance effect Note The enlargement of targets has effect on all echoes So a large target such as land is also enlarged Consequently land and a small target may sometimes be...

Страница 75: ...rger value applies stronger interference rejection effect Too much removal effect may also remove small targets Pay attention to that 2 25 Video contrast This is a function to change the relation between the strength of returned echo and their display gradation At VID 1 the difference of signals strength between strong echo and weak echo becomes larger As the numerical figure becomes larger in VID...

Страница 76: ...NT key Selection value 1 Lowest signal level color Selection value 14 Highest signal level color 2 27 Pulse width This radar can change pulse width of the transmission from 0 25NM to 12NM range scale SP and LP pulse width can be set separately The pulse width in use is displayed at the upper left of the display using the indications shown in the table below 1 Press MENU key to display Menu Select ...

Страница 77: ... L1 L2 12 L1 L2 L1 L2 24 L2 L2 48 L2 L2 96 L3 L3 SP mode LP mode 4kW Range 0 125 S1 S1 0 25 S1 S2 S1 S2 0 5 S1 S2 M1 M2 S1 S2 M1 M2 0 75 S1 S2 M1 M2 S1 S2 M1 M2 1 5 S1 S2 M1 M2 L1 S1 S2 M1 M2 L1 3 S2 M1 M2 L1 L2 S2 M1 M2 L1 L2 6 M1 M2 L1 L2 M1 M2 L1 L2 12 L2 L2 24 L2 L2 48 L2 L2 SP mode LP mode S 1 Short pulse 1 S 2 Short pulse 2 M 1 Medium pulse 1 M 2 Medium pulse 2 M 3 Medium pulse 3 L 1 Long pu...

Страница 78: ...o display Menu Select SYSTEM INTER SWITCH select INTER SWITCH mode and press ENT key Available choices INDEPENDENT MASTER INDEPENDENT SLAVE DUAL MASTER DUAL SLAVE CROSS MONITOR INDEPENDENT MASTER Connection status where one antenna is connected to one radar INDEPENDENT SLAVE Connection status where the dedicated cable is connected to the above mentioned INDEPENDENT MASTER and the image of antenna ...

Страница 79: ...ars to which each antenna is connected In this status the antenna that is not connected to its own radar is used MONITOR In this status the antenna is not connected and a simulator is connected and used Note When you use inter switch mode at first time please set Heading HL OFFSET TX DELAY and ANT CABLE adjustment of each antenna Refer to 4 1 2 4 1 3 and 4 1 5 of Installation manual These setting ...

Страница 80: ...N The cursor shape and data are always indicated on the display OFF The cursor shape and date will be disappeared after 30 sec from last cursor operation POSN DISP ON OFF of the latitude and longitude position display CURSOR HUP MOVE When HUP mode is used OFF always remains at the fixed position ON links a bearing changes and moves INFO ON OFF of the TT AIS and MAP information data display selecte...

Страница 81: ...p outline 1 Press MENU key to display Menu Select NAV TOOL SHIP OUTLINE SHIP OUTLINE ON or OFF and press ENT key ON Display own ship outline OFF Non display own ship outline 2 Select OS PROFILE and after selection This setup is to designate ship s outline A B C D OUTLINE A 0 511m B 0 511m C 0 63m D 0 63m ...

Страница 82: ...ON Turn ferry mode on or off HDG 0 180 Gyro reading has 180 degrees added to it or subtracted from it HEADING LINE UP DOWN Change of the heading line indication up or down 90 90 270 270 BOW 90 T STERN 270 T FERRY MODE OFF FERRY MODE ON HDG 0 HEADING LINE DOWN FERRY MODE ON HDG 180 HEADING LINE DOWN 90 FERRY MODE ON HDG 0 HEADING LINE UP FERRY MODE ON HDG 180 HEADING LINE UP FERRY FERRY FERRY FERRY...

Страница 83: ...ding on angle of ship s bearing When the ship s bearing is changing little by little the pictures become stable if the set value is larger In this case the direction of the heading line moves according to the change of the bearing When bearing exceeds the set value the pictures rotate to right position and heading line returns to the origin position 1 Press MENU key to display Menu Select DISPLAY ...

Страница 84: ...de of the display 1 Press MENU key to display Menu Select DISPLAY INFO DISP select UPERP MIDDLE1 MIDDLE2 or BOTTOM Selection value OWN SHIP INFO TARGET INFO WAY POINT INFO DAY INFO DEPTH TEMP WIND CRS SPD SET DRIFT This information of INFO DISP is displayed transparent overlaid on radar display Please use following procedure 1 Press MENU key to display Menu Select DISPLAY INFO BKGND OFF and press ...

Страница 85: ...nction has two movement modes of IN and OUT IN mode When the echo enters a specified fan type alarm area alarm message will be displayed at lower right of the display and an alarm will sound OUT mode When echoes leave specified fan type alarm area alarm message will be displayed at lower right of the display and an alarm will sound How to set echo alarm area Fan type 1 Press MENU key to display Me...

Страница 86: ...le line will disappear and echo alarm will be active 4 There are additional items ALARM DETECT LEVEL select 1 to 15 It designates echo strength to determine an alarm sound 1 means lowest signal echo level 15 means highest signal echo level When the level is set too low noise may cause false alarm Note DETECT LEVEL is applied to the map area alarm function of next section Note If the echo alarm are...

Страница 87: ...ss ENT key 2 Move cursor to first input position then press ENT key No 1 mark small circle is displayed with numerical number on the display and numerical data information is displayed in the AREA INFO area at right side on the display If necessary Latitude and longitude data can be changed using cursor and ENT key by AREA INFO Also line color can be changed directly by using cursor by AREA INFO I...

Страница 88: ...o methods to move map area position First method is to use cursor second is to input latitude longitude via the menu Example Cursor method 1 Press MENU key to display Menu Select ALARM MAP AREA ALARM MOVE CURSOR select 1 to 10 GO and press ENT key 2 Move cursor to the map area mark which you want to move to new positon then change color or delete position data 3 Press ACQ key middle circle mark wi...

Страница 89: ...hange color or delete position data 3 Press ACQ key middle circle mark will appear on the selected mark position and numerical data information is displayed in the AREA INFO at right side on the display 4 Move cursor to new position where you want to add point then press ENT key New position point will be inserted on the display Selected latitude and longitude position data can be changed directly...

Страница 90: ... ALARM DELETE CURSOR select 1 to 10 GO and press ENT key 2 Move cursor on the map area mark which you want to delete 3 Press ENT key Selected map area position data will delete How to clear entire block of map area data The map area data block can be cleared by using menu operation 1 Press MENU key to display Menu Select ALARM MAP AREA ALARM CLEAR BLOCK NUMBER select 1 to 10 GO and press ENT key S...

Страница 91: ...sor to first input position then press ENT key No 1 mark small circle is displayed with numerical number on the display and numerical data information is displayed in the NAV LINE INFO area at right side on the display If necessary latitude and longitude data can be changed using cursor and ENT key by NAV LINE INFO area Also line color can be changed directly by using cursor and ENT key by NAV LIN...

Страница 92: ... key 2 Move cursor to the nav line cross mark which you want to move to new positon then change color or delete position data 3 Press ACQ key medium circle mark will appear on the selected mark position and numerical data information will be displayed in the NAV LINE INFO area at right side on the display 4 Move cursor to new position then press ENT key Selected mark positon will move to new posit...

Страница 93: ...l appear on the selected mark position and numerical data information is displayed in the NAV LINE INFO area at right side on the display 4 Move cursor to new additional position then press ENT key New position point will be inserted on the display Selected latitude and longitude position data can be changed directly using cursor and ENT key via NAV LINE INFO area Line color can be changed directl...

Страница 94: ...ect 1 to 10 GO and press ENT key 2 Move cursor to the nav line cross mark which you want to delete 3 Press ENT key Selected nav line cross position data will be deleted How to clear The nav line cross alarm data block can be cleared by using menu operation 1 Press MENU key to display Menu Select ALARM NAV LINE CROSS CLEAR BLOCK NUMBER select 1 to 10 GO and press ENT key Selected nav line cross ala...

Страница 95: ...e display REL and true display TRUE REL This vector adds the course speed of a target to the course speed of own ship If the vector is directed towards own ship possibility of collision exists It shows danger of collision at a glance and is useful to avoid collision TRUE This vector shows the course speed of a target only regardless of own ship 1 Press MENU key to display Menu Select TARGET VECT a...

Страница 96: ...avoid collision it sets up LIMIT CPA closest point of approach and LIMIT TCPA time to CPA 1 Press MENU key to display Menu Select TARGET CPA and press ENT key after selecting the setup value Setting value 0 0 to 19 9 NM Select TARGET TCPA and press ENT key after selecting the setup value Setting value 1 0 to 63 0 min Set AIS ID DISP TYPE ID can be displayed with AIS target Set items NUMBER NAME MM...

Страница 97: ...ting value 1 0NM to 64 0NM ASSOCIATION When an AIS target and a tracked target of TT ATA are the same target it is automatically associated to a single target Select priority of the association with either AIS or TT ATA If the low speed ship is associated and displayed with TT priority then HDG may be unstable So the display with AIS priority is recommendable 1 Press MENU key to display Menu Selec...

Страница 98: ... SPD LIM It designates the minimum speed to determine association 1 0kn to 10 0kn TIME REPRIEVE It designates the time to determine association 1sec to 99sec RATIO It designates the ratio to determine association 0 to100 Automatic acquisition area AUTO ACQ AREA is function that is used for automatic acquisition of TT or AIS targets that enter area designated in a fan type range TT When an un track...

Страница 99: ...th a symbol at the left of numerical indication at the auto acquisition area in the menu display 4 When the setting of the automatic acquisition area is completed then press ENT key AUTO ACQ AREA will be activated Note If AUTO ACQ AREA is set in the whole circumference WIDTH needs to be set the 0 0 or 360 0 AUTO ACQ AREA BRG REL 338 0 WIDTH 115 0 RNG 006 0NM DEPTH 002 0NM EBL knob and VRM knob are...

Страница 100: ...ges to red In that case change TARGET INPUT RNG value and decrease the displayed targets Note If the displayed targets exceed 500 then next coming AIS data cannot be displayed For the sake of safety if warning is displayed then change INPUT RNG value immediately and decrease the displayed targets AIS function does not work due to incompleteness of input sentence If AIS is used in combination with ...

Страница 101: ...Refer to 4 2 AIS Types of AIS target symbol 1 Press MENU key to display Menu Select TARGET AIS HDG LINE ON and press ENT key Selection values OFF ON Turn indicator This is displayed only when HDG LINE is included in the target information received by AIS Refer to 4 2 AIS Types of AIS target symbol 1 Press MENU key to display Menu Select TARGET AIS TURN INDICATOR ON and press ENT key Selection valu...

Страница 102: ...SPD 0 0 to 100 0kn CPA TCPA OFF ON MOORED OFF ON AT ANCHOR OFF ON AGROUND OFF ON NUC OFF ON GUARD ZONE OFF ON Exclude from RNG filter ECHO ALARM OFF ON Exclude from RNG filter AIS auto active When sleeping target enters the AUTO ACQ AREA or AUTO ACTIVE sleeping targets is changed to active target AUTO ACQ AREA is applied to both AIS and TT ATA Refer to 4 1 Common setting Automatic acquisition area...

Страница 103: ...her reported HDG nor COG Activated target Activated target without HDG Activated target with neither reported HDG nor COG Activated target true scaled outlines Blink in 0 5 sec interval Activated target dangerous targets Blink in 0 5 sec interval Activated target without HDG Blink in 0 5 sec interval Activated target with neither reported HDG nor COG Activated target with heading lines Activated t...

Страница 104: ...ast cardinal mark South cardinal mark West cardinal mark Port hand mark Starboard hand mark Isolated danger Safe water Special mark Off position Lights failure Racon failure IALA dictionary topmarks Basic shape Emergency wreck mark North cardinal mark East cardinal mark South cardinal mark West cardinal mark Port hand mark Starboard hand mark Isolated danger ...

Страница 105: ...AIS and TT 0093153004 00 4 11 AIS SART AIS Search And Rescue Transponder BASE AIS SAR aircraft AIS SAR vessel ID can be displayed with Activated target Intended location of missing AtoN Safe water Special mark IALA dictionary topmarks ...

Страница 106: ...picture of the target being tracked is affected by rain snow clutter returns or sea clutter returns or moves very close to land Intensity of echoes and the TT function have a correlation ship and thus the target will be lost if no echoes and detected during six scans in succession If a lost target exists therefore radar gain must be increased to support detection of the target If radar gain is inc...

Страница 107: ...ing TT in combination with INFO DISP Manual acquisition 1 Move cursor to a target to be acquired and then press ACQ key A broken circle symbol is displayed at the cursor location and acquisition starts About 30sec from 1min later a broken circle symbol turn into a thick solid line displayed vector of target s motion trend and TT ID number if selected and displayed within 3min the target s predicti...

Страница 108: ... selected SELECT ID and DELETE function 1 Press MENU key to display Menu Select TARGET TT SELECT ID select ID number and press ENT key Selection values 1 to 50 2 Select DELETE and press ENT key Cursor operation 1 Move cursor to a TT ATA target to be deleted keep OFF key pressed and then press ACQ key Delete all TT targets 1 Press MENU key to display Menu Select TARGET TT ALL DELETE and press ENT k...

Страница 109: ...isplayed at indicating numerical value Tracked radar targets dangerous target Red clolor Blink in 0 5 sec interval Lost target Red clolor Pressing OFF key to acknowledge changes of target symbol to normal color and stop blinking ID can be displayed in Tracked target Alarm display and alarm sound disappear by pressing OFF key to acknowledge while color remains red until the target leaves outside of...

Страница 110: ... This page intentionally left blank ...

Страница 111: ...rd line from own ship can be set from 0 to 10000m left and right side independently 1 Press MENU key to display Menu Select NAV TOOL GUARD LINE GUARD LINE ON and press ENT key 2 Select LEFT set left side distance 0 to 10000m and press ENT key 3 Select RIGHT set right side distance 0 to 10000m and press ENT key Right side guard line Left side guard line Right side distance Left side distance Headin...

Страница 112: ... no small targets right under the HL marker 1 Press MENU key to display Menu Select NAV TOOL HL BLINK ON and press ENT key 5 3 Stern line STERN LINE is to set up the display of dotted line extended from reference position to bearing scale toward stern direction 1 Press MENU key to display Menu Select NAV TOOL STERN LINE ON and press ENT key Heading line Heading line Stern line ...

Страница 113: ...able to display it on the display 1 Press MENU key to display Menu Select NAV TOOL BARGE ICON BARGE ICON ON and press ENT key 2 Select and set POSITION LENGTH WIDTH LINE NO ROW NO and OFFSET POSITION FWD AFT LENGTH 0m to 511m WIDTH 0m to 511m LINE NO 1 to 10 ROW NO 1 to 10 OFFSET 0m to 511m Length Width Line number Row number Offset OS outline Barge icon OS outline Forward positon After position L...

Страница 114: ... This page intentionally left blank ...

Страница 115: ...1 Press MENU key to display Menu Select MAP OWN TRACK select TRACK0 to TRACK9 select OFF ON or DISP and press ENT key 1 Setting 2 Record Display of Own ship past track 3 OFF 4 Own ship past track is not recorded 5 Own ship past track is not displayed 6 ON 7 Own ship past track is recorded and displayed 8 When own ship past track record will be full in a block it continues to be recorded in the nex...

Страница 116: ...ct color from eight colors press ENT key PAST TRACK of the selected block will turn selected color 4 Select STYLE select TRACK NUMBER 0 to 9 select STYLE select past track line style press ENT key How to Clear OWN SHIP PAST TRACK 1 Press MENU key to display Menu Select MAP OWN TRACK CLEAR select TRACK NUMBER 0 to 9 GO and press ENT key PAST TRACK of the selected block will be cleared 6 3 Target tr...

Страница 117: ...numbers are not displayed when NUMBER of AIS ID DISP TYPE TT ID DISP TYPE setting is OFF Refer to 4 1 Common setting Set TT ID DISP TYPE or Set ID DISP SIZE 6 4 COAST LINE This function is to let user generate up to 10 coast lines with up to 100 points each to mark important areas of navigation such as danger zone areas or navigation channels etc Coast line can be setup by inputting Lat Lon inform...

Страница 118: ... line info area 3 Move cursor to second input position then press ENT key No 2 mark is displayed and a line is generated from No 1 to No 2 4 Move cursor to third input position then press ENT key No 3 mark is displayed and a line is generated from No 2 to No 3 You can input up to 100 point When input is completed press MENU key Mark number will disappear 5 Refer to 3 3 Nav line cross How to edit f...

Страница 119: ...to the right left up or down and press ENT key 4 Select COLOR Eight colors box is displayed Select color by moving of joystick up or down and press ENT key 5 Select DIVIDE ON or OFF and press ENT key DIVIDE ON means that it is not connected coast line to the next number data 6 Select SET and press ENT key to save input data How to move 1 CURSOR OPERATION 1 Press MENU key to display Menu Select MAP...

Страница 120: ...cursor to new position then press ENT key 4 Press MENU key to exit MOVE operation 2 BLOCK NUMBER OPERATION 1 Press MENU key to display Menu Select MAP COAST LINE MOVE BLOCK NUMBER select 1 to 10 Following input menu is displayed 2 Select NUMBER NUMBER data screen is displayed select 1 to 100 Press ENT key Selected number s numerical data is shown 3 Edit data of LAT LON COLOR and DIVIDE 4 Select SE...

Страница 121: ... mark will be displayed on the selected 3 Move cursor to the position that new data will be added then press ENT key 4 Press MENU key to exit ADD operation 2 BLOCK NUMBER OPERATION 1 Press MENU key to display Menu Select MAP COAST LINE ADD BLOCK NUMBER select 1 to 10 Following input menu is displayed 2 Select NUMBER NUMBER data screen is displayed select 1 to 100 Press ENT key Selected number s nu...

Страница 122: ...ess ENT key Selected coast line data will be deleted 2 BLOCK NUMBER OPERATION 1 Press MENU key to display Menu Select MAP COAST LINE DELETE BLOCK NUMBER select 1 to 10 Following delete menu is displayed 2 Select NUMBER NUMBER data screen is displayed select 1 to 100 Press ENT key Selected number s numerical data is shown 3 Select SET and press ENT key to delete selected data How to clear All data ...

Страница 123: ...m function for NAV LINE CROSS alarm Refer to 3 3 Nav line cross 1 Press MENU key to display Menu Select MAP NAV LINE NAV LINE Select the number of the nav line to display ALL 1 to 10 OFF EDIT Make nav line CURSOR BLOCK NUMBER MOVE Revise the position of the nav line CURSOR BLOCK NUMBER ADD Add a point data in a nav line CURSOR BLOCK NUMBER DELETE Delete a point data in a nav line CURSOR BLOCK NUMB...

Страница 124: ...is set to OFF then route waypoint name information will not be displayed and if set to ON all waypoints on the route will have name information displayed next to them 1 Press MENU key to display Menu Select MAP ROUTE ROUTE Select the number of the route to display ALL 1 to 10 OFF EDIT Make route CURSOR BLOCK NUMBER MOVE Revise route position CURSOR BLOCK NUMBER ADD Add a point to a route CURSOR BL...

Страница 125: ...ent mark using cursor and ENT key or BLOCK NUMBER CLEAR Clear all event marks in a given memory block User can designate function key such as F1 F2 F3 keys or RAIN SEA GAIN knobs to EVENT CURSOR or EVENT OWN for quick shortcut to input EVENT MKR Refer to 2 20 Function key usage When set EVENT MKR by using function key operation this radar can output Lat Lon data of EVENT MKR to external device It ...

Страница 126: ...s in area CURSOR BLOCK NUMBER ADD Add a point to any given position in an area line CURSOR BLOCK NUMBER DELETE Delete a point data in area CURSOR BLOCK NUMBER CLEAR Clear selected block number area data AREA operation is same as 3 2 Map area alarm operation 6 9 MONITORED ROUTE This function when activated can display ROUTE information from external device such as chart plotter or GPS navigator RTE...

Страница 127: ...he numbers will disappear or reappear with turning this function on or off 1 Press MENU key to display Menu Select MAP TARGET TARCK ID ON and press ENT key 6 12 WPT FLAG This function is related to MONITORED ROUTE function When route or waypoint is inputted from external device flag will be shown of first waypoint When route and waypoint information is inputted the first waypoint on a route takes ...

Страница 128: ...r of the Processor unit The sticker of SD Card 2 is attached by the side of the lower card reader CAUTION Turn off the power of radar system before inserting removing the C MAP SD card Chart on off 1 Press MENU key to display Menu Select MAP CHART select ON or OFF and press ENT key Setting of the detailed chart display 1 Press MENU key to display Menu Select MAP CHART DISP SET select item of detai...

Страница 129: ...L time can be changed directly at the INFO DISP area with joystick and ENT key without using menu Note Refer to 2 33 3 INFO DISP Refer to MAINTENANCE I O TIME menu for detailed how to set time For display of DATE TIME receive ZDA sentence from the external device or set the internal clock of radar Refer to 4 2 1 Setup TIME of Installation manual When the battery runs low the internal clock of the ...

Страница 130: ...and press ENT key Selection values 1 to 8 1 Lowest frequency 8 Highest frequency Key click ON OFF 1 Press MENU key to display Menu Select SYSTEM SOUND KEY CLICK select ON or OFF and press ENT key External buzzer setting External buzzer signal Failure alarm can be output from J1 connector on the back panel Output signal is relay contact Alarm contact will close in case of failure Output of relay co...

Страница 131: ...se the RANGE key Language changes to Japanese To English 1 Press POWER ON OFF key to turn on while keeping RANGE key 2 Keep RANGE key pressed until the start up screen is displayed then release the RANGE key Language changes to English 7 5 DISPLAY INFOMATION DISP INFO This radar can reduce the radar information items to watch radar image wider Selection items are ALL MAIN OFF the indication inform...

Страница 132: ...M and MAP menu 1 Press MENU key to display Menu Select SYSTEM HELP select ON or OFF and press ENT key 7 7 MAINTENANCE MENU STARTUP Refer to 4 1_STARTUP menu of Installation manual I O Refer to 4 2_Setup I O Interface of Installation manual SECTOR MUTE Refer to 4 3_Setup SECTOR MUTE mode of Installation manual PRESET Refer to 4 4_Setup PRESET of Installation manual BACKUP BITE Refer to Chapter 9_Si...

Страница 133: ...ey External save of setup and map data To save setup and map data externally this information can be later used to restore after a possible malfunction The external memory uses an SD memory card CAUTION Please do not use the SD memory card which is loaded with software program files To perform external backup to SD card 1 Insert SD memory card in the upper card reader of the Processor unit SD Card...

Страница 134: ...ed while transmitting TOTAL HOUR menu indicates the total operating time of the radar This menu can reset total hour to 0 1 Press MENU key to display Menu Select MAINTENANCE TOTAL HOUR RESET and press ENT key TX HOUR menu indicates the total transmitting time of the radar This is useful information to use when exchanging radar parts Use this hour information to judge magnetron life expectancy Rese...

Страница 135: ...d to simplify full menu and turn off the items in full menu that are not used This is often used to remove not needed menu items for simple operation of the radar 1 Press MENU key to display Menu Select MAINTENANCE MENU SETUP GO and press ENT key Setup menu display will display 2 Select menu item to set ON or OFF select X or and press ENT key 3 When setup finish press MENU key Menu display will di...

Страница 136: ...cessor unit SD Card 1 is labeled beside the upper card reader 4 Press POWER ON OFF key to turn on radar will start update procedure automatically Message of LOADING IN PROGRESS PLEASE DO NOT POWER OFF etc and time bar will be displayed During updating EBL1 and VRM1 EBL2 and VRM2 BRILL and PANEL key s lamps flash red Few minutes later when program update is complete LOADING COMPLETE and PLEASE EJEC...

Страница 137: ... glance The microwave radiated from the radar is referred to as pulse wave and the transmitting and receiving of these waves is alternated Up to thousands of pulse waves are transmitted and received during one rotation The typical radar antenna is of parabolic type or slotted array type and its performance is essential for good radar performance Some of factors affecting the quality of the target ...

Страница 138: ...h1 Characteristics of radar radio wave D NM h2 Target height m h1 Antenna height m Target hardness reflected The strength of the reflected wave from a target varies depending on not only the distance from the target its height or size but also its material and features A target with a low degree of reflection or low incident angle such as FRP Fiber Reinforced Plastic and wooden ship is not reflect...

Страница 139: ... should be paid in shadowed areas False image An image that does not actually exist false image at sea may appear on the display The phenomena that causes false echoes are categorized and be described as follows Virtual image The image of a large physical object in proximity may appear in two different orientations One is a real image and the other is a false image caused by wave re reflected by t...

Страница 140: ...ng between own ship and the reflective target changes then the duplicate targets will disappear Therefore this false image can be easily distinguished Double image Real image False image caused by double image Own ship Large vessel Side lobe images The microwave beam radiated from the antenna has a side lobe in different direction than that of the main beam Since this side lobe level is lower than...

Страница 141: ...ayed as a false image with closer distance than the actual one This phenomenon is a result of the wide range echo delay time exceeding the transmission period and is displayed as echo in the following rotation If the range scale is changed and the target range is changed it can be judged as a false image 8 3 Radar interference When the radar with the same frequency band is used nearby interference...

Страница 142: ... This page intentionally left blank ...

Страница 143: ... listed below refer to the Installation manual Items posted 9 1 No alarm sound ALARM TEST 9 2 Operation unit panel key is not operational PANEL TEST 9 3 TT ATA is not operational DIAGNOSE TT 9 4 No AIS display DIAGNOSE AIS 9 5 Need to confirm serial input SERIAL MONITOR 9 6 No radar video display ANT MONITOR 1 Press MENU key to display Menu Select MAINTENANCE BITE ...

Страница 144: ...quency setting because it may be hard to hear the alarm sound according to the setting value Select SYSTEM SOUND FREQUENCY Initial setting 4 3 Alarm sounds two times and alarm display appears at the lower right of the display Alarms displayed are WARNING B 999 Test alert only 4 Confirmation is completed if alarm sounded 5 Alarm sounds are repeated every 60 seconds Select MAINTENANCE BITE ALARM TES...

Страница 145: ...isplay Menu Select MAINTENANCE BITE PANEL TEST 2 Panel illustration will appear on the display 3 Press any key except MENU key mark will appear at the left side of key name during the key press The line in the circle will rotate when the knob is turned The circle color will change when the knob is pressed The small circle in the square will move when joystick is moved 4 Pressing MENU key will comp...

Страница 146: ...eing pressed First confirm that INPUT RNG is properly set The targets outside of INPUT RNG will not be acquired This procedure confirms ATA function 1 Press MENU key to display Menu Select MAINTENANCE BITE DIAGNOSE TT 2 Confirm mark appears on the left side of HDG 3 Move joystick to the left to complete If x mark is displayed in step 2 then confirm HDG input for Processor unit ...

Страница 147: ...o the left to complete If x mark is displayed in step 2 then In the case of AIS DATA No valid AIS data input Confirm AIS receiver connected to Processor unit AIS DATA is input to AIS J2 connector In the case of HDG No valid HDG input Confirm HDG input of Processor unit HDG is input to NMEA connector In the case of SPD No valid SPD input Confirm SPD input of Processor unit SPD is input to NMEA conn...

Страница 148: ...TOR select J3 J5 J6 AIS or ALL and press ENT key ALL can confirm the data of all ports at a time 2 Input data will be displayed Since the data keeps coming in and the display keeps changing it may be hard to observe the sentences By pressing ENT key data display will stop temporarily to confirm data content 3 Move joystick to left to complete Data confirming item in step 2 In the case that data is...

Страница 149: ...o left to complete Antenna status criteria in step 2 Connected scanner model name and type HIGH VOLTAGE If the value is other than xxx to xxx indicates high voltage malfunction MAG CURRENT MONI If the value is other than xx to xxx indicates magnetron malfunction MAG HEATER If the value is other than xx to xxx indicates magnetron malfunction MOTOR MONI No use TUNE VOLTAGE If the value is other than...

Страница 150: ... This page intentionally left blank ...

Страница 151: ... 2 0 8 Vertical beam width 22 22 22 25 Side lobe within 10 23dB 25dB 25dB 25dB Side lobe outside 10 28dB 30dB 30dB 30dB Polarization Horizontal Scanner Model name MDC 5004 MDC 5006 MDC 5012 MDC 5025 Scanner unit RB806 RB807 RB808 RB809 Rotation 24 rpm or 48 rpm 24 rpm or 42 rpm Output frequency X band 9410MHz 30MHz Output power Peak 4kW 6 kW 12 kW 25 kW Magnetron MAF1421BY MAF1562R MAF1565N M1568B...

Страница 152: ... 4 1400 0 6 1000 0 8 600 1 2 450 1 2 L3 PRF Hz Pulse width μs Range NM S1 S2 M1 M2 M3 L1 L2 0 125 0 25 0 5 0 75 1 5 3 6 12 24 48 2000 0 08 2000 0 08 1800 0 15 1500 0 3 800 0 5 500 1 0 L1 L2 M1 M2 S1 S2 PRF Hz Pulse width μs Range NM 0 125 0 25 0 5 0 75 1 5 3 6 12 24 32 48 64 2600 0 08 2600 0 15 2400 0 3 2000 0 4 1400 0 6 1000 0 8 600 1 2 450 1 2 L3 L2 M3 L1 M1 M2 S1 S2 Range NM PRF Hz Pulse width ...

Страница 153: ... 25 0 5 0 75 1 5 3 6 12 24 48 64 96 NM Up to 48 NM for transmit output 4kW Up to 64 NM for transmit output 6 kW 12 kW Up to 96 NM for transmit output 25 kW Bearing accuracy 1 Presentation modes Head up North up and Course up Functions CFAR Clutter rejection Interference rejection Enhance Process Residual image Averaging VRM EBL Parallel index Cursor position Lat Lon Bearing true relative Trail tru...

Страница 154: ...Chapter 10 Specifications MDC 5000 Series 0093153004 00 10 4 10 3 External view and dimensions Unit mm inch MRO 110 MRM 110 ...

Страница 155: ...MDC 5000 Series Chapter 10 Specifications 0093153004 00 10 5 9Feet RW701B 09 For RB808 only RB806 RB807 808 Unit mm inch Unit mm inch ...

Страница 156: ...Chapter 10 Specifications MDC 5000 Series 0093153004 00 10 6 Unit mm inch RB809 ...

Страница 157: ...TOM INFO BKGND OFF ON ALARM ECHO ALARM OFF IN OUT BRG REL 000 0 to 359 9o WIDTH 000 0 to 360 0o RNG 000 0 to 999 9 NM DEPTH 000 0 to 999 9 NM MAP AREA ALARM OFF IN OUT EDIT CURSOR 1 to 10 CANCEL GO BLOCK NUMBER 1 to 10 NUMBER LAT 90o 00 000S to 90o 00 000N LON 180o 00 000W to 180o 00 000E COLOR 8 colors DIVIDE OFF ON SET MOVE CURSOR 1 to 10 CANCEL GO BLOCK NUMBER 1 to 10 NUMBER 1 to 100 LAT 90o 00...

Страница 158: ... GO BLOCK NUMBER 1 to 10 NUMBER 1 to 100 LAT 90o 00 000S to 90o 00 000N LON 180o 00 000W to 180o 00 000E COLOR 8 colors DIVIDE OFF ON SET ADD CURSOR 1 to 10 CANCEL GO BLOCK NUMBER 1 to 10 NUMBER 1 to 100 LAT 90o 00 000S to 90o 00 000N LON 180o 00 000W to 180o 00 000E COLOR 8 colors DIVIDE OFF ON SET DELETE CURSOR 1 to 10 CANCEL GO BLOCK NUMBER 1 to 10 NUMBER 1 to 100 LAT 90o 00 000S to 90o 00 000N...

Страница 159: ... 0 to 60 0o SPD 1 0 to 20 0 kn SPD LIM 1 0 to 10 0 kn TIME REPRIEVE 1 to 99 sec RATIO 0 to 100 AUTO ACQ AREA OFF ON BRG REL 000 0 to 359 9o WIDTH 000 0 to 360 0o RNG 000 0 to 999 9 NM DEPTH 000 0 to 999 9 NM AIS AIS OFF ON SELECT ID 101 to 1100 ACTIVE SLEEP ANCH OFF ON SHIP OUTLINE OFF ON HDG LINE OFF ON TURN INDICATOR OFF ON OS DISP OFF ON OS MMSI 0 to 1073741824 AUTO ACTIVE CPA TCPA OFF ON RNG 0...

Страница 160: ...P OUTLINE OFF ON OS PROFILE OUTLINE A 0 to 511m OUTLINE B 0 to 511m OUTLINE C 0 to 63m OUTLINE D 0 to 63m HL BLINK OFF ON STERN LINE OFF ON BARGE ICON BARGE ICON OFF ON POSITION FWD AFT LENGTH 0 to 511 m WIDTH 0 to 511 m LINE NO 1 to 10 ROW NO 1 to 10 OFFSET 0 to 511 m MAP OWN TRACK TRACK0 OFF ON DISP TRACK1 OFF ON DISP TRACK2 OFF ON DISP TRACK3 OFF ON DISP TRACK4 OFF ON DISP TRACK5 OFF ON DISP TR...

Страница 161: ... 1 to 10 NUMBER 1 to 100 LAT 90 00 000S to 90 00 000N LON SET CLEAR BLOCK NUMBER 1 to 10 CANCEL GO NAV LINE NAV LINE ALL 1 2 3 4 5 6 7 8 9 10 OFF EDIT Same COAST LINE EDIT MOVE Same COAST LINE MOVE ADD Same COAST LINE ADD DELETE Same COAST LINE DELETE CLEAR Same COAST LINE CLEAR ROUTE ROUTE ALL 1 2 3 4 5 6 7 8 9 10 OFF EDIT Same COAST LINE EDIT MOVE Same COAST LINE MOVE ADD Same COAST LINE ADD DEL...

Страница 162: ...SER2 EVENT MKR NORMAL USER1 USER2 AREA NORMAL USER1 USER2 PAST TRK NORMAL USER1 USER2 MONITORED ROUTE NORMAL USER1 USER2 LAT LON LINE NORMAL USER1 USER2 CURSOR NORMAL DARK USER1 USER2 CHART LAND DEPTH WHITE BLUE USER1 USER2 USER1 COLOR ECHO Set color of 15 levels individually USER2 COLOR TRAIL Set color of 16 levels individually BKGND PPI BKGND DATA Set 2 colors of BKGND and BORDER DATA SCALE OS T...

Страница 163: ...to 4 000 ANT HEIGHT 0 to 100 m ANT CABLE 0 to 100 m MBS 0 000 to 2 000 SEA CURVE 1 to 8 FUNCTION KEY F1 OFF F2 ECHO F3 PROCESS RAIN IR SEA VID GAIN RAIN SEA GAIN TRAIL TRAIL T REL TRAIL TIME TRAIL RESET DISPLAY STAB MODE TM RESET C UP RESET FERRY MODE ALARM FUNCTION KEY TARGET VECT T REL VECT TIME CPA TCPA AIS TT DELETE NAV TOOL RR BRG T REL GUARD LINE SHIP OUTLINE STERN LINE BARGE ICON MAP MAP DI...

Страница 164: ... HDT HDG HDM VTG RMC RMA MAN MAN 0 0 to 359 9 OFFSET 0 0 to 359 9 XXXX HDG input source display OFFSET HDG OFFSET value STW STW AUTO VHW VBW VTG RMC RMA MAN CURRENT MAN 0 0 to 100 0 kn XXX STW input source display COG SOG COG SOG AUTO VBW VTG RMC RMA MAN COG MAN 0 0 to 359 9o SOG MAN 0 0 to 100 0 kn XXXX COG input source display XXXX SOG input source display POSITION POSITION AUTO GNS RMA MAN LAT ...

Страница 165: ... 0 to 10 0sec TLL 0 0 to 10 0sec TTD 0 0 to 10 0sec TTM 0 0 to 10 0sec VBW 0 0 to 10 0sec VDR 0 0 to 10 0sec VHW 0 0 to 10 0sec VTG 0 0 to 10 0sec ZDA 0 0 to 10 0sec TLL OUT TT MARK TARGET INPUT BWC DBT DPT DTM GGA GLC GLL GNS HBT HDG HDM HDT MTW RMA RMB RMC ROT RTE THS VBW VDR VHW VTG WPL XTE ZDA BAUDRATE J3 4800 9600 19200 38400 J5 4800 9600 19200 38400 J6 4800 9600 19200 38400 AUTO SETUP CANCEL...

Страница 166: ...CANCEL GO OWN TRACK SAVE CANCEL GO PARAMETER RESET CANCEL GO MAP PAST RESET CANCEL GO BITE ALARM TEST OFF ON PANEL TEST Panel test DIAGNOSE TT TT status DIAGNOSE AIS AIS status SERIAL MONITOR J3 Monitor J5 Monitor J6 Monitor OP1 Monitor OP2 Monitor AIS Monitor ALL Monitor ANT MONITOR ANT status monitor SD CARD SD CARD 1 Backup status SD CARD 2 Backup status TOTAL HOUR CANCEL RESET TX HOUR CANCEL R...

Страница 167: ...oint position 2 OFF key ACQ key Move cursor to a TT ATA target to be deleted And press ACQ key while pressing OFF key Delete TT target Refer to 4 3 TT ATA Delete TT target 3 OFF key Function key which EVENT CURSOR function is registered with F1 F2 F3 keys RAIN SEA GAIN knobs Move cursor to an event mark to be deleted And press Function key while pressing OFF key Delete event mark Refer to 6 7 EVEN...

Страница 168: ...to Function key is displayed Refer to 2 20 Function key usage 2 Move cursor to AIS or TT ATA target to display track And press ACQ key while pressing ENT key Start target track Refer to 6 3 Target track past position display 3 Move cursor to AIS or TT ATA target to track off and press OFF key Finish target track Refer to 6 3 Target track past position display 4 MENU ENT key Power ON Long press Aft...

Страница 169: ...true T hh CR LF Check sum Heading degrees true Note for IMO mode II IN HE HN HC GA GP GL GN and SN are accepted HDG Heading deviation and variation hh CR LF Check sum Magnetic variation degrees Magnetic variation degrees Magnetic sensor heading degrees Note This sentence is not accepted for IMO radar HDM Heading Magnetic M hh CR LF Check sum Heading degrees magnetic Note This sentence is not accep...

Страница 170: ...mmss ss A llll ll N S yyyyy yy E W Speed VBW Dual ground water speed A hh CR LF Check sum These fields are not used Status ground speed A Valid V Invalid Transverse ground speed knots Longitudinal ground speed knots Status w ater speed A Valid Invalid Tranverse w aterspeed knots Longitudinal w ater speed knots Note for IMO mode II IN VD GA GP GL GN SN VM and VW are accepted VTG Course over ground ...

Страница 171: ...de Check sum UTC of position These field is not used GPS quality indicator 1 2 3 4 5 Valid 0 6 7 8 Invalid 0 Fixnot invalid or invalid 1 GPS SPS mode 5 Float RTK 2 Differential GPS SPS mode 6 Estimated mode Note for IMO mode 3 GPS PPS mode 7 Manual input mode II IN GA GP GL GN and SN are accepted 4 Real time Kinematic 8 Simulator mode hh CR LF a GGA hhmmss ss llll ll N S yyyyy yy E W a xxxx xx RMC...

Страница 172: ...c GNSS data a hh CR LF UTC of Not used Check sum position fix Longitude E W Navigation status S Safe Latitude N S Mode indicator C Caution Status A Valid V Invalid A D P R F Valid U Unsafe E M S N Invalid V Not valid RMA Recommended minimum specific LORAN C data a hh CR LF Not used Not used Check sum Longitude degrees E W Mode indicator A D valid Latitude degrees N S E M S N invalid Status A data ...

Страница 173: ... entries Sequential message identifier 00 to 99 Sentence number 01 to 99 Total number of sentences for this message 01 to 99 ARC Alert command refused c hh CR LF Relese time Check sum Note Refused alert command A Q O or S A Acknowledge Alert instance 1 to 999999 Q Request repeat information Alert identifier O Responsibilitytransfer Manufacturer mnemonic code S Silence ALR Set alarm state Time of a...

Страница 174: ... message Message part 6bit fields AIS channel A B Message number 1 to 9 Sentence number 1 to 9 Total number of sentences needed to transfer the message 1 to 9 VDO AIS VHF data link own vessel report x hh CR LF Check sum Number of fill bits 0 to 5 Encapsulated ITU R M 1371 radio message Message part 6bit fields AIS channel A B Message number 1 to 9 Sentence number 1 to 9 Total number of sentences n...

Страница 175: ... latitude longitiude Mode indicator N S E W Waypoint ID Distance nautical miles Note Mode indicator Bearing digrees magnetic A D Valid Bearing digrees true E M S N Invalid RTE Routes hh CR LF Check sum w aypoint n identifier Additional w aypoint identifiers Waypoint identifire FROM TO Route identifier Message mode C complete route all w aypoints W w orking route first listed w aypoint is FROM seco...

Страница 176: ...digrees true E M S N Invalid x x N c c yyyyy yy E W x x T x x M BWC hhmmss ss llll ll N S yyyyy yy E W x x x x x x A RMB A x x a c c c c llll ll N S RMB Recommended minimum navigation information a hh CR LF Status Not used Destination Not used Check sum A Valid w aypoint longitude Mode indicator V Data Direction E W A D valid Invalid to steer Destination w aypoint E M S N invalid L R latitude N S ...

Страница 177: ...otal number of sentences WPL Waypoint location hh CR LF Check sum Waypoint identifier Waypoint longitude E W Waypoint latitude N S c c WPL llll ll N S yyyyy yy E W c c a c c c c c c RTE x x x x Depth DPT Depth Check sum Maximum range scale in use Offset from transducer in metres Water depth relative to the transducer in metres DBT Depth below transducer Check sum Water depth fathoms Water depth m ...

Страница 178: ...s These fields are not used status status status status status A Valid B Blink w arning Note When only tw o TD data are effective TD data is displayed C Cycle w arning S SNR w arning a hh CR LF x x a x x a x x a x x a x x a GLC xxxx x x Wind MWD Wind direction and speed hh CR LF Check sum Wind speed m s Wind speed knots Wind direction 0 to 359 magnetic Wind direction 0 to 359 true MWD x x T x x M ...

Страница 179: ...er the message 01 to FF TLB Target label hh CR LF Check sum Additional label pairs x x c c Label assigned to target n Target number n reported by the device TTM Tracked target message hh CR LF Target Target Target UTC Check sum distance course label Reference Type of from degrees Speed target R acquisition ow n ship true distance null otherw ise A Automatic Target number Target speed units N Targe...

Страница 180: ...ta Own ship data OSD Own ship data a hh CR LF Check sum Speed unit K km h N knots S statute miles h Vessel drift speed Vessel set degrees true Speed reference B M W R P Note Reference Vessel speed B Bottom tracking log Course refference B M W R P M Manually entered Vessel course degrees true W Water referenced Heading status A data valid V data in valid R Radar tracking or fixed target Heading deg...

Страница 181: ... entries Sequential message identifier 00 to 99 Sentence number 01 to 99 Total number of sentences for this message 01 to 99 ARC Alert command refused c hh CR LF Relese time Check sum Note Refused alert command A Q O or S A Acknowledge Alert instance 1 to 999999 Q Request repeat information Alert identifier O Responsibilitytransfer Manufacturer mnemonic code S Silence ALR Set alarm state Time of a...

Страница 182: ...sentence x hh CR LF Check sum Sequential sentence identifier Equipment status A Yes V No Configured repeat interval HBT x x A Activity information EVE General event message c c hh CR LF Check sum Event description Tag code used for identification of source of event Event time EVE hhmmss ss c c ...

Страница 183: ...le Circuit configuration RS422 driver IC Type SN65HVD3085 TI Serial data output circuit OUT B Data output OUT A SN65HVD3085 J3 and J5 Data connector pin assignment Processor unit upper view J3 and J5 J6 Pin number Signal name 1 Shield Shield 2 OUT A OUT A 3 OUT B OUT B 4 IN A IN A 5 IN B IN B 6 12V NC Data connector pin assignment 1 2 3 4 5 6 Input connector J3 and J5 Connector used BD 06PMMP LC70...

Страница 184: ...3 kHz Negative 2 092 μs TTL 200 Ω Vertical sync signal V SYNC 60 0 Hz Negative 124 μs TTL 200 Ω R G B Video signal Positive 0 7 V p p 75 Ω Alarm output Contact Capacity 1A Alarm contact will close in case of failure Pin number Signal name 1 RVD 2 R GND 3 GVD 4 G GND 5 BVD 6 B GND 7 H SYNC 8 V SYNC 9 ALARM 10 ALARM J1 External monitor and alarm output connector pin assignment Processor unit upper v...

Страница 185: ...ceptable BD 08BFFA LL6001 Serial data input Listener Standard signals conforming to IEC61162 2 is acceptable Input load 500 Ohm Circuit configuration Photo coupler Type ACPL M61 Avago Serial data output circuit Talker Standard signals conforming to IEC61162 2 can be output Circuit configuration RS422 Driver Receiver IC Type SN65HVD3085 TI Separated from ground level 1 2 3 4 7 8 5 6 J2 Data connect...

Страница 186: ...J8 Connector used BU 12PMMP LC7001 Connector acceptable BU 12BFFA LL7001 Pin number Signal name 1 VIDEO OUT 2 TRIG OUT 3 GND 4 AZIP OUT 5 SHF OUT 6 GND 7 VIDEO IN 8 TRIG IN 9 GND 10 AZIP IN 11 SHF IN 12 12VDC Data connector pin assignment 1 2 3 4 5 6 7 8 9 12 10 11 J8 Inter switch connector pin assignment Processor unit upper view ...

Страница 187: ...s magnetic HC HC gyro north seeking HE GYRO gyro non north seeking HN GYRO Integrated instrumentation I I INS Integrated navigation IN INS Loran C LC LC Electronic positioning system SN EPFS Velocity sensors Doppler general VD DLOG magnetic log VM LOG mechanical log VW LOG Other devices Display of talker device 11 6 6 Priority of talker device code Heading II IN HE HN HC GN GP GL GA SN Speed II IN...

Страница 188: ... This page intentionally left blank ...

Страница 189: ...T LINE 6 3 Course up 2 15 CPA TCPA 4 2 CROSS 2 41 Cursor 2 21 2 42 Cursor Access 1 9 Cursor data 2 42 D Day Night 2 26 Delete all TT target 4 14 Delete TT target 4 14 Display Mode 2 14 DUAL MASTER 2 41 DUAL SLAVE 2 41 E EBL 2 22 EBL OFFSET 2 23 Echo alarm 3 1 Echo color 2 26 Echo color rejection 2 38 Electronic bearing lines 2 22 Enhance 2 36 EVENT MKR 6 11 External buzzer 7 2 External save 7 5 F ...

Страница 190: ... 2 32 Own ship outline 2 43 OWN SHIP PAST TRACK 6 1 P Panel brilliance 2 2 Parallel Index PI lines 2 25 Parameter reset 7 6 PI 2 25 Picture mode 2 34 POWER ON OFF 2 1 Process 2 35 Pulse width 2 13 2 38 Pulse width SP LP 2 13 R Radar Display 1 1 RAIN 2 10 RAIN MAN 2 12 Rain snow clutter 2 10 Range 2 5 Range Rings 2 20 Range scale 2 5 Range unit 2 5 Relative display 2 31 Relative motion 2 17 Reset 7...

Страница 191: ...arget symbol 4 15 Trail 2 29 Transmission 2 3 True display 2 31 True motion 2 17 TT 4 12 TT ID DISP 4 3 6 3 Tuning method 2 4 Turn indicator 4 7 TX HOUR 7 6 U UTC LOCAL time 7 1 V Variable Range Marker 2 21 VECTOR 4 1 VECTOR REL TRUE 4 1 Video contrast 2 37 VRM 2 21 W WAIT 2 1 ...

Страница 192: ......

Отзывы: