Page
54
4
Recording a Song
Step 2
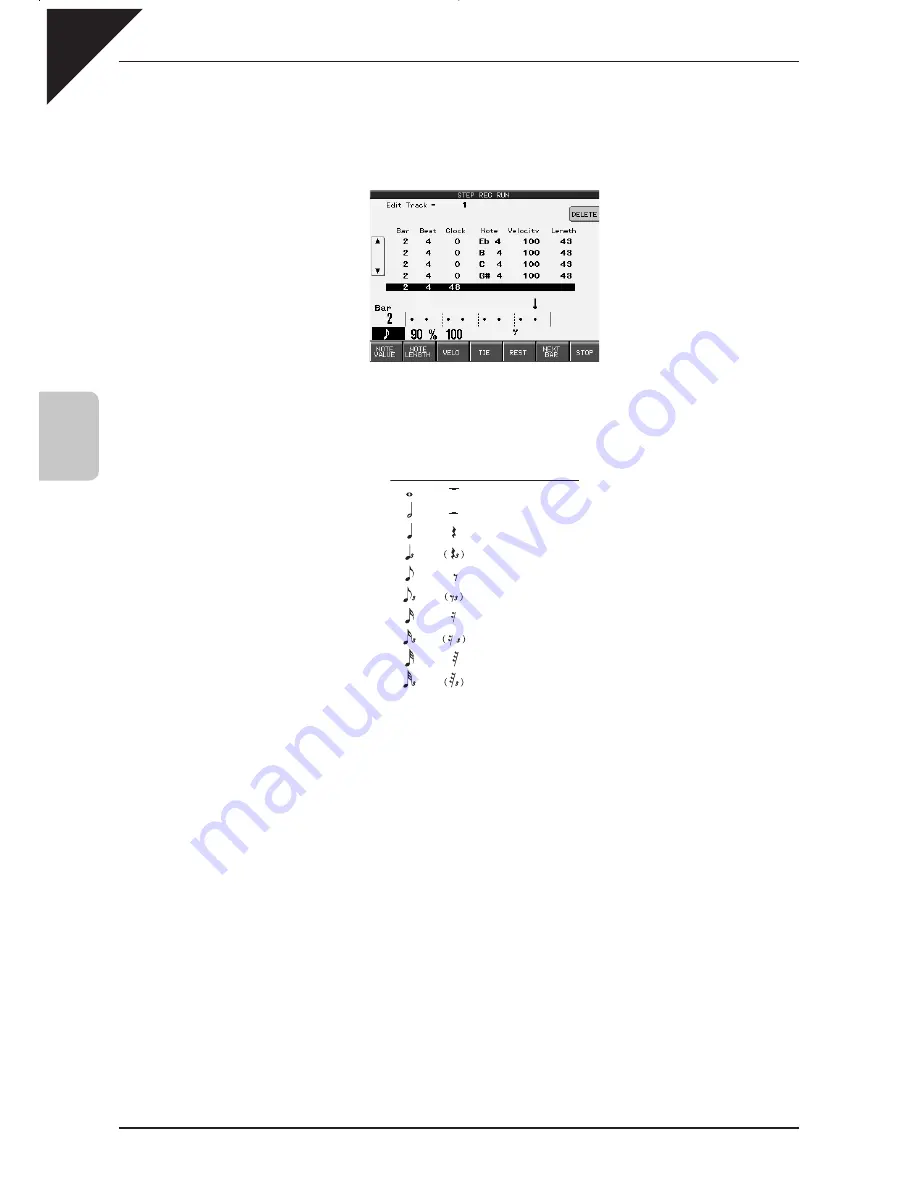
To enter a note event, play the note using the keyboard.
The note data will be displayed on the screen. Continue entering as many notes as you wish; notice how previously
entered notes continue to be displayed as a list, screen room permitting. The graphic navigator near the bottom
of the screen gives you feedback as to what bar you are in.
ARROWS : Moves the cursor up and down
the list of entered notes in OVERDUB
mode.
DELETE : Deletes the last note entered in
OVERDUB mode.
NOTE VALUE : Selects the note value.
NOTE LENGTH : Adjusts the note length.
VELO : Selects the velocity value. Values are from 1–127 or Key.
TIE : Enters Tied note values.
REST : Enters a rest.
NEXT BAR : Takes you to the beginning of the next measure.
STOP : Stops recording.
Note
Rest
Clock value
384
192
96
64
48
32
24
16
12
8
Step 3
If you enter a wrong note and wish to delete it, touch the DELETE button. When you are using the REPLACE
mode for recording, every time you press DELETE the list of your entered notes on the screen scrolls back
one event, and that event is erased immediately. Therefore, if you scroll back to the first beat of bar 5 of a
10-bar list of notes, everything from bar 5 on will be erased. In OVERDUB mode, however, you can delete only
the most recently added note, and scrolling back over the list using the arrow buttons will not automatically
erase events. When using OVERDUB, you need to touch the Delete button to erase the event.
Step 4
If you would like to enter a rest, touch the REST button. This moves the cursor to the next beat without
entering any data. The rest value is the same as the note value.
If you would like to enter a rest for the remainder of the measure, touch the NEXT BAR button. This will
bring the cursor to the top of the next measure.
Step 5
When you like to tie notes, touch the TIE button while holding down the key. This doubles the length of the
note. If you touch the TIE button twice while holding down the key, the length of the note is tripled.
Содержание Concert Performer CP139
Страница 1: ...1 OVERVIEW OF CONTROLS 2 SOUNDS 3 STYLES 4 RECORDER 5 USB USAGE Quick Start Guide ...
Страница 2: ......
Страница 38: ...Page 38 USER NOTES ...
Страница 39: ...Page 39 ...
Страница 42: ...All descriptions and specifications in this manual are subject to change without notice ...
Страница 217: ...Page 177 11 Appendices User Notes ...
Страница 218: ......
Страница 219: ......


