


Full Digital Color Doppler Ultrasonic Diagnostic Instruments (Vet) User’s Manual V1.01
- 70 -
Chapter 12 Managing Images/Data
You can save images after scanning the images. The saved patient data can be backup to the USB storage
devices for future use.
12.1 Saving the Image/Cine
Press the
Save
key on the control panel in the frozen mode to save the current screen as an image.
Press the
Cursor
or
Cine
key on the control panel in the frozen mode to activate the cursor, move the
cursor to [Save Film] by using the trackball, and press the
Set
key to save the cine.
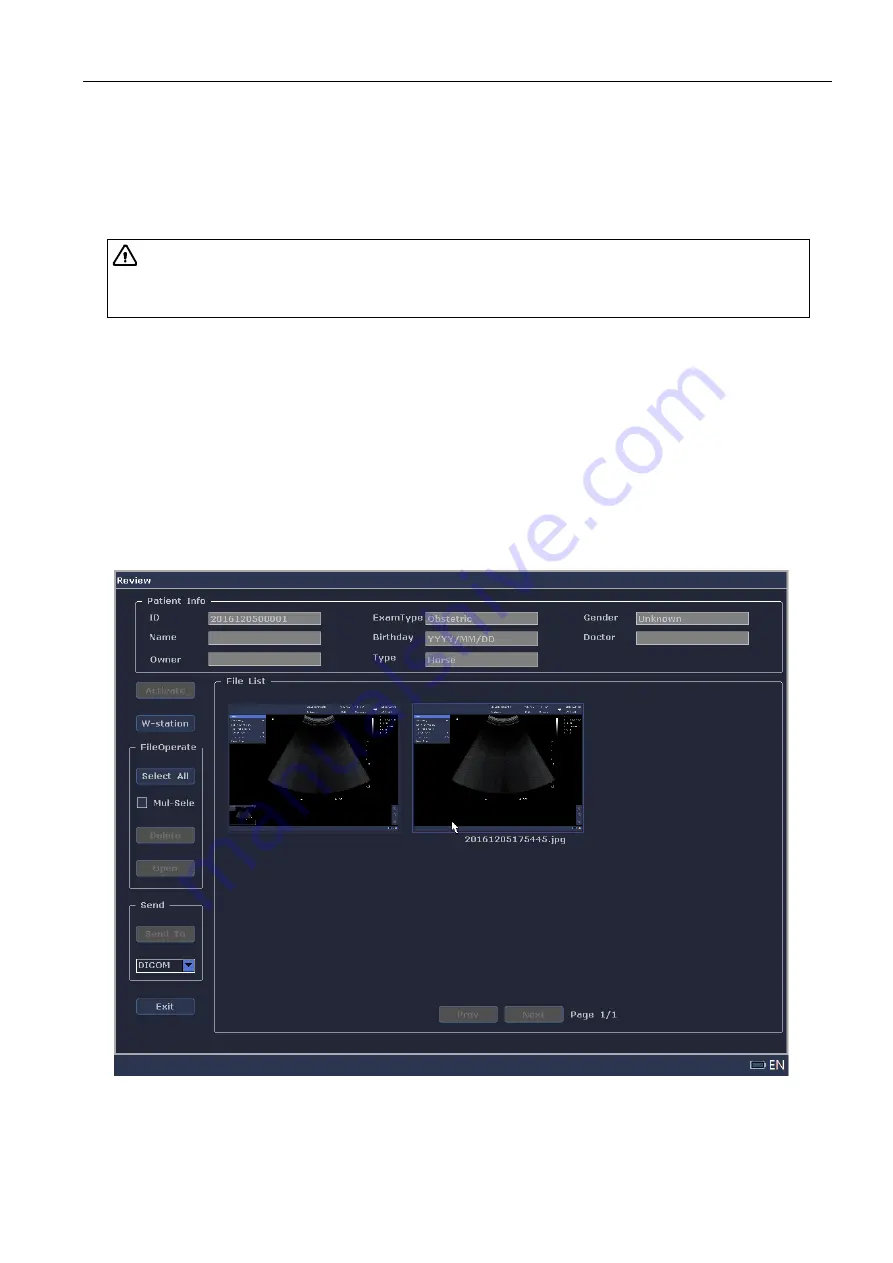
12.2 Reviewing the Image/Cine
Current patient
You can view the saved images or cines in the Review screen.
Steps are as follows:
1.
Press the
Review
key on the control panel to enter the Review screen, as shown in Figure12-1.
The thumbnail images display in the [File List].
Figure 12-1 Review Screen
2.
Select the image or cine by using the trackball and double click the
Set
key or click [Open] at the
left to view the image or cine.
3.
Press the
Freeze
key to return to the main screen.
Attention:
The data is saved to the built-in disk of the system by default. You can also
export the data to the USB storage devices or DICOM server. For details, refer to Section
12.5 Saving Data.


