Hardware Installations and Upgrades
78
Intel
®
Server Chassis P4000M Service Guide
Installing and/or Removing a Expander card
Installing the Expander card
1. Observe the safety and ESD precautions at the beginning of this book.
2. Power down the server and unplug all peripheral devices and the AC power cable.
3. Remove the chassis cover. For instructions, “Removing the Chassis Cover”.
4. Remove the fans. For instructions, see “Removing the Fixed Fan” or “Removing the Hotswap Fans”.
5. Remove the Fixed HDDs or Hotswap drive cages. For instructions, see “Remove Fixed Hard Drives”,
or “Remove 8x3.5 Hotswap Drive Cage Assemble”, or “Remove 8x2.5 Hotswap Drive Cage
Assemble”.
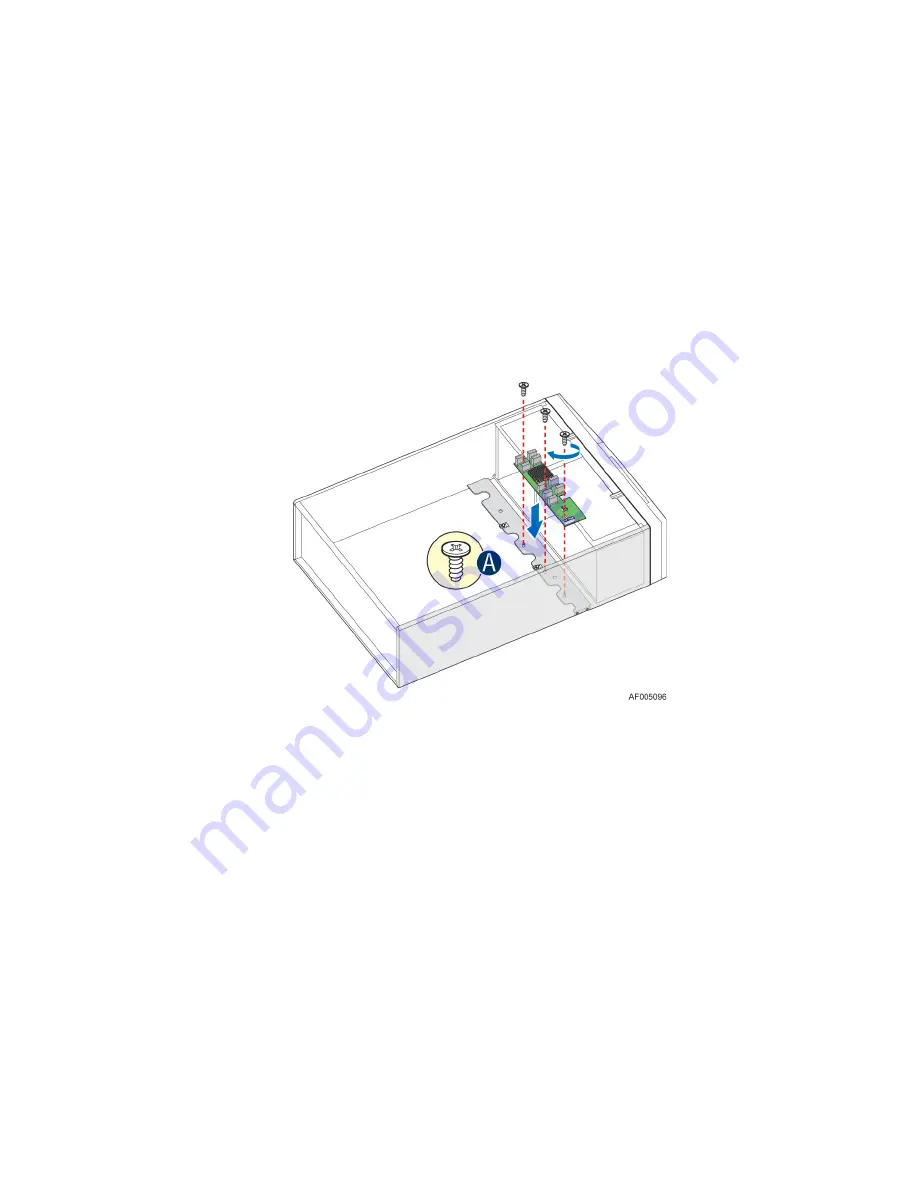
6. Locate the expander card bracket in the chassis. Mount the expander card to the bracket with screws.
Figure 129. Installing the Expander Card
7. Connect the data cable between server board and expander card, and between expander and
backplane(s). See documents for your server boards for instructions.
8. Install the Fixed HDDs or Hotswap drive cages. For instructions, see “Install Fixed Hard Drives”, or
“Install 8x3.5 Hotswap Drive Cage Assemble”, or “Install 8x2.5 Hotswap Drive Cage Assemble”.
9. Install the fans. For instructions, see “Install the Fixed Fan” or “Install the Hotswap Fans”.
10. Install the chassis cover. For instructions, “Install the Chassis Cover”.
Removing the Expander card
1. Observe the safety and ESD precautions at the beginning of this book.
2. Power down the server and unplug all peripheral devices and the AC power cable.
3. Remove the chassis cover. For instructions, “Removing the Chassis Cover”.
4. Remove the fans. For instructions, see “Removing the Fixed Fan” or “Removing the Hotswap Fans”.
5. Remove the Fixed HDDs or Hotswap drive cages. For instructions, see “Remove Fixed Hard Drives”,
or “Remove 8x3.5 Hotswap Drive Cage Assemble”, or “Remove 8x2.5 Hotswap Drive Cage
Assemble”.


