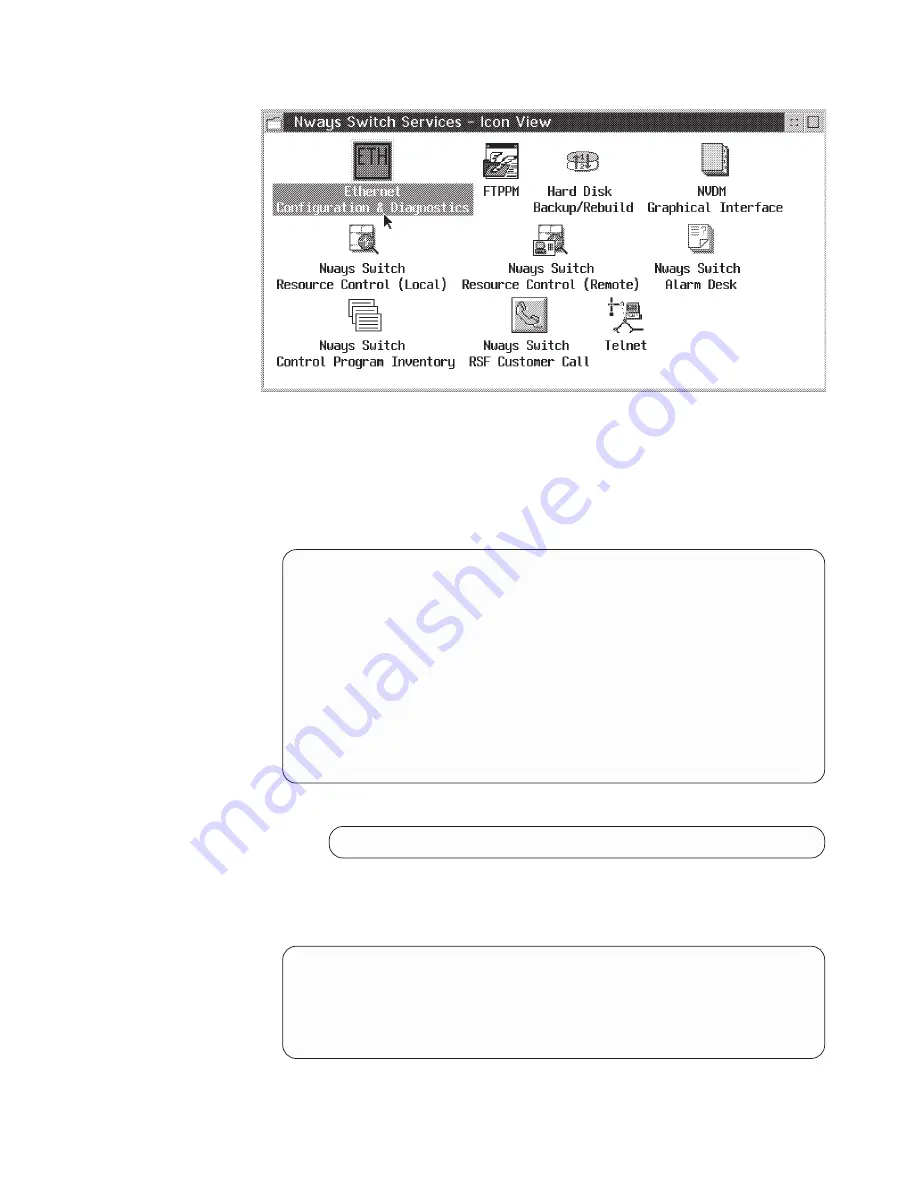
– In the Ethernet Configuration & Diagnostics window, select the Display /
Change Adapter Configuration option using the
↑↓
keys, then press the Enter
key.
– In the SELECT ADAPTER TO BE ACCESSED window, select the I/O port using
the Tab key, and then press the Enter key.
– The following window appears. Modify your parameters to match those shown in
the following screen.
DISPLAY / CHANGE ADAPTER CONFIGURATION
Novell Configuration
None
I/O Bus Address
0X300
---> 0X300
Interrupt Assignment
IRQ5
---> IRQ5
Physical media
Thin Ethernet ---> Thin Ethernet (Note)
Adapter Architecture
Shared Memory ---> Shared Memory
Boot Prom
No boot Prom
Advanced Configuration Options
Temporarily change Configuration
Save Configuration
Return to previous Menu
-------------------------------------------------------------------------
Make selection using arrows keys and <enter>
Scroll through option using <TAB>
Note: Depending of your cabling, you might have the following option:
Physical media
TPI(10BaseT) ---> TPI (10baseT)
– Once the parameters have been changed, select the Advanced Configuration
Options, then press the Enter key.
– You obtain the following window. Modify your parameters to match those shown
in the following screen.
ADVANCED CONFIGURATION OPTIONS
CHRDY generated as fast
TPI Link integrity checking enabled
No BOOT ROM
Return to previous menu
– Once the parameters have been changed, select the Return to previous menu
option, then press the Enter key.
MAP 0510 (continued)
Chapter 5. Nways Switch Administration Station FRU and Display Exchange Procedures
5-19
Содержание xSeries 300
Страница 2: ......
Страница 9: ...Tables 1 1 Telecommunication Cables 1 31 Copyright IBM Corp 1998 2000 vii ...
Страница 10: ...viii 2220 Setup and Service Guide ...
Страница 14: ...xii 2220 Setup and Service Guide ...
Страница 66: ...Figure 3 4 Example of PM Ping Results 3 8 2220 Setup and Service Guide ...
Страница 67: ...Chapter 4 Nways Switch Administration Station Problem Determination Copyright IBM Corp 1998 2000 4 1 ...
Страница 82: ...4 16 2220 Setup and Service Guide ...
Страница 142: ...B 10 2220 Setup and Service Guide ...
Страница 144: ...C 2 2220 Setup and Service Guide ...
Страница 146: ...D 2 2220 Setup and Service Guide ...
Страница 156: ...E 10 2220 Setup and Service Guide ...
Страница 159: ......


