8
i3-TRNG-CAMS-Ax45RM_65RM-UM.indd
Rev. 161107
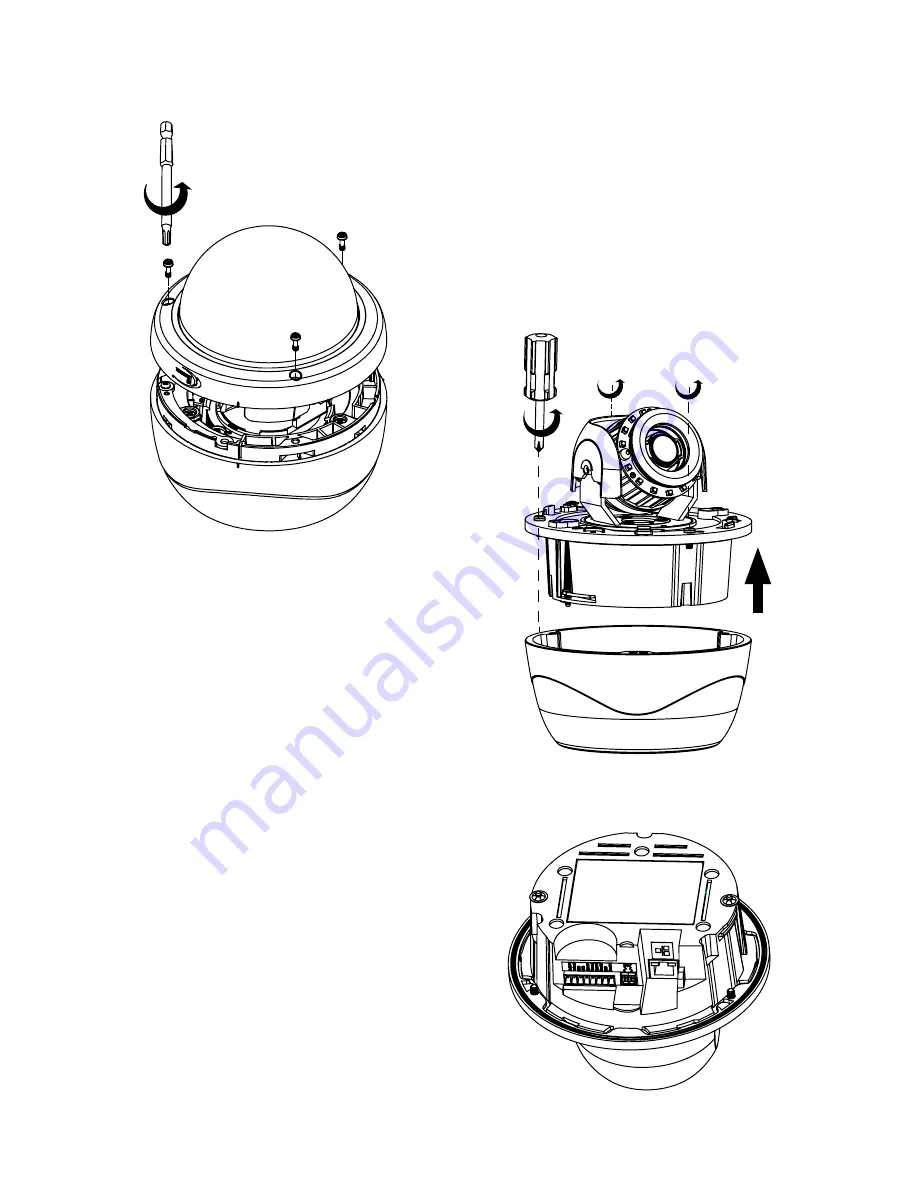
4.1 Disassembling the Camera
Before mounting and adjusting the camera, follow
these steps to disassemble the camera.
1. Use the provided security Torx bit to loosen
three silver screws securing the dome
bubble housing to camera module (#6). Do
not completely remove the screws from the
dome bubble. Set the dome bubble aside.
2. Use Phillips screwdriver to loosen three
silver screws attaching camera to the
back box (#15)
3. Remove camera’s back box and set aside.
4.2 I/O Connectors
(Reserved for future use
Once the camera’s back box has been
removed, Ax45RM/Ax65RM input/output
connectors will be revealed on the
camera’s module, including RJ45 Ethernet/
PoE connector, Audio and Alarm connectors
and AC24V power port.


