5-17
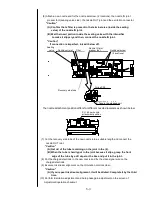
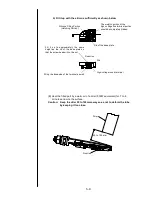
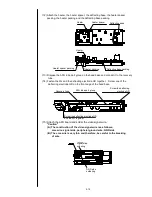
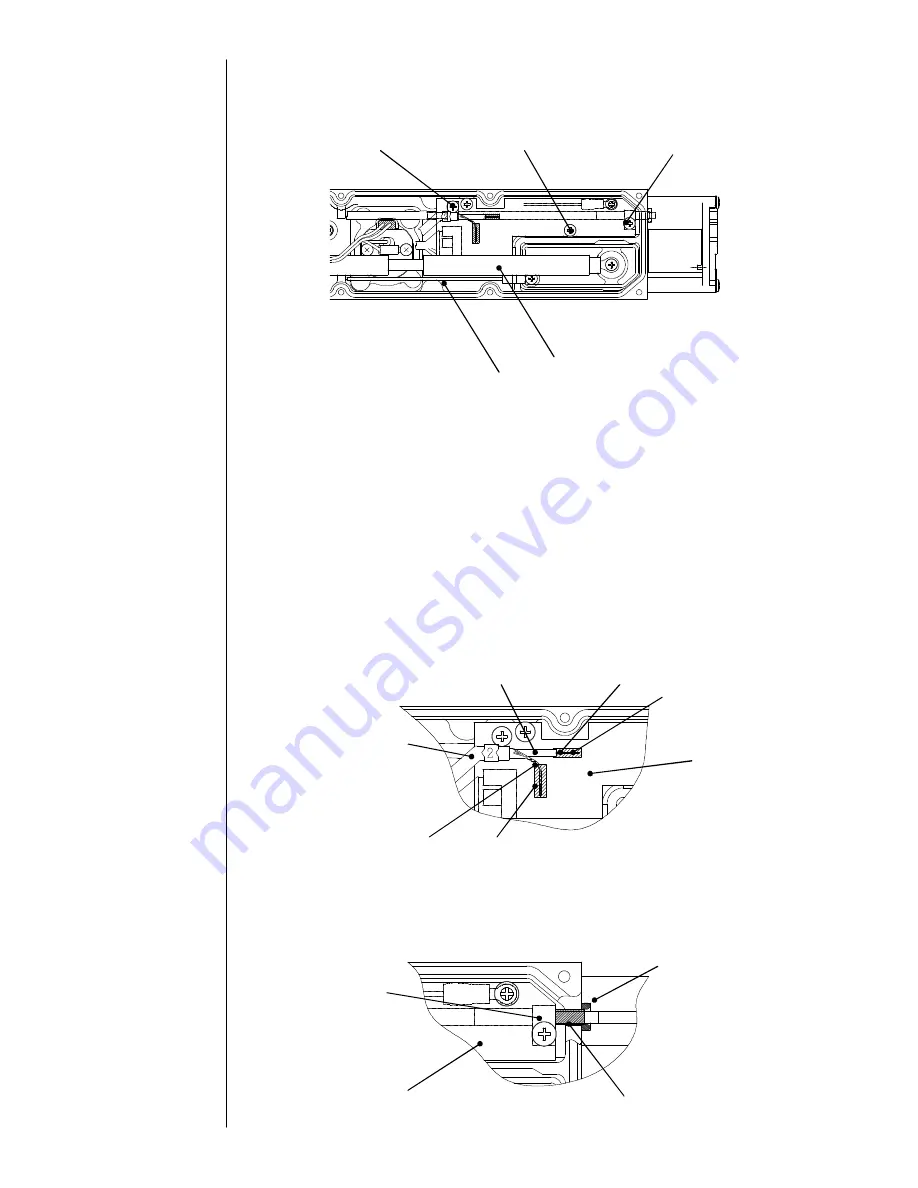
(3) Remove the four setscrews and unplug connector CN1 of lead wires.
Among the four setscrews (M2x5), two are for securing the EZJ98 board, the other
two, for securing the APH sensor and EZJ98 board.
(4) With new board, insert the connector into CN1, and tighten the two screws for securing
the APH sensor and the two screws for securing the board.
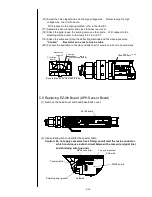
(5) Solder the coaxial cable to EZJ98 board.
Caution: Do not apply excessive heat: Doing so will melt the resin conductor,
which could cause a short-circuit between the core wire (signal line)
and shielding wire (ground).
(6) Perform the automatic phase gain adjustment.
Caution: If the APH sensor is removed from head base for adjustment, the
insulation tube (5 mm long) may become detached. If it does, be sure to
reattach the insulating tube during reinstallation.
Screw (for APH sensor)
Screw (for APH sensor)
Screws (for securing)
Connector CN1
EZJ98 board
Coaxial cable
Soldered
Soldered
Resin conductor
Core wire (signal line)
Shielding wire (ground)
EZJ98 board
EZJ98 board
Insulating tube
O-ring
APH sensor
Содержание IJ PH
Страница 1: ...Service Manual HITACHI Printer Model PH Revision Aug 2011 Version First edition ...
Страница 2: ... Revision of PH service manual Revision Chapter Revised Page ...
Страница 13: ...1 2 2 Main body internal PH D 1 8 ...
Страница 80: ...3 25 3 25 Circuit diagram of EZJ95 ...
Страница 201: ...7 1 7 Attached Drawing 7 1 Circulation System Diagram ...
Страница 202: ...7 2 7 2 Electrical Connection Diagram ...
Страница 205: ...7 5 7 4 Dimensions around charge electrode and deflection electrode Nozzle diameter 65 um ...

